How to Scribe a Bookshelf to a Brick Fireplace Without Gaps
I stood there staring at a three-quarter-inch gap that looked wide enough to swallow a TV remote. I had spent two weeks in the shop building a floor-to-ceiling bookshelf, and the moment it touched the brick of my fireplace, all that hard work looked amateur. My mistake? I assumed the brick was flat. It wasn’t. It was a jagged, undulating mess of 1970s masonry. I tried to hide it with a thick bead of caulk, but all I did was create a sticky, white mess that eventually cracked. It was a total failure, and it forced me to learn the one skill every finish carpenter needs: scribing.
Stop Trying to Measure Your Way Out of a Crooked Wall
The reality is that no fireplace on earth is perfectly plumb, and brick is the most unforgiving neighbor a piece of wood will ever have. When you are tackling built-ins that elevate your living rooms functionality, you cannot rely on a tape measure alone. You need to stop fighting the imperfections and start mimicking them. This process is essentially tracing the texture of the brick onto your wood so they lock together like puzzle pieces. I have seen homeowners try to use standard interior paint on cabinets to hide gaps, or worse, use giant pieces of trim that ruin the clean lines of the custom cabinets ideas they worked so hard to design. Today, I am going to show you exactly how to get that built-in look where the wood seems to grow right out of the masonry. It is the same technique I used when learning how to scribe a bench to a stone wall without any gaps, and once you nail it, you will never look at a crooked wall the same way again. Have you ever reached the end of a project only to find a gap so big it made you want to walk away?
Is this level of precision really necessary for your home?
You might be thinking this sounds like a lot of extra work for a few small gaps. However, the National Association of Home Builders (NAHB) notes that masonry can have significant surface variations, often up to 1/4 inch or more in any 4-foot area. If you do not account for this, your built-ins and storage hacks will look like they are floating away from the wall. A tight scribe does not just look better; it adds structural integrity and prevents dust from settling into unreachable crevices. Let us get into the actual tools you will need to stop guessing and start scribing.
Get the Cabinet Plumb Before the Pencil Touches the Wood
The biggest mistake you can make is trying to scribe a cabinet that is not already 100% level and plumb. If your base unit is leaning even a fraction of a degree away from the wall, your scribe line will be a lie. I learned this the hard way during a custom cabinets as a game changer in your kitchen remodel journey where I rushed the setup. I traced the line, cut it perfectly, and then realized the cabinet was tilted forward. When I leveled the cabinet, my perfect cut suddenly had a massive gap at the top. To avoid this, shim your cabinet into its final, permanent position first. Ensure it is rock solid and that your base cabinets should be secured with 3-inch rugged screws to the wall studs. Only once the box is immobile should you even think about grabbing your tools.Think of the cabinet as a stationary dock and the brick wall as a moving tide; you need the dock to be perfectly still before you can map the shoreline.
The Magic of the Simple Compass
You do not need a fancy laser or a high-tech scanner for this. A simple schoolhouse compass is the gold standard for finish carpentry. The goal is to set the distance between the metal point and the pencil lead to the exact width of the largest gap between your wood and the brick. Once set, you hold the compass perpendicular to the wall. As the metal tip follows the peaks and valleys of the masonry, the pencil replicates that exact ‘heartbeat’ onto your wood. I remember a specific fireplace job in McCordsville where the bricks were so irregular they looked like a topographical map of the Rockies. I tried to freehand the mark at first—huge mistake. The moment I switched to the compass and took my time, the line became a perfect roadmap. 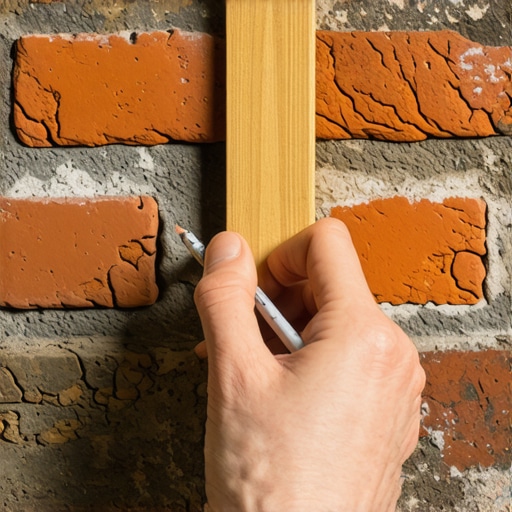
Back-Cutting for a Hand-in-Glove Fit
Now comes the part that separates the pros from the weekend warriors: the cut. If you cut straight through the wood at a 90-degree angle, you will fight every single bump on that brick. Instead, you want to ‘back-bevel’ or back-cut the wood. This involves angling your jigsaw blade or your belt sander at about 30 to 45 degrees, cutting away more material from the back of the board than the front. This creates a sharp, thin leading edge on the face of the wood. This thin edge is much easier to ‘tune’ with a sanding block and allows the wood to tuck into the mortar joints of the brick without the bulk of the board getting in the way. It is a similar level of detail to the secret to making plywood edges look like solid wood; it’s all about what the eye sees on the surface. When you push that back-beveled board against the wall, it should look like the wood grew out of the stone. If you have a tiny hair-line gap left, don’t reach for the caulk immediately. Cheap sealants are often the reason white cabinets are turning yellow or cracking over time. A truly great scribe stands on its own, needing nothing but a steady hand and a sharp blade.
While that back-beveled edge looks like magic, the biggest trap I see pros and DIYers alike fall into is the ‘Tightness Paradox.’ Most people believe that if a scribe is so tight you can’t slide a piece of paper between the wood and the brick, they have achieved perfection. In reality, over-restricting your wood can lead to structural failure. Wood is a hygroscopic material; it breathes. If you wedge a massive built-in between two fixed masonry points without a microscopic amount of ‘breathing room’ in the joinery itself, you are essentially building a ticking time bomb. I have seen beautiful modern kitchen remodels featuring custom cabinets and built-ins literally pull their own frames apart because the wood expanded in a humid summer and had nowhere to go but out. This is exactly why solid wood door panels still need room to breathe in summer, and your scribe pieces are no different.
The Silicone Trap That Ruins Finish Work
Here is a contrarian take that might ruffle some feathers: Stop using silicone to ‘finish’ your scribe lines. I know, it’s the industry standard for many, but silicone is a nightmare for future maintenance. It attracts dust like a magnet and, more importantly, it cannot be painted. If you ever decide to refresh your space, that silicone bead will prevent any new finish from sticking, leading to the same peeling issues seen when using standard interior paint on your kitchen cabinets. Instead, if your scribe is truly tight, leave it alone. If there is a hairline gap, use a high-quality, paintable polymer or a wax stick that matches your wood. This maintains the integrity of the custom cabinets for a stylish kitchen overhaul without creating a sticky mess that fails in two years.
How much movement should you actually allow for seasonal shifts?
Advanced installers often ask how to balance a tight scribe with the reality of wood movement. According to data from the Wood Database, certain species like White Oak can have a tangential shrinkage/expansion rate of up to 10.5%. If your scribe is on a wide face-frame, that could mean a shift of nearly 1/16th of an inch. To mitigate this, I always ensure your cabinet boxes should be stapled, glued, and screwed but the scribe molding itself should be pinned with 23-gauge headless pinner nails. These allow the wood to ‘creep’ slightly without splitting the grain. 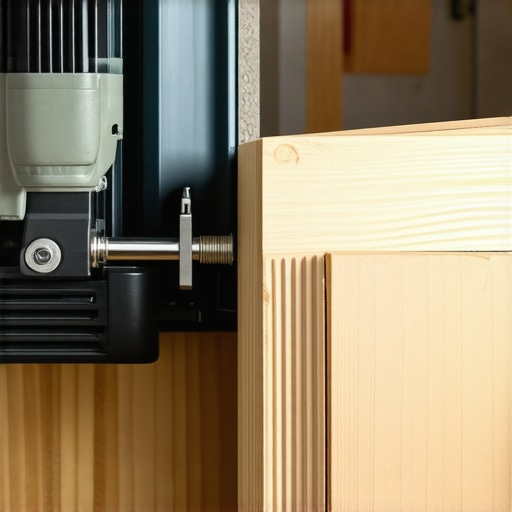 This level of nuance is what separates a cabinet that looks good today from one that looks good in 2045. When you are planning smart storage solutions for small kitchens in 2025, don’t just think about the footprint; think about the physics of the materials you are using. Have you ever fallen into the trap of making a joint so tight it eventually cracked your wood? Let me know in the comments. If you’re ready to start your own project without these headaches, feel free to contact us for expert guidance.
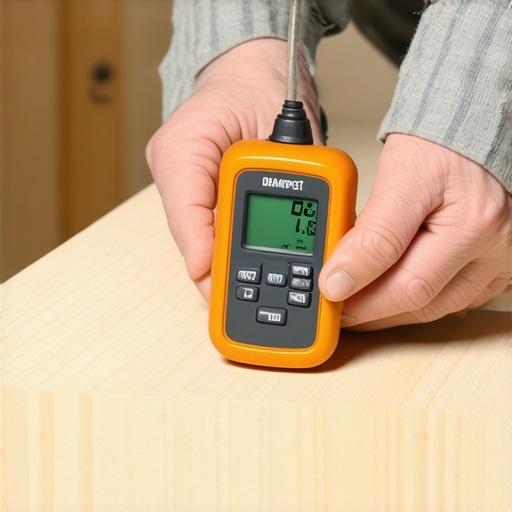
I’ve spent years refining my toolkit, but if you’re serious about your custom cabinets as a game changer in your kitchen remodel journey, you cannot just wing it with a standard toolbox. To achieve that seamless scribe we discussed, I rely on two non-negotiables: a barrel-grip jigsaw and a high-end moisture meter. The barrel-grip design allows me to get my hand closer to the wood, providing the tactile feedback needed for those micro-adjustments against a jagged brick surface. But even the best cut fails if the wood isn’t stable. This is where a tool like the Delmhorst J-2000 moisture meter comes in. The Architectural Woodwork Institute (AWI) explicitly states in their Quality Standards that for most of North America, the moisture content of wood at the time of installation should be between 6% and 10% to minimize movement. If I skip this check, I’m essentially guessing at how much that wood will shrink or expand, which is a recipe for cracked joints later.
The Specialized Tools That Save My Reputation
Beyond the cut, long-term results depend on the quality of the finish and the hardware. I’ve seen homeowners get frustrated when the reason your cabinet doors are slamming despite having soft-close hinges turns out to be poor installation or cheap components. I personally use a Festool Carvex for my scribes because of its strobe light feature that makes the pencil line visible even in a dusty shop. If you’re tackling smart storage solutions for small kitchens in 2025, investing in a dedicated scribe tool or a high-quality belt sander for that back-bevel is the difference between a project that looks DIY and one that looks architectural. It’s about the precision of the removal, not just the speed of the cut.
How do I keep my custom woodwork from shifting over time?
Maintenance is where most people drop the ball. Once the built-ins are in, you need to monitor the environment. I tell my clients that a humidifier is just as important as a cleaning cloth. To prevent damage, you should learn how to remove stubborn water rings from natural wood cabinet surfaces without stripping the lacquer. Additionally, seasonal shifts will inevitably move your doors. Don’t panic; it’s just physics. Knowing the 5-minute hinge adjustment for fixing wonky cabinet reveals can save you from a service call. It’s a simple skill, much like knowing how to adjust european hinges for a perfectly level door reveal, and it ensures your lines stay as crisp as the day they were installed.
The Future of Custom Cabinets Is More Integrated Than Ever
Looking ahead, I see a massive shift toward ‘stealth’ functionality. We aren’t just building boxes anymore; we are building infrastructure. I predict that in the next few years, every high-end built-in will feature integrated induction charging and hidden tech hubs as standard. This is why I always suggest that every kitchen should have a dedicated charging station for laptops or tablets hidden within the cabinetry. We are moving away from purely aesthetic furniture and toward smart, multi-functional walls that happen to look beautiful. If you want to future-proof your home, start thinking about where your wires will go before the first board is cut. If you’re ready to integrate these advanced features into your next project, reach out and contact us to start the design process today.
The Hard Truth About Scribing to Jagged Masonry
Over the years, I have learned that the perfect scribe isn’t just about the cut; it’s about the mindset. Here are a few “lightbulb moments” that changed the way I approach every project:
- Respect the Breathe: I used to think a tight joint was a good joint. But as I’ve seen in many modern kitchen remodels featuring custom cabinets and built-ins, if you don’t account for humidity, that wood will fight back. Remember why solid wood door panels still need room to breathe in summer and apply that same logic to your scribes.
- Silicone is a Temporary Fix: I cannot stress this enough—why you should never use silicone for cabinet joinery is one of the first things I teach. It ruins the ability to paint and ages poorly.
- The Setup is 90% of the Success: If your cabinet isn’t level, your line is a lie. Spend the extra twenty minutes shimming and securing.
My Go-To Gear for Achieving Invisible Joinery
You don’t need a massive shop to get pro results, but you do need tools that don’t fight you. I always keep a high-quality compass in my pocket—it’s low-tech but high-precision. For the actual surgery on the wood, a barrel-grip jigsaw is a game changer because it puts your hand directly over the blade for better control. While you’re at it, don’t forget that the one tool you need for perfectly aligned cabinet knobs every time is just as vital as the scribe tool once the unit is in. I trust these tools because they eliminate the guesswork that leads to “oops” moments. #IMAGE_PLACEHOLDER_E#
Creating a Legacy in Your Living Room
At the end of the day, building custom cabinets as a game changer in your kitchen remodel journey is about more than just storage; it’s about craftsmanship that stands the test of time. Scribing is that final touch that says, “this was made for this home, and nowhere else.” It’s a skill that takes patience, but the first time you see that wood hugging the brick without a single gap, you’ll know it was worth the effort. If you find yourself stuck or want to ensure your next project has that architecturally integrated feel, don’t hesitate to contact us for a professional perspective. Have you ever spent hours on a scribe only to find a new gap when the seasons changed? Let me know your biggest struggle below.