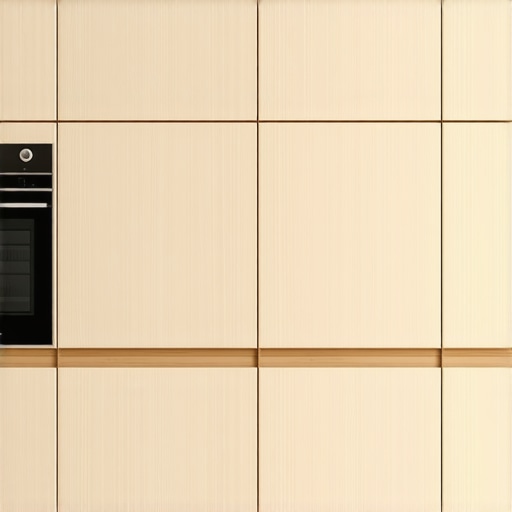
Why Birch Plywood Beats Particle Board for Long-Lasting Kitchen Carcasses
It was a bright Saturday afternoon when I first learned the hard way about the difference between quality materials and cheap shortcuts in kitchen construction. I was installing a new set of cabinets, eager to see the transformation, but by the end of the day, I noticed the drawers starting to sag after just a few months. The particle board used in my cabinets didn’t hold up—warping and breaking down faster than I ever expected. That lightbulb moment made me realize that choosing the right material isn’t just about aesthetics; it’s about enduring strength and long-term value.
The Real Cost of Cutting Corners in Kitchen Cabinets
You’ve probably heard a lot about different materials for cabinetry—MDF, particle board, plywood—and might be tempted to go for the most affordable options. But here’s the thing: your kitchen is a place of constant activity. The cabinets need to withstand weight, moisture, and daily wear and tear. Trust me, investing in quality materials from the start saves you money and frustration down the line. Birch plywood, for example, offers superior durability compared to particle board, which can crumble under pressure. Plus, according to a recent study by the Woodworks Association, natural wood veneers like birch are less prone to warping, ensuring your cabinets stay pristine for years to come. For more insights on choosing the right materials, check out this comprehensive guide on [custom cabinets](https://artisancabinetworkz.com/revolutionize-your-kitchen-remodel-using-built-ins-and-creative-storage).
Is Birch Plywood Actually Worth the Extra Investment?
Initially, I thought I could cut costs by opting for particle board due to its lower price. I made this mistake early in my remodeling ventures—assuming all wood-based products are created equal. The reality hit me hard when, within a year, my cabinets presented significant signs of aging. Birch plywood offered me a different experience—resilience, ease of finishing, and a refined look. Isn’t it worth investing a little more upfront for peace of mind and longevity? If you’re skeptical, consider this: a study published by the Journal of Wood Science reports that plywood’s cross-grain construction provides enhanced structural stability over particle board, especially in humid environments.
Have you faced a similar dilemma with cabinetry materials? If so, you’re not alone. Making informed decisions about your kitchen’s foundation today will make all the difference tomorrow. Ready to explore how to choose the best materials for your project? Let’s dive into the details and discover a solution that lasts.
Plan Your Layout and Storage Needs
Start by measuring your kitchen space precisely and listing your storage priorities. Think of your cabinets as a wardrobe for your kitchen—every utensil and ingredient needs a designated spot. Use a tape measure to record dimensions of walls, doorways, and existing fixtures. Sketch a layout that includes necessary features like drawers, shelves, and special compartments. For inspiration, explore built-in storage ideas that optimize space and accessibility.
Select High-Quality Materials
Choose materials that balance durability and aesthetics. For example, opt for plywood with a hardwood veneer for the cabinet boxes—this combination resists warping and handles moisture well. Remember, the core of your cabinets is like the frame of a house: if the foundation isn’t solid, everything else will suffer. As I learned from my own experience, spending a bit more on quality materials like birch plywood saved me headaches and expenses down the line. To ensure your selections withstand daily use, consult guides on custom cabinet materials.
Carve Precise Measurements and Cuts
Accurate measurements are the backbone of a seamless cabinet fit. Use a combination square and a saw with a fine blade for straight, clean cuts. Think of this process as tailoring a suit—precision is everything. During my first DIY attempt, I mistakenly cut a few panels too short, which created gaps and alignment issues. To avoid this, double-check all your measurements before cutting and mark each piece carefully. Employ a circular saw with a guide fence for long cuts, and consider using a jig for repetitive cuts. This approach ensures uniformity and saves time. For detailed techniques, review measurement and cutting tips.
Assemble Your Frames Seamlessly
Assembling the cabinet frames correctly is like building the skeleton of your masterpiece. Use pocket hole joinery or dowels for strong, invisible joints. During my project, I clamped each corner tightly and checked squareness with a carpenter’s square—think of it as ensuring your structure is as straight as an arrow. Nail or screw the pieces together securely, avoiding over-tightening which can cause warping. For added stability, reinforce joints with wood glue. Proper assembly results in a sturdy base that can handle heavy countertops and frequent use. Learn more about joint techniques in joint reinforcement methods.
Finish with Professional-Grade Painting or Veneering
The finishing step protects your cabinets and adds style. Sand all surfaces thoroughly, then apply a primer suited for your material. For a sleek look, consider a spray finish that delivers an even coat—avoiding brush marks and drips. During my early attempts, I learned that a smooth finish requires patience and multiple thin coats. This process is like painting a car: prep, primer, base coat, and clear sealant create a durable, attractive surface. Use high-quality paint or veneer that resists scratches and moisture to prolong your investment. For additional finishing tips, visit finishing tricks.
Install and Secure Your Cabinets Properly
Securely anchoring cabinets is crucial to prevent sagging or accidents. Use wall anchors and screws designed for your wall type—think of your cabinet as a sturdy bookshelf that needs to be anchored firmly. Drill pilot holes, then fasten the cabinets at multiple points along the top and sides. During a recent remodel, I made the mistake of rushing this step, which resulted in a slight wobble. To achieve a perfect finish, level each cabinet before fixing it in place, using a spirit level and shims if necessary. Join the process with an awareness of structural support—like installing steel brackets under heavy overhangs—to ensure longevity. Learn more about mounting strategies in mounting best practices.
While many believe that choosing the trendiest cabinets or the flashiest built-ins guarantees a perfect kitchen, the real nuance lies beneath surface aesthetics. One common misconception is that all built-in solutions are universally adaptable. In reality, what looks sleek in a magazine might falter under everyday use if the design doesn’t consider the detailed nuances of your specific space. For instance, many overlook the importance of custom framing that accommodates uneven walls or structural quirks, leading to gaps, misalignments, and long-term durability issues. Investing time in detailed measurements and consulting with experts ensures your built-ins provide both style and function, rather than just filling space superficially.[discover how built-ins can elevate your living space].
Advanced tips for seasoned remodelers: Why does the common ‘one-size-fits-all’ approach often backfire?
Many seasoned remodelers make the mistake of standardizing storage solutions without customizing for specific kitchen behaviors or user habits. According to a study by the National Kitchen & Bath Association, tailored storage, like deep drawers for pots or custom spice racks, significantly enhances usability and reduces clutter. Failing to incorporate these nuances, especially in multi-user households, can result in wasted space and frustrated users. For example, installing standard-height upper cabinets in a space where many users are taller may cause discomfort or access issues, defeating the goal of seamless functionality. Always measure for real-world use cases rather than default assumptions. If you’re interested in specific strategies for perfect integration, consider exploring expert tips on selecting storage solutions.Maintaining your custom-built cabinetry and storage solutions over time requires the right tools and consistent care. Personally, I rely on a high-quality orbital sander with variable speed control to achieve smooth finishes during touch-ups, ensuring my cabinets retain their pristine look after years of use. A digital moisture meter is also invaluable, as monitoring humidity levels helps prevent warping and delamination, especially in kitchens prone to high moisture. When it comes to cleaning, I recommend using non-abrasive microfiber cloths combined with gentle, pH-balanced cleaners that won’t damage delicate veneer surfaces—this prolongs the life of your finish. An essential aspect of long-term preservation is periodic inspection; I schedule quarterly checks to tighten hardware, examine for any signs of moisture ingress, and address scratches or chips before they escalate. In the future, I predict that smart maintenance tools, such as connected moisture sensors and AI-driven issue detection apps, will become standard, making proactive care even easier. To make the most of these tools, consider installing a smart humidity monitor near your built-ins, which can alert you via an app when levels fluctuate beyond a safe range. How do I keep my built-ins working smoothly? Regularly lubricate hinges and slides with silicone spray—avoid oil-based lubricants that can attract dust—and revisit joint integrity annually, especially in areas with seasonal humidity changes. For precise hardware maintenance techniques, explore this detailed guide. If you’re ready to take your cabinetry upkeep a step further, I recommend trying the silicone spray trick for squeaky hinges, which I’ve personally found to significantly extend hinge lifespan and prevent annoying creaks that can develop over time.
What I Wish I Knew Before Diving into Kitchen Built-ins
One of the most valuable lessons I learned was the importance of precise measurements and planning. Rushing this step led to misalignments that could have been avoided with patience and careful calculation. (Trust me, taking the time here saves headaches later.)
Another insight was investing in quality materials early on. Opting for plywood with a hardwood veneer might seem pricier initially, but it pays off through durability and long-term appearance. Cheap particle board can warp and break down faster than most homeowners expect, costing more in repairs or replacements.
Finally, I discovered that understanding the specific needs of my household—such as storage habits and accessibility—allowed me to design built-ins that truly enhanced everyday life. Custom solutions that cater to your unique routines make a world of difference in usability and satisfaction with your remodel.