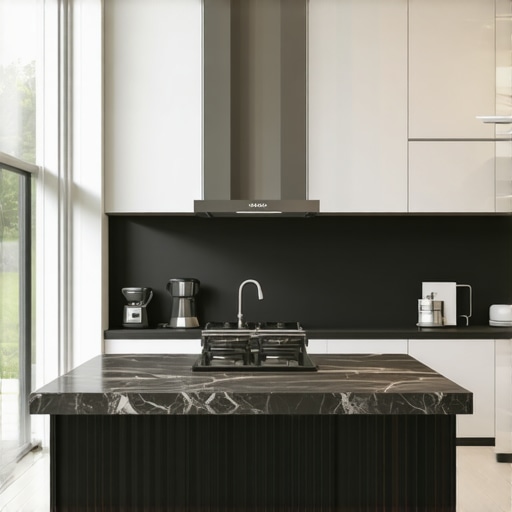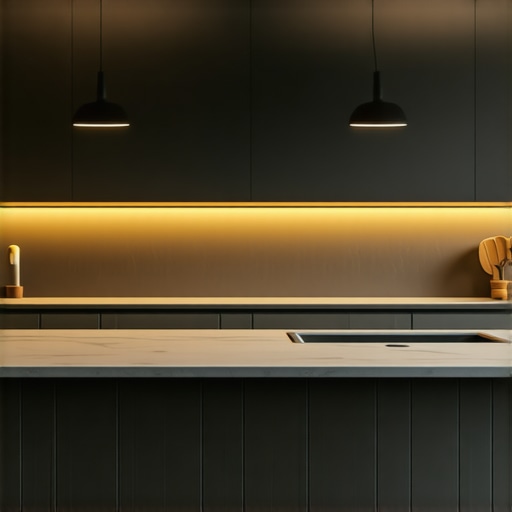
Why Your Kitchen Island Needs a 12-Inch Overhang for Real Leg Room
I remember the day I finally realized the importance of a proper kitchen island overhang. I was battling the cramped feeling every time I sat down, elbows bumping into the countertop, and hunching over to give my legs some space. It hit me—no matter how beautiful or functional my cabinetry was, without that extra few inches, everything felt just a bit off. That was my lightbulb moment and the start of a journey to redesign with comfort in mind.
The Hidden Power of a 12-Inch Overhang: More Than Just Aesthetic
Yes, you read that right. A 12-inch overhang isn’t just about style; it’s about *living*. When I finally incorporated this simple tweak, my kitchen transformed from a lovely space to a truly functional one. It’s amazing how such a small detail can make a big difference in your everyday experience. Trust me, I’ve seen countless homeowners overlook this, only to regret it during those long family breakfasts or when hosting friends.
But what does that mean for your kitchen? Well, a generous overhang provides **ample legroom** for seated meal prep, casual chats, or even homework sessions at your island. And the best part? You don’t have to sacrifice style or workspace—just a little planning and some expert tips.
In the next sections, I’ll walk you through the **why** behind this design choice, share my personal mishaps, and show you exactly how to get that perfect overhang to make your kitchen more inviting and comfortable. Ready to make your kitchen both beautiful and livable? Let’s dive in!
Is a 12-Inch Overhang Actually Worth the Hype?
Early in my remodel, I made the mistake of thinking a smaller overhang was sufficient—after all, who needs so much space? It turns out, I was missing out on crucial comfort benefits. Studies show that ergonomic design isn’t just a luxury; it significantly enhances usability and even your kitchen’s overall value (source: Expert Tips on Selecting Storage Solutions). I’ll admit, I underestimated the importance at first, but once I experienced the difference firsthand, I became a fervent believer.
Have you faced similar frustrations? If so, you’re not alone. Many homeowners overlook this detail because they don’t realize how much it impacts daily comfort. But don’t worry—I’ll guide you through everything you need to know to avoid my early mistake and ensure your island is both functional and fabulous.
Getting this right can seem tricky, but with the right planning, it’s straightforward. Curious how? Stay tuned, because the next part of this post will cover exactly what you need to do to add that generous overhang—and why it’s worth every effort.
Choosing the Right Materials for Your Overhang
Start by selecting durable, moisture-resistant materials like marine-grade plywood or high-quality MDF with a waterproof sealant because the overhang will be exposed to spills and humidity. During my last remodel, I mistakenly picked softwood, which warped within months. To avoid this, I used birch plywood for the overhang and sealed it with multiple coats of water-resistant finish, ensuring longevity and a sleek appearance. For detailed guidance, check out why solid wood doors warp in high humidity zones.
Measuring and Marking for Precision
Use a trustworthy tape measure and a level to mark your desired 12-inch overhang on the underside of the countertop frame. I recommend snapping a chalk line as a visual guide, especially if you’re working alone. I once miscalculated by just half an inch and had to redo the entire cut. Accurate measurements are crucial because this dimension impacts legroom and aesthetics. Remember, precise measurements result in a professional finish and avoid costly mistakes. For more on measuring techniques, visit expert tips on selecting storage solutions.
Supporting the Overhang with Steel Plates
Install steel support plates underneath the overhang to bear the weight of the countertop and prevent sagging over time. I used steel L-brackets during my project, attaching them to the cabinet framing with heavy-duty screws. Proper support is essential for safety and durability; without it, the overhang can crack or become unstable. Visualize the support as the bones of your overhang—strong, discreet, and vital for longevity. For detailed support strategies, see steel support techniques for granite islands.
Cutting and Installing the Overhang Extension
Clamp your chosen material firmly to prevent slipping, then mark your cut line. I prefer a fine-tooth circular saw for a clean, smooth cut—practice on scrap first to perfect your technique. During my last installation, a slight wobble in my saw caused uneven edges, so I stabilized it carefully and finished with a sanding block. Precise cuts ensure a seamless fit with the existing countertop, enhancing both look and function. After cutting, secure the extension with countersunk screws into the support brackets, making sure not to overtighten and cause warping. For comprehensive cutting tips, visit cutting tips for DIY cabinetry.
Sealing and Finishing the Overhang
Apply a high-quality, food-safe sealant along all exposed edges and the surface to protect against moisture and staining. I originally overlooked sealing the edges, leading to water seepage and a rough finish, but reapplying sealant and sanding smoothed out the surface beautifully. Finish with a matching stain or paint if desired, and consider installing a decorative trim or corbel for a refined look. Proper finishing not only enhances aesthetics but also prolongs the lifespan of your installation. For finishing ideas and expert advice, explore custom cabinet finishing options.Many homeowners approach kitchen storage with a set of ingrained beliefs that can hinder their remodeling success. One prevalent myth is that all custom solutions are prohibitively expensive, which isn’t always true; strategic planning can help you achieve tailored storage without breaking the bank. Another misconception is that built-ins are only aesthetic—they actually maximize space utilization and accessibility, as discussed in detail on our built-in features guide.
A hidden nuance many overlook is the importance of proper planning for future needs. For example, standard cabinets may seem sufficient initially but can limit flexibility as your storage requirements evolve over time. Opting for adjustable shelving or modular components ensures longevity.
**Are Custom Cabinets Always Better Than Off-the-Shelf Options?** Many assume custom cabinets are superior in every way, but in reality, they’re most beneficial when tailored to specific space challenges or aesthetic goals. Rushing into a full custom build without assessing your true needs can lead to unnecessary expenses. It’s crucial to evaluate if semi-custom options or smart storage solutions, like deep drawer dividers or corner optimizers, can meet your needs effectively, as highlighted in our smart storage tips.
Never fall into the trap of thinking that style always trumps function. While sleek, uniform cabinetry looks appealing, neglecting functional aspects like accessible pull-outs or built-in spice racks can result in a cluttered, inefficient kitchen. Research shows that well-designed storage enhances not just usability but also your home’s value—making it a worthy investment.
Finally, be wary of the myth that custom solutions are only effective in large kitchens. Even small spaces benefit from tailored storage, provided you work with professionals who understand space maximization. For insights on small kitchen upgrades, explore modern cabinetry tricks.
Remember, understanding these nuances helps you avoid costly mistakes and craft a kitchen that truly fits your lifestyle. Have you ever fallen into this trap? Let me know in the comments. For more expert advice on creating functional, stylish storage, consider reaching out through our contact page. Let’s build a kitchen that marries form and function seamlessly.Maintaining your custom kitchen solutions and built-ins requires more than just good intentions; it demands the right tools, consistent care, and an understanding of long-term management. Over the years, I’ve developed a toolkit that caters specifically to the nuances of high-quality cabinetry and innovative storage solutions, ensuring they stay functional and looking their best. In this section, I’ll share the tools I personally recommend, along with methods to keep everything working smoothly well into the future.
Invest in Precision Tools for Accurately Adjusting Cabinets
One of my must-have tools is a high-precision Torx and Phillips screwdriver set. These allow me to fine-tune hinges and drawer slides without damaging components—especially crucial for soft-close hinges or heavy-duty slides that require specific torque settings. I also swear by a digital angle finder, which helps correct misaligned doors and ensures consistent gaps. For example, when adjusting inset cabinet doors, accurate alignment makes a noticeable difference in the overall aesthetic and operation.
Use Specialty Lubricants to Prevent Wear and Tear
Regular use of silicone-based lubricants on hinges, Drawer slides, and pivot points prevents squeaking and minimizes wear. I prefer silicone sprays because they don’t attract dust or dirt, unlike oil-based lubricants. Applying these with an applicator straw ensures precise coverage, prolonging the lifespan of your hardware. After installing custom cabinets, periodically reapplying lubricant can ward off maintenance issues down the line.
Implement a Maintenance Schedule for Long-Term Results
Developing a routine checks calendar—every six months—is essential. During these inspections, I look for loose screws, misaligned doors, or signs of hardware fatigue. Tightening screws and reapplying lubricants as needed prevent small issues from becoming costly repairs. Consistency in maintenance preserves both the functionality and appearance of your cabinets and storage solutions.
Embrace Smart Technological Solutions for Future Trends
Looking ahead, integrating smart sensors and automation can streamline your maintenance efforts. Installing motion sensor LED strips not only brightens spaces but also let you monitor usage patterns, informing your future storage designs. As these technologies become more affordable and user-friendly, they enable homeowners to manage their spaces proactively.
How do I keep my built-ins functioning seamlessly over time?
Ensure routine inspection and proper adjustment of hardware, clean hardware components with gentle cleaners, and perform timely repairs. Using a quality multi-tool kit that includes precision screwdrivers, putty knives, and a multimeter for electrical components can make these tasks more manageable. For complex issues, consulting a professional can help, but many maintenance tasks are manageable with the right tools and knowledge. For ongoing tips on effective storage and cabinet upkeep, visit our built-in features guide.
3 Lessons That Changed How I Approach Kitchen Storage
One of the toughest truths I learned is that big ideas often hide small battles. For example, choosing a 12-inch overhang seemed trivial at first, but it transformed my entire kitchen experience. It made me realize that paying attention to fine details — from material selection to precise measurements — can make or break your remodel.
Sometimes, I wish I had known earlier how support plates beneath the overhang could save me from sagging nightmares, saving stress and costly fixes later on. My journey taught me to prioritize strength and longevity over aesthetics alone.
And finally, sealing those edges properly isn’t glamorous, but neglecting it led to water damage that set me back months. My biggest takeaway? Success in kitchen remodeling isn’t just about DIY skills — it’s about understanding the unseen, often overlooked elements that elevate your space from good to extraordinary.
Tools and Resources I Trust for a Smooth Remodel
If you’re aiming to replicate my results, I recommend a handful of trusted tools and sources. First, a high-quality digital angle finder helps me get perfect alignments, emphasizing precision in every step. Then, a Silicone spray lubricant is a game changer for long-term hardware performance, keeping everything smooth and quiet. For planning, Expert Tips on Selecting Storage Solutions provided invaluable insights tailored exactly to my needs. Lastly, the book The Ultimate Guide to Custom Cabinets broadened my understanding of style and function, inspiring me to think bigger about space utilization. These resources form the backbone of my remodeling approach, making complex projects manageable and even enjoyable.
Where Your Kitchen Storage Journey Could Lead
Now, I challenge you to envision a kitchen where every inch serves a purpose, where clutter is a thing of the past, and comfort is the priority. It’s easy to get overwhelmed by all the options and expert advice out there, but remember: starting small and focusing on the essentials—like proper overhangs and sturdy supports—can yield big results. Don’t be afraid to experiment with ideas like hidden pantries or custom-built-in storage solutions that match your lifestyle. If you’re ready to take the next step, explore built-in storage ideas or contact professionals for tailored solutions. The most rewarding part? Seeing a space you’ve carefully designed and built transform into something functional, beautiful, and uniquely yours—one thoughtful detail at a time.