4 Low-VOC Finishes That Don’t Smell Like a Chemical Factory
It was late one evening when I finally realized the pungent chemical smell lingering in my kitchen wasn’t just an inconvenient odor—it was a sign I was risking my family’s health with every project. I remember sealing my freshly built custom cabinets, only to be chased out of the room by the overwhelming fume that made my eyes water and my nose protest. That moment was a lightbulb, a wake-up call that prompted me to rethink every finish I used.
Discovering Finishes That Keep Your Home Safe and Smell-Free
For years, I relied on standard finishes that promised durability but left behind a noxious scent and fumes filled with volatile organic compounds (VOCs). The harsh smell wasn’t just unpleasant; it was a red flag indicating harmful chemicals were off-gassing into my living space. During renovation projects, I’d often find myself holding my breath, waiting for the finish to dry, and crossing my fingers that my pets and kids wouldn’t suffer health issues down the line.
Eventually, I found a better way. Today, I want to share with you some low-VOC finishes that don’t smell like a chemical factory—because your home deserves safer, healthier options. But before I dive into the solutions, let me address a common concern: Is investing in these finishes really worth it?
Is a No-Smell Finish Worth the Extra Cost?
Early on, I made the mistake of dismissing the importance of choosing the right finish, thinking all products were created equal. I used cheap, readily available options, only to regret it later when the smell persisted long after application and I noticed a slight fog in the air that just wouldn’t clear. It’s true that some low-VOC options come with a higher price tag, but the benefits—better indoor air quality, peace of mind, and a healthier environment—far outweigh the initial investment.
If you’re considering a kitchen remodel or installing built-ins, I highly recommend exploring [modern kitchen remodels featuring custom cabinets and built-ins](https://artisancabinetworkz.com/modern-kitchen-remodels-featuring-custom-cabinets-and-built-ins), which often incorporate safer finishes from the start. Because, honestly, who wants to spend days masking themselves in masks or worrying about lingering fumes?
In my experience, one of the biggest mistakes newcomers make is choosing finishes solely based on cost or durability, neglecting the health implications and smell. But I learned that with a little research, I could find finishes that check all the boxes—protect my wood, look stunning, and smell neutral.
So, if your current finishing process has you battling chemical odors or worried about health risks, stick around. I’m going to walk you through some tried-and-true low-VOC options that truly don’t smell like a factory. Trust me, once you switch, you’ll wonder why you didn’t do it sooner. Ready to transform your space with safer finishes? Let’s get started.
Select Non-Toxic, Low-VOC Finishes for Your Cabinets
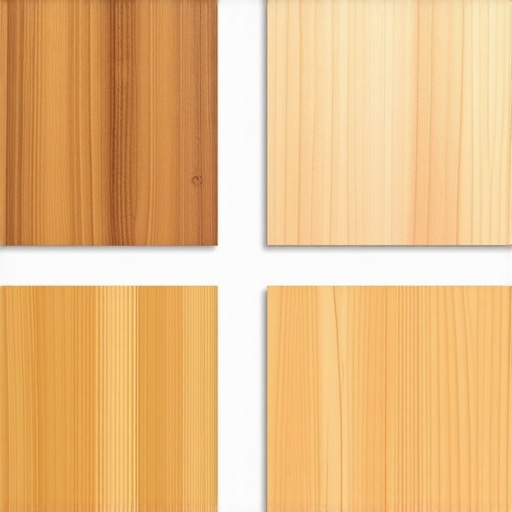
Start by research—visit local supplier stores to compare VOC levels on labels, then test small samples of your preferred finish on scrap wood to evaluate smell and drying time. When I remodeled my kitchen, I applied a handful of low-VOC polyurethane on a test piece, which dried quickly with no chemical odor lingering—saving me from days of chemical fumes. Use a high-quality brush or roller for even application, and work in a well-ventilated area to speed up drying. Remember, safety and smell are crucial; a good finish should be odorless within hours.
Designing Custom Cabinets with Practical Storage Solutions
Plan cabinet layouts with purpose—think of your kitchen like a well-organized toolbelt. I once designed a pull-out spice rack inside a tall cabinet, which not only kept spices accessible but also freed up valuable shelf space. Consider incorporating specialized storage, such as deep drawers for pots and pans or hidden trays for lids, to maximize efficiency. Use internal dividers to keep items tidy and prevent clutter. When designing, visualize daily workflows and aim to reduce unnecessary steps—like positioning frequently-used items within easy reach. For inspiration, explore smart storage ideas that adapt to your needs.
Constructing Built-ins That Fit and Function
Measure your space meticulously—use a laser distance meter for precision, and note any wall irregularities. I once faced a wall with slight curve, and I used a flexible sanding block to scribe the cabinet filler strip, achieving a seamless fit. Assemble components on a clean, level surface, and use a carpenter’s square to ensure right angles during framing. When installing, secure built-ins to metal studs to guarantee stability—consult this guide for tips on fixing to different wall types. Finishing touches, like trim and paint, will integrate your built-ins into the room seamlessly.
Optimizing Space Without Crowding
Identify excess vertical space—install narrow floating shelves for mugs or spices, freeing up counter space. I added a custom blind-corner pull-out to maximize inaccessible areas, which turned wasted corner rooms into valuable storage. Think of your kitchen as a puzzle; each piece should fit without forcing other pieces out of place. Use innovative storage solutions to make your layout smarter, not bigger. Don’t forget to consider the flow—placing the trash and recycling close to prep areas simplifies cleanup and maintains a clean look.
Finishing Touches that Elevate Your Design
Choose hardware finishes that resist fingerprints and water spots—like matte black or brushed nickel—to maintain a sleek look. I installed magnetic in-drawer knife strips instead of cluttered countertop blocks, which kept my knives sharp and within reach. Use lighting under cabinets to brighten work areas, making the space more inviting and functional. Labeling drawers for spices, utensils, and prep tools can streamline your cooking routine. Remember, each detail, from the hardware to organizational inserts, contributes to a cohesive and user-friendly kitchen. Dive deeper into custom cabinets ideas for inspiration.Many homeowners believe that choosing the most popular cabinet styles or the latest storage trends guarantees a successful renovation. However, as an expert who has navigated countless remodels, I can tell you that misconceptions often lead to costly mistakes. One common myth is that larger cabinets always mean better storage, but in reality, overstuffed cabinets can hinder access and cause long-term wear. Instead, thoughtful internal dividers and specialized compartments, like those found in [smart storage solutions](https://artisancabinetworkz.com/smart-storage-solutions-for-small-kitchens-in-2025), optimize space without sacrificing accessibility. Also, many assume built-ins are only for aesthetics, neglecting their crucial role in maximizing every inch of available space—particularly in tight kitchens or multi-purpose rooms. Incorporating built-in furniture strategically can turn wasted corners into functional areas, as demonstrated in [this detailed guide](https://artisancabinetworkz.com/built-ins-that-elevate-your-living-rooms-functionality).
Tools I Trust for Long-Term Success
When it comes to maintaining and scaling your custom cabinets and storage solutions, having the right tools makes all the difference. I personally swear by my cordless orbital sander because it ensures smooth, even finishes when reapplying protective coatings or touching up surfaces. Unlike cheaper sanders, my makita orbital sander provides consistent power, reducing the risk of uneven wear or gouges—something I learned the hard way early in my projects. Additionally, I rely on a digital moisture meter to monitor wood humidity levels, which is crucial for preventing warping or cracking over time. These tools give me peace of mind that my craftsmanship will stand the test of time.
Beyond physical tools, I recommend using software like SketchUp for planning your layouts. This free, intuitive program helps visualize storage configurations or built-in placements before committing to any cuts or installations, saving both time and money. For managing project timelines and inventory, I leverage Trello, which keeps all steps organized and ensures nothing slips through the cracks during scaling or maintenance phases.
How do I maintain my cabinets and storage solutions over time?
Regular cleaning is vital. I use a damp microfiber cloth combined with a mild, wood-friendly cleaner to wipe down surfaces weekly. For stubborn spots, a paste of baking soda and water gently tackles grime without damaging the finish. Protecting hardware is just as important; applying a small amount of mineral oil periodically keeps handles and hinges functioning smoothly. Inspect your finishes annually to identify and address any scratches or chips early, especially if your kitchen sees high traffic. Installing soft-close hinges, like those I detailed in my lazy Susan tips, can greatly extend their lifespan. Keeping moving parts well-lubricated and checking for loose screws safeguards your investment against the wear and tear of daily use. In the future, I foresee an increase in smart maintenance accessories, such as sensors that alert you when hinges or slides need lubrication, making long-term upkeep even more straightforward and efficient. Don’t forget, a well-maintained system not only looks better but also functions safer and lasts longer. To get started, try applying a silicone-based lubricant to your drawer slides and hinges this month, and observe how much smoother and quieter your cabinets become.
The Hardest Lesson I Learned About Custom Cabinets and Kitchen Makeovers
Early in my renovation journey, I underestimated the importance of choosing finishes that are both beautiful and health-conscious. I thought durability was enough—until I realized that toxic fumes could linger for days, affecting my family’s wellbeing. It was a tough lesson that now guides every project I touch, reminding me that safety shouldn’t be sacrificed for style.
3 Myths About Built-ins and Storage That Held Me Back
One misconception was that larger cabinets mean more storage, which often led to cluttered, inaccessible spaces. I also believed that hidden compartments complicated design—when in fact, smart internal dividers and optimized layouts make storage both sleek and functional. Debunking these myths opened up new possibilities for clean, efficient kitchens that serve real-life needs.
What Experts Won’t Tell You About Low-VOC Finishes and Kitchen Safety
Many professionals don’t emphasize how crucial it is to test finishes on scrap wood or ensure proper ventilation during application. Skipping these steps can result in lingering odors or incomplete curing, which may compromise air quality long after your project is done. Learning these insider techniques ensures your renovation is both stunning and safe for everyone involved.
My Essential Toolkit for Elevating Kitchen Remodels
I rely on a cordless orbital sander—my Makita model—to achieve smooth, even finishes without hassle. A digital moisture meter is invaluable for monitoring wood health, preventing warping over time. I also trust SketchUp for precise planning and Trello for keeping projects organized. These tools streamline my workflow, making complex renovations feel manageable and ensuring lasting quality.
This Is Your Moment to Transform Your Space
Choosing safer finishes and smarter storage solutions isn’t just about aesthetics—it’s about creating a home that promotes health and happiness. Embrace innovation, plan thoughtfully, and don’t shy away from expert resources. Your dream kitchen that’s both beautiful and safe is within reach, so start today and enjoy the process of building a space you’ll love for years to come.