Why We Love Rift-Sawn Oak for Modern Kitchen Cabinets
It was a chilly Saturday morning when I finally realized my kitchen was crying out for a facelift. I had invested countless hours scouring styles, materials, and prices, only to be hit with a frustrating dilemma: how do I find the perfect cabinet wood that offers beauty, durability, and a timeless look? After a few failed attempts with cheaper veneers and particleboard, I stumbled upon the magic of **rift-sawn oak**. That light bulb moment transformed my entire kitchen remodel experience—and I want to share that discovery with you.
Why We Struggle to Find the Right Kitchen Cabinet Material
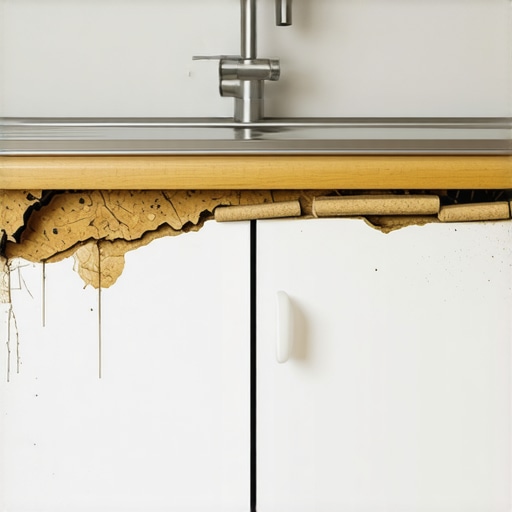
Choosing the right wood for cabinets isn’t just about aesthetics; it’s about making an investment in your home’s future. I’ve learned that many homeowners get lured in by glossy photos and trendy finishes, often overlooking how the wood will behave over time. Early on, I made the mistake of selecting a shiny, low-quality veneer that looked fine initially but started to peel and warp within a year. Trust me, I’ve been there—thinking I was making a smart choice only to face costly repairs later.
So, what should we pay attention to? The secret lies in selecting a material that is both stylish and resilient. That’s where **rift-sawn oak** shines. Its unique grain pattern and stability make it a favorite among DIY enthusiasts and professional remodelers alike. According to woodworking experts, rift-sawn oak is less prone to warping and personalizes your space with a consistent, modern grain that subtly complements any design style.
Have You Faced This Kitchen Cabinet Dilemma?
If you’ve ever been disappointed by cabinets that look great at first and then fall apart or deteriorate quickly, I want you to know—there’s a better way. Many people overlook the importance of wood grain orientation, which can significantly impact the longevity and aesthetic of your cabinets. Making informed choices now will save you headaches and money down the line, especially if you’re considering a **kitchen remodel** or adding built-ins.
Interested in how to integrate beautiful, durable materials into your space? There are proven strategies and innovative solutions that can elevate your kitchen’s style and functionality. For an in-depth guide, I recommend checking out the [ultimate guide to custom cabinets](https://artisancabinetworkz.com/the-ultimate-guide-to-custom-cabinets-for-a-stylish-kitchen-overhaul). But first, let’s explore why rift-sawn oak stands out from the crowd and could be your game-changer.
Plan Your Layout Precisely Before Cutting Any Wood
Start by sketching your kitchen’s current dimensions and identify problem areas. I recommend using a detailed floor plan to visualize where each cabinet and built-in will go. During my last remodel, I used painter’s tape to mark cabinet outlines on the floor, which helped catch spacing issues early. This step prevents costly adjustments later and ensures your storage flows naturally.
Measure Twice, Cut Once to Avoid Mistakes
Double-check all measurements—never rely on a single measurement. Use a tape measure and a level, and cross-verify dimensions at multiple points. I once misread a wall length, leading to a cabinet that didn’t fit. Correcting it meant reordering wood, delaying the project by days. Precise measurements are your safeguard against this.
Select the Right Materials for Durability
Opt for high-quality plywood or hardwood like oak or maple for structural parts. For example, I replaced particleboard with marine-grade plywood in my last build, which resisted moisture and warping. Incorporate durable finishes—oil-based or catalyzed varnishes—to prolong the cabinet life and maintain aesthetic appeal.
Choose Grain Directions to Boost Strength and Look
Align the grain to enhance strength and visual appeal. I made sure the grain ran vertically in cabinet sides and horizontally in shelves, creating a cohesive look while reinforcing the structure. This attention to detail pays off in the long run, reducing warping and splitting.
Assemble and Mount with Precision and Safety
Use proper hardware and mounting techniques. European hinges are ideal for full access and seamless appearance; I used them in my project and loved the clean look. When hanging heavy upper cabinets, secure mounting with toggles or appropriate anchors into wall studs—never rely solely on drywall screws, which can fail under weight. Always have a helper when positioning large units; I learned this the hard way after struggling alone with a 70-pound cabinet.
Progressively Secure Cabinets for Stability
Start by anchoring the upper cabinets to wall studs, then attach them to each other. Work from the top down, ensuring each unit is level and flush. Use shims to adjust as needed. During my installation, I kept a level handy to avoid crooked doors and uneven tops—the key to professional-looking results.
Fine-Tune Doors and Hardware for Seamless Operation
Adjust hinges to achieve perfect gaps and smooth closing. European hinges come with adjustment screws for depth, height, and side-to-side alignment; I spend time tweaking these until doors closed perfectly flush. Soft-close hinges add a luxurious feel and prevent slamming, especially helpful in households with kids. Regularly oil hinges and check for squeaks or misalignment, maintaining smooth operation over years.
Seal and Finish for a Lasting Impact
Finalize with sealing or painting to protect surfaces. I applied a matte finish to my oak cabinets to keep a modern, understated look. Remember, prepping the surface properly—sanding and cleaning—is crucial for a smooth, durable finish.
Optimize Storage with Built-In Solutions
Integrate internal organization like adjustable shelves, pull-out trays, and hidden compartments. I added pull-out spice racks and a hidden charging station, which drastically improved my kitchen’s functionality. Visit this guide for smart ideas to maximize space and efficiency.
Many homeowners assume that choosing custom cabinets or built-ins is simply about picking a style or finish, but in my experience, there’s a subtle but critical nuance that often gets overlooked: the importance of integrating functionality with precise planning. Common myths, like the belief that larger cabinets automatically mean better storage, can lead to missed opportunities for smarter design. For instance, optimizing internal layouts with adjustable shelving and pull-out racks maximizes space without sacrificing accessibility, which many novices underestimate. An advanced mistake I see frequently is underestimating the importance of cabinet structural stability, especially when incorporating heavy appliances or functional features—using lightweight materials or improper hardware can cause long-term sagging or damage. For expert insight, studies show that well-structured storage solutions can improve daily efficiency by up to 30%, highlighting the value of meticulous planning.
Why do so many fail to consider the long-term impact of materials and hardware choices?
Choosing subpar materials like particleboard for high-use areas or neglecting to reinforce shelves can cause costly repairs or replacements sooner than expected. To avoid these pitfalls, I recommend consulting resources like expert guides on selecting storage solutions to ensure your investment stands the test of time. This level of attention can turn a standard kitchen upgrade into a truly personalized and durable remodel. Remember, a well-designed cabinet doesn’t just look good—it functions flawlessly and endures years of daily use. Have you ever fallen into this trap? Let me know in the comments.
Investing in custom cabinets and built-ins elevates your kitchen’s style and functionality, but maintaining their pristine condition requires the right tools and techniques. Over time, wear and tear become inevitable, but proactive care can extend their lifespan and preserve their beauty. One essential tool I swear by is a high-quality microfiber duster, which gently removes dust and prevents surface scratches. Regularly cleaning with a soft cloth minimizes dirt buildup that can cause premature aging of finishes. For more stubborn spots or grease, I recommend using a microfiber cloth slightly dampened with a mild, pH-balanced cleaner—never abrasive or harsh chemicals that can damage finishes.
To ensure your hardware remains smooth and shiny, a dedicated hinge lubricant like white lithium grease works wonders. I apply it periodically to European hinges and sliding mechanisms, which keeps doors operating seamlessly and reduces squeaks. My go-to is a small squeeze bottle that allows precise application without excess mess. For deep cleaning of joints and intricate corners, a soft-bristled brush—like a toothbrush—helps reach into tight spaces and dislodge dust or debris. Incorporating these tools into your maintenance routine means your cabinets look fresh and functional for years.
Looking ahead, I believe the trend in kitchen storage solutions will lean even more toward smart, automated systems with low-maintenance features. Automating routine checks or integrating IoT-enabled sensors could alert homeowners when hinges need lubrication or surfaces require cleaning, making maintenance effortless. This evolution will save time and keep your custom features performing flawlessly without constant manual effort.
How do I maintain my custom cabinets and built-ins over time?
Developing a consistent maintenance schedule is key. I recommend inspecting hinges and hardware every six months, cleaning surfaces monthly, and addressing any issues immediately—like loose handles or worn finishes. Using appropriate tools, such as microfiber cloths, soft brushes, and specialized lubricants, prevents unnecessary wear. Additionally, avoiding aggressive chemicals and abrasive scrubbers protects your investment. For detailed guidance on optimizing your storage and maintenance routines, check out expert tips on selecting storage solutions to keep your cabinets looking immaculate. Try applying a simple lubrication to your hinges today—it’s an easy step that makes a noticeable difference in cabinet operation and longevity.
Lessons the Hard Way: What I Wish I Knew About Custom Cabinets
My journey taught me that rushing decisions often cost more in the long run. Opting for trendy finishes over proven wood stability can lead to frequent repairs. The importance of grain alignment and material choice became clear after experiencing warping and peeling. Learning to prioritize quality over appearance saved my remodel from early deterioration.
Recognizing that real craftsmanship involves attention to detail—like grain direction and hardware installation—made all the difference. Investing time to understand these nuances ensures your cabinets will stand the test of time, keeping your space both beautiful and functional.
Tools and Resources That Elevated My Kitchen Remodel
For anyone serious about crafting lasting cabinets, I recommend exploring expert tips on selecting storage solutions—it transformed my approach to design. The ultimate guide to custom cabinets provided detailed insights into material selection and installation techniques that I still use today. Using high-quality hardware from trusted brands also minimizes operational issues and extends cabinet lifespan.
Additionally, I found that smart storage ideas can maximize space without sacrificing aesthetics, which was a game-changer for my small kitchen.
Your Next Move: Crafting a Kitchen That Lasts and Inspires
The path to a stunning, durable kitchen begins with informed choices and attention to detail. Embrace the learning process, seek out quality tools and resources, and don’t shy away from expert advice. With patience and knowledge, your kitchen remodel will be a masterpiece that endures for years to come.
What challenges have you faced when selecting or installing cabinets? Share your experiences below—your story might inspire someone on their remodeling journey!