Why We Recommend 42-Inch Upper Cabinets for High-Ceiling Kitchens
I remember the exact moment I realized my kitchen was begging for a makeover. Cabinets that seemed spacious enough in standard-height ceilings suddenly felt cramped, cluttered, and uninspired. Despite my efforts to organize, I was constantly battling to find space, and the view above the cabinets was nothing but a dull, empty gap. That lightbulb moment led me to explore taller upper cabinets, specifically 42-inch models tailored for high-ceiling kitchens. The transformation was astonishing, and I want to share why it might be the game-changer you’re searching for too.
The Secret to Making High Ceilings Work for You
If your kitchen boasts ceilings taller than the usual 8 feet, standard cabinets often fall short in maximizing your space and style. It’s frustrating when the uppermost shelves are a wasted, inaccessible zone, creating a sense of imbalance rather than grandeur. I faced this challenge firsthand—struggling with limited storage and an awkward viewing gap that made my kitchen look unfinished.
That’s when I discovered the magic of 42-inch upper cabinets. These taller units not only fill the void but also elevate the entire room’s aesthetic, making your ceilings appear higher and your space more cohesive. They seamlessly fill the gap to the ceiling, hiding unsightly wiring or ductwork, and provide ample storage without sacrificing style. Since making this switch, I’ve enjoyed a more organized, spacious, and impressive kitchen—one that truly complements my high ceilings.
Is Extra-Tall Cabinetry Worth the Hype?
Initially, I was skeptical. Would extra-tall cabinets be a hassle to install or harder to reach? I made the mistake early on of assuming taller meant more trouble—turns out, it’s quite the opposite. With the right hardware and a little planning, these cabinets are accessible and incredibly practical. Plus, they instantly give your kitchen a sleek, custom look that’s hard to beat.
Curious about how to integrate these taller cabinets into your design? I found that visiting resources like this guide helped me understand the various options and how custom solutions can transform your space. If you’re considering redoing your kitchen, I strongly recommend exploring the potential of 42-inch upper cabinets—they might just be the upgrade you need.
Now that I’ve shared my personal experience, let’s dive into how you can determine if these taller cabinets are right for your kitchen and the steps to make the most of it.
,
Plan Your Space and Choose the Right Cabinets
Begin by measuring your ceiling height precisely. Use a tape measure and a level to determine the exact distance from the floor to the ceiling, noting any irregularities or crown molding that might affect cabinet fit. During my project, I discovered that old uneven floors meant my measurements needed to be taken at multiple points to ensure accuracy. Once you have your measurements, explore options for 42-inch upper cabinets, which are ideal for high ceilings. Visit this resource to view custom solutions tailored for high-ceiling kitchens. Choosing the right cabinetry is critical; custom cabinets allow you to maximize every inch and ensure seamless integration with your existing design.
Remove Existing Cabinets and Prepare the Space
Carefully detach your current upper cabinets, starting with removing the hardware and unscrewing the mounting brackets. Use a stud finder to locate wall studs, ensuring stability for the new taller units. During my install, I used a heavy-duty scraper and a rubber mallet to gently pry the cabinets without damaging the wall, making the process smoother. Protect the surrounding area with drop cloths and keep tools organized for efficiency. Proper preparation prevents mishaps and ensures a sturdy installation.
Reinforce the Wall for Support
Since taller cabinets are heavier, reinforce the wall with blocking or additional framing, especially if you’re attaching to drywall alone. Install horizontal blocking between studs at the mounting height to distribute the weight evenly. I reinforced the wall with 2x4s, which prevented sagging over time. For added support, consider heavy-duty brackets, like those detailed here. This step ensures your cabinets will hold up regardless of content weight or long-term use.
Install the Taller Cabinets Securely
Position the cabinet box against the wall, aligning it with prior markings or the ceiling line. Use a level to verify perfect alignment before screwing into studs or reinforcement. During my installation, I used shims to level cabinets that faced slight unevenness, ensuring a flush and professional appearance. Secure the cabinets with appropriate fasteners through the back and sides, anchoring into wall studs or reinforcements. Remember to check the leveling frequently during fastening to avoid misalignment.
Create a Seamless Look with Custom Details
To blend your new taller cabinets seamlessly, consider installing crown molding or trim that runs to the ceiling. For the gaps at the top, insulate or seal with caulk to achieve a sleek, finished appearance. I added crown molding painted to match the cabinets, which elevated the aesthetic and concealed any uneven gaps. Additionally, finishing touch, like matching paint or stain, enhances cohesiveness.
Optimize Storage with Built-in Solutions
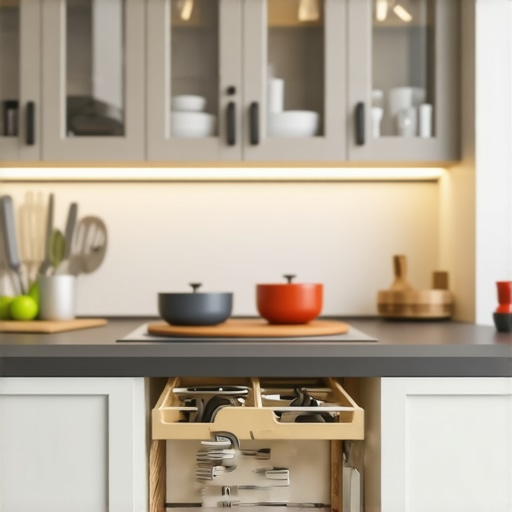
Maximize your cabinet capacity by incorporating internal organizing features such as pull-out shelves, spice racks, or lazy Susans. For example, I installed pull-out baskets in the lower sections to easily access heavy pots, reducing clutter. Use built-in storage solutions to utilize every available inch, especially in high cabinets that are harder to reach. Custom inserts and dividers make a noticeable difference in functionality and ease of access.
Address Accessibility and Safety
Considering safety and ease of reach, install pull-down mechanisms or step stools integrated into your design for taller cabinets. During my project, I added a built-in step stool that stored within a cabinet panel, allowing safe access for all users. Soft-close hinges and hardware improve the user experience, preventing slams and reducing wear. For more expert tips, visit this guide on hardware enhancements.
Final Touches and Inspection
Once installed, thoroughly inspect the fit and finish. Check for gaps, alignment, and secure fastening. Clean the surfaces and touch up paint or stain as needed. Take your time during this step—attention to detail ensures your investment looks polished and lasts. When I completed my installation, I tested each cabinet’s opening and closing, making adjustments with hinges and latches for smooth operation, as recommended in this article.
When it comes to kitchen remodels, many homeowners believe they need to follow popular trends or stick with standard solutions to achieve a functional and stylish space. However, a common misconception is that off-the-shelf cabinets and generic storage fittings are sufficient for every home. In reality, embracing custom cabinets and tailored built-ins can dramatically improve both usability and aesthetic appeal. What many overlook is that the real secret to a successful renovation lies in understanding the nuanced differences between these options and how subtle choices can make a big impact. For example, selecting the right depth for wall cabinets—like opting for 15-inch instead of standard 12-inch deep units—can optimize storage without crowding the room, as discussed in expert guides on [the proper cabinet depth](https://artisancabinetworkz.com/why-most-corner-cabinets-are-wasted-space-and-the-blind-corner-pull-out-solution).
One trap to avoid is falling for the myth that all custom cabinets will significantly blow your budget. While it’s true that bespoke solutions can be pricier upfront, they often prevent costly modifications later because they precisely fit your space. Moreover, many assume that built-in storage is only suitable for large kitchens, but strategic integrations—such as hidden toe-kick drawers or vertical pull-out pantry units—maximize even small spaces efficiently. In fact, expert insights reveal that well-designed storage can eliminate clutter and provide quick access to essentials, as highlighted in [this comprehensive guide](https://artisancabinetworkz.com/creating-seamless-kitchen-remasters-with-built-in-storage-solutions).
An advanced point that even seasoned renovators often overlook involves the installation details of built-ins. For instance, improper reinforcement can lead to sagging over time, especially when heavy materials or large appliances are involved. Reinforcing wall support with extra framing or heavy-duty brackets ensures durability, a nuance covered extensively in [support strategies](https://artisancabinetworkz.com/the-heavy-duty-bracket-strategy-for-supporting-18-inch-island-overhangs).
What Are the Risks of Overlooking Structural Details in Custom Builds?
Neglecting proper reinforcement and support during custom cabinetry installation can result in long-term issues like warping, sagging, or even collapse—costly mistakes that’s why expert consultation is invaluable. Studies from the American Institute of Architects emphasize that structural integrity is as critical as aesthetic design in custom projects. Remember, every detail, from the type of hardware used to how storage solutions are integrated to match your specific needs, influences your overall satisfaction.
Have you ever fallen into this trap? Let me know in the comments, and share your experiences or questions about avoiding these common pitfalls in your next kitchen upgrade.
Keeping It Working: Essential Tools and Maintenance Strategies
Embarking on a kitchen remodel is just the beginning; maintaining those custom cabinets, built-ins, and storage solutions ensures your investment stands the test of time. Over the years, I’ve honed a set of specific tools and methods that simplify upkeep and help me catch issues early. A top recommendation is always a high-quality multi-bit screwdriver set. I personally rely on the Wera Kraftform series because of its durability and ergonomic design, making repetitive adjustments, like tightening hinges or adjusting pulls, quick and comfortable. These tools prove invaluable during routine checkups, especially when hardware begins to loosen over time.
Another critical piece is a compact cordless drill, ideally with adjustable torque settings. I use my Milwaukee M12 for everything from installing new storage solutions to fixing squeaky hinges. Having a reliable drill allows me to tighten or replace hardware without fuss, keeping everything gliding smoothly. When it comes to cleaning, a soft microfiber cloth combined with a gentle wood cleaner like Howard Feed-N-Wax helps preserve the finish on custom cabinetry, preventing grime buildup and maintaining a fresh look.
Investing in a digital level also pays dividends in ensuring your cabinets stay aligned. Kitchens are prone to settling or shifting, especially in older homes. Regularly checking alignment with a precise level helps catch sagging or uneven doors early—saving you from more extensive repairs later. I schedule quarterly inspections to verify everything is square, then adjust hinges or support brackets as needed, following expert guidance from sources like this guide.
How do I keep my storage solutions performing long-term?
Consistency is key. Apply lubrication, such as silicone spray, to drawer slides and hinges every year to prevent sticking or squeaking. For heavy-duty pull-out shelves, I recommend checking and reinforcing support brackets periodically—particularly if you notice sagging or difficulty opening. Additionally, sealing exposed wood edges with a clear finish prevents moisture damage, extending the life of your custom-built features.
Looking ahead, the trend of smart kitchen technology is going to influence maintenance routines significantly. Imagine auto-lubricating hinges or sensors that predict hardware failure—these innovations could make upkeep even more effortless in the future. Currently, I’m experimenting with smart sensors that monitor humidity and humidity-sensitive finishes, helping prevent warping or mold growth. Embracing these advancements can help you stay ahead of wear and tear, ensuring your custom cabinets and storage solutions remain pristine and functional for decades.
Get started today by applying a quality silicone lubricant to your hinges and drawer slides. It’s a simple step that can dramatically extend their lifespan. Remember, regular checkups and preventative care aren’t just upkeep—they’re investments in your kitchen’s ongoing beauty and utility. For more detailed tips on maintaining your custom solutions, visit this resource.
Surprising Truths I Wish I Knew Before Starting My Kitchen Remodel
- Opting for taller cabinets was not only about aesthetics — it fundamentally changed how I perceived space and organization, revealing that sometimes, thinking outside the standard sizes unlocks hidden potential.
- Choosing custom solutions over off-the-shelf options might seem pricier initially, but the long-term savings in flexibility and durability are invaluable — I learned that tailored designs prevent costly modifications later on.
- The structural details matter more than I anticipated; reinforcing walls and ensuring proper support for heavy cabinets saved me from sagging and future repairs, underscoring the importance of expert planning.
- Incorporating seamless hardware and finishing touches elevated the appearance dramatically, proving that small details can have a big impact on the overall look and feel of your high-ceiling kitchen.
- Regular maintenance routines with simple tools like a quality screwdriver and a microfiber cloth kept my custom cabinets functioning flawlessly, reminding me that a little effort goes a long way in preserving beauty and function over time.
My Favorite Resources That Transform the Kitchen Renovation Journey
- This guide on custom cabinet ideas: It helped me understand how to tailor storage for my high ceilings and maximize every inch efficiently.
- Built-in storage solutions resource: It provided innovative ideas to utilize hidden spaces and keep my kitchen clutter-free.
- Expert tips on hardware and finishes: Ensuring my cabinets operated smoothly and looked professional.
- Support strategies for heavy cabinets: Critical for durability, especially with taller units and weightier elements.
Let Your Kitchen Dream Become a Reality
Transforming your kitchen with custom cabinets and smart storage is more than a renovation—it’s a chance to create a space that truly functions for your lifestyle while reflecting your style. Embrace innovative solutions, pay attention to structural details, and don’t shy away from asking for expert help when needed. Your ideal kitchen is within reach; start today with confidence and enthusiasm!
What’s the one custom cabinet or storage hack you’re excited to try in your kitchen? Share your ideas below and let’s inspire each other to craft truly exceptional spaces!