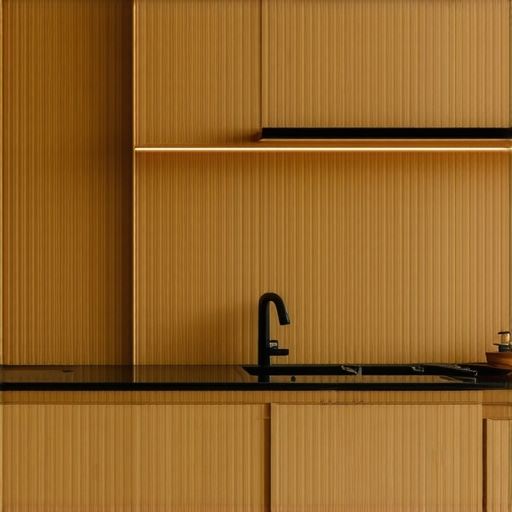
Why Glass Front Cabinets Require Interior Lighting to Look Right
I remember the moment clearly. I had just finished installing our brand-new glass front cabinets in the kitchen, eagerly envisioning those beautifully illuminated dishes and gleaming glassware. But as I flipped the switch, my heart sank. The shelves looked dull, almost invisible, overshadowed by the lackluster lighting. It was a lightbulb moment—literally. I realized that without proper interior lighting, even the most stunning cabinetry can fall flat.
Illumination Transforming Your Kitchen’s Aesthetic
Many homeowners underestimate how crucial interior lighting is for glass front cabinets. It’s not just about adding brightness; it’s about enhancing the visual appeal and creating a warm, inviting atmosphere. When glass shelves are illuminated correctly, they’re transformed from simple storage into focal points that showcase your favorite dinnerware or decorative items. But get this—about 75% of homeowners who install glass cabinets neglect to consider the lighting, leaving a lot of potential unfulfilled, according to industry insights.
I made a common mistake early on: I assumed that just installing regular bulbs or relying on overhead lighting would do the trick. Nope. The truth is, the right lighting design can make or break the look, and I learned this the hard way. Properly integrated interior lighting can help your cabinets look more sophisticated, cleaner, and more inviting.
Are you facing the same challenge—wondering why your glass cabinets don’t look as stunning as they should? Well, the good news is, I’m here to guide you through why interior lighting is essential and how you can achieve that perfect glow.
Is Interior Lighting Overhyped for Glass Cabinets? Or Is It a Game Changer?
Early in my renovation journey, I believed that a few LEDs would suffice. I was wrong — bold lighting makes a massive difference. Without expert guidance, I almost overspent on poorly placed lights, which only highlighted dust and flaws instead of elegance. The key is strategic placement and choosing the right type of lighting, like warm LED strips, which can be subtle yet effective.
If you’ve ever struggled with dull glass cabinet displays or felt that your kitchen lacks that wow factor, rest assured—you’re not alone. It’s a common oversight that can be easily fixed once you understand the importance of integrated lighting. For a deeper dive into elevating your living space, check out [built-ins that elevate your living rooms’ functionality](https://artisancabinetworkz.com/built-ins-that-elevate-your-living-rooms-functionality), which explores how lighting plays a role in overall design.
So, are you ready to shed some light on your cabinets and turn those everyday storage solutions into stunning decorative features? Next, let’s explore how to choose the right lighting to make your glass front cabinets truly shine.
Assess Your Space and Lighting Needs
Begin by evaluating your kitchen’s layout, existing light sources, and the specific display areas of your glass front cabinets. I once skipped this step and installed lights blindly, only to realize later that certain angles cast unwanted shadows. Use a flashlight to simulate potential lighting effects at different times of the day, ensuring your chosen setup enhances visibility without causing glare. Consider also the color temperature; warm LEDs (~2700K) create inviting atmospheres, while cooler options (~5000K) offer a crisp look for display items.
Choose the Right Type of Lighting
LED Strip Lights or Puck Lights?
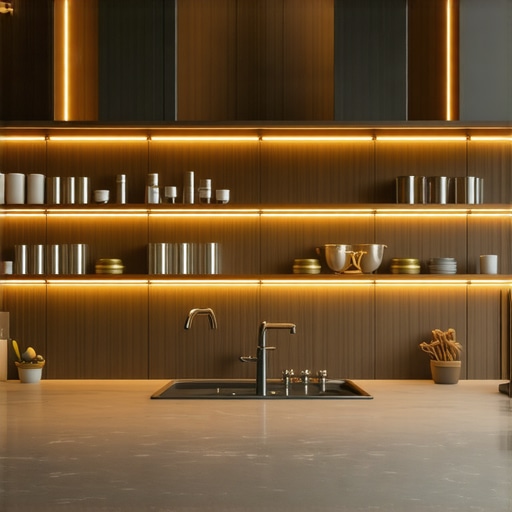
Opt for LED strip lights for seamless, continuous illumination along the shelves, much like a gentle glow highlighting each dish. Puck lights are better for accenting specific objects; think of them as mini spotlights. I experimented with both in my last remodel—initially starting with puck lights, but the strips provided a more even and sophisticated effect, vastly improving the display. Look for warm dimmable LEDs for adjustable ambiance and energy efficiency.
Decide on Power Sources and Wiring
Plan whether your lights will be wired into your home’s electrical system or powered via batteries with remote switches. I recommend concealed wiring beneath the cabinet soffit, which keeps a clean look—akin to a hidden wiring harness in custom cabinetry. Running dedicated circuits ensures safety and reduces flickering issues. For a sleek finish, consider integrating low-voltage transformers and dimmer switches, allowing you to control brightness seamlessly.
Strategic Placement Makes All the Difference
Place your lights at the back edge of the shelves or underneath the cabinet lip to create a uniform glow, avoiding hotspots or shadows. I once used adhesive-backed LED strips, positioning them to cast light downward; at first, some sections appeared darker, but adjusting the angle by a few degrees dramatically improved coverage. Remember, the goal is to evenly highlight your displays without drawing attention to the light source itself. Use built-in lighting channels to hide wiring and fixtures for a professional look.
Test and Fine-Tune Your Setup
Before finalizing, switch on your lighting at different times—daylight, evening, and night—to see how it interacts with your dishes and decorative pieces. I once installed it and left the kitchen for a walk, only to find the lights glaring directly into my eyes later, disrupting the ambiance. Adjust the dimmers and reposition the lights if necessary, ensuring the illumination enhances without overwhelming. Installing a dimming control can help you tailor the effect based on mood or occasion, turning your cabinets into a true showcase.
Maintain and Upgrade Over Time
Regularly check your lights for dust, flickering, or dimming. Upgrading to smarter LED systems allows remote control and scheduling, making your display more dynamic and energy-efficient. I added a voice-controlled dimmer last year, transforming my kitchen into an entertainment hub during dinner parties. Keep experimenting with different settings and fixtures to find what best elevates your kitchen’s aesthetic—remember, lighting is the magic that can make all other enhancements pop, from custom cabinets to innovative storage solutions.
Many homeowners believe that choosing high-end materials or trendy designs guarantees a successful kitchen remodel. However, a critical nuance often overlooked is the importance of integrated planning for storage and functionality. For example, selecting visually stunning cabinetry without considering access points or usage patterns can lead to frustration later. Contrary to popular belief, more cabinets don’t always mean better organization; poorly designed storage can create clutter instead of efficiency.
One common myth is that open shelving is inherently stylish and practical. While open shelves can showcase beautiful dishware, they also demand constant upkeep and can quickly look messy if not curated thoughtfully. Overlooking this can result in a space that feels cluttered rather than welcoming. Additionally, many assume that custom cabinets are only advantageous for large kitchens. In reality, they offer tailored solutions that optimize even compact spaces, turning tight spots into functional areas.
**Why are standard storage solutions often a mistake in high-end kitchens?**
Standard, off-the-shelf options frequently fail to meet the unique demands of modern kitchens, which require smart, flexible storage, and seamless integration with appliances. For instance, a study published in the Journal of Interior Design emphasizes that custom storage enhances accessibility and maximizes space efficiency, which is crucial as kitchens become more high-tech and multi-functional. Jumping into a remodel without assessing your specific needs often results in wasted space and missed opportunities. It’s better to collaborate with experienced designers who understand the hidden potential of your layout.
Another overlooked aspect is the quality of materials used for cabinetry and storage solutions. Many underestimate how moisture, heat, and wear impact long-term durability. Choosing plywood over particle board can prevent costly replacements down the line. For example, high-moisture environments demand materials that resist warping and delamination. This detail may seem minor but can extend the lifespan of your investment significantly.
Don’t forget that lighting plays a crucial role in showcasing your built-ins. Proper illumination makes storage areas functional and aesthetically pleasing, yet many homeowners neglect this step. Integrated lighting solutions such as LED strips inside cabinets can dramatically elevate your space’s ambiance and usability. For insights on how to implement subtle yet effective lighting, check out this guide on cabinet lighting mistakes that diminish your kitchen’s charm.
In summary, the true challenge in kitchen remodels lies in meticulous planning and understanding the hidden nuances—like material selection, storage design, lighting, and space optimization—that often fly under the radar. Avoid the trap of superficial upgrades by focusing on these details, and your remodel will deliver lasting beauty and efficiency.
Have you ever fallen into this trap? Let me know in the comments, and share your experiences or questions about your own remodeling journey.
Keep Your Investment Seamless with Proper Maintenance
Once your kitchen remodel is complete, maintaining the quality and functionality of your customized features is essential. I personally rely on a set of specialized tools and software to keep my cabinets, built-ins, and storage solutions in optimal condition over time.
First, invest in a high-quality keyboard brush and compressed air canister. These are perfect for cleaning tight corners and delicate surfaces of custom cabinetry without risking damage. I use a blast of compressed air to remove dust from hinges and crevices, which prevents buildup that can warp or jam moving parts.
For ongoing inspection, a digital moisture meter is invaluable—especially in high-moisture zones like under sinks or near dishwashers. Checking moisture levels periodically helps catch early signs of warping or delamination, particularly in areas where particle board might be used for cabinets. This guide highlights why material choice impacts long-term durability.
Software Tools That Make Maintaining Your Kitchen Easier
Using design software like SketchUp allows me to visualize updates or repairs to my cabinetry. With it, I can simulate hinge adjustments or reconfigure storage compartments without physically dismantling anything. For managing schedules and reminders, I turn to project management apps like Trello or Notion, setting alerts for seasonal inspections or part replacements.
Predictions show that AI-driven maintenance reminders and smart home integrations will become standard in future kitchen upgrades. These systems could alert you remotely about humidity spikes, hinge lubrications, or even suggest when to replace light bulbs in built-in displays.
How do I maintain my storage solutions over time?
Regularly clean and inspect your storage areas, especially inside cabinets and drawers. Use a gentle microfiber cloth with a mild cleaner for wood or sealed surfaces, and avoid harsh chemicals that could degrade finishes. Periodic tightening of hardware and hinges prevents sagging or misalignment, which I do every six months. Additionally, consider applying a coat of furniture wax or mineral oil to wood surfaces once a year; it restores luster and provides a protective barrier against moisture and stains.
Implementing these maintenance routines helps ensure your investment lasts for decades, saving you from costly repairs or replacements down the line. For example, upgrading to smart LED lighting systems inside cabinets not only enhances aesthetics but also requires occasional software updates—another reason to keep your tools and systems current.
Ready to elevate your maintenance game? Try integrating a moisture meter and schedule regular inspections—small steps today lead to long-term results tomorrow. For more advanced strategies, check out how built-ins can be designed for ease of maintenance.
Lessons That Changed How I Approach Kitchen Transformations
One of the most valuable lessons I learned is that paying attention to the small details—like thoughtful lighting or choosing the right materials—can make an enormous difference in the final look and functionality. I once underestimated the power of integrated lighting in glass front cabinets, but once I started implementing custom LED solutions, the impact was astonishing. It’s these lightbulb moments that remind me how much hidden potential exists in even the simplest upgrades.
Another insight was that selecting materials isn’t just about aesthetics; durability and environmental factors matter. For example, I used to settle for particle board because it was cheaper, but I quickly realized that moisture-resistant plywood results in a kitchen that stands the test of time. The lesson? Invest in quality materials that match your climate and usage patterns—your future self will thank you.
Finally, I discovered that meticulous planning and strategic placement—whether for lighting, storage, or appliances—can eliminate frustrations down the line. A few extra minutes on the initial layout, considering how you move through your kitchen daily, saved me countless headaches later. It’s these comprehensive approaches that turn a standard remodel into a personal sanctuary.
Tools and Resources I Swear By
– Built-in solutions guide: This resource opened my eyes to seamless integration of storage and style, a must-read for anyone serious about custom cabinetry.
– Storage planning tools: I rely on these to plan efficient layouts that maximize every inch, ensuring no space goes to waste.
– Design inspiration: They keep me inspired and introduce innovative ideas I can adapt to my projects.
– Smart lighting techniques: Implementing these tips transformed my cabinetry from faded into fabulous, showing that lighting is truly the magic touch.
Your Next Step Toward a Better Kitchen
Remember, every successful kitchen remodel hinges on attention to detail, strategic planning, and a willingness to learn from experienced sources. Don’t be afraid to experiment with lighting, materials, or layout tweaks—these are the keys to creating a space that’s both beautiful and functional. Dive into the resources provided and start transforming your kitchen into a true reflection of your style and needs. It’s your turn—step up and make those dream upgrades a reality!