The Plywood Delamination Crisis: How to Spot Cheap Glue Before Your Kitchen Rots
It was a quiet Saturday morning when I opened my kitchen cabinet, and a sudden creak made my stomach drop. One of the shelves, wobbling just slightly, was a sign that something hadn’t been right from the start. Turns out, that was just the beginning. I soon discovered that using cheap glue in cabinetry isn’t just a cost-cutting move—it’s a ticking time bomb for your home. If you’ve ever felt the sting of a sagging shelf or the horror of a falling cabinet door, you’re not alone. These little signs are often the first clue that inferior materials have been used, and they can lead to costly repairs or replacements down the line.
Why the Quality of Glue Matters More Than You Think in Built-Ins
When building or remodeling a kitchen, everyone focuses on cabinets, countertops, and appliances. But what really holds everything together—sometimes literally—is the glue. I learned this the hard way early in my DIY journey. I once bought a set of “cheapest-in-the-market” cabinets, convinced I was saving a few bucks. The result? A year later, space between the shelves widened, and the entire structure started to feel unstable. That mistake taught me that not all glues are created equal, and cheap options just can’t handle the weight and humidity of a kitchen environment.
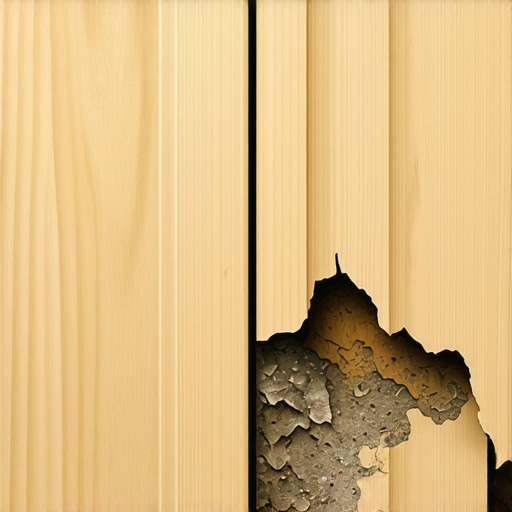
Research shows that high-quality adhesives in cabinetry can significantly extend the lifespan, especially in humid kitchens where cheap glues often fail prematurely. An article by the *Woodworking Network* emphasizes that subpar glues are notorious for breakdown under moisture exposure, leading to delamination—the very crisis I was unknowingly courting with my first DIY project.
If you’ve invested in custom cabinets or smart storage solutions, it’s crucial to understand what’s holding everything together. An inexpensive glue might seem like a bargain now, but the cost of replacing delaminated shelves or sagging cabinets will far outweigh the initial savings.
By paying close attention to the quality of adhesives used, you’re not just prolonging the life of your cabinetry—you’re preserving the integrity and safety of your entire kitchen.
Are you facing issues with sagging or unstable cabinets? Or maybe you’ve wondered how to tell if the materials used are worth your investment? Don’t worry—next, I’ll show you how to detect poor-quality glues and avoid costly mistakes. We’ll look into common signs of delamination and how to spot cheap ingredients before your beautiful kitchen turns into a rotting mess. Stay with me, because being able to identify these warning signs could save you hundreds, if not thousands, in repairs or replacements.
Choose the Right Adhesive for Your Project
Start by selecting a high-quality, moisture-resistant polyurethane or epoxy glue. While it might cost more upfront, this adhesive withstands humidity and weight better, preventing delamination. I once used a cheap PVA glue for a bathroom cabinet, and within a year, the entire shelf laminate peeled off. That was a costly lesson in investing in proper materials.
Prepare Your Surfaces Thoroughly
Ensure all surfaces are clean, dry, and free of dust or grease. Use a damp cloth to wipe down panels and allow them to dry completely. Skipping this step is like trying to stick two wet pieces of paper together—failure is nearly guaranteed.
Apply the Glue Correctly
Use a brush or roller to spread a uniform, thin layer of adhesive on one surface. For large panels, employ a notched trowel to distribute the glue evenly. In my first custom cabinet build, rushing this step led to uneven adhesion, causing doors to misalign later. Take your time here; the results will be more precise.
Clamp and Set Properly
Clamp pieces together firmly to ensure maximum contact. Use bar clamps or specialized face clamps, depending on the project size. For my living room built-ins, I used ratchet clamps to hold shelves tightly overnight. Proper clamping prevents gaps and ensures stronger joints, making your cabinetry more durable.
Allow Sufficient Curing Time
Check the glue manufacturer’s instructions, but generally, allow at least 24 hours for full cure before applying weight or stress. Rushing this step can compromise strength. I learned this during a DIY project when I moved shelves too early, causing them to sag.
Inspect and Reinforce When Necessary
After curing, inspect your joints for gaps or weak spots. Use wood filler on minor gaps and consider adding mechanical fasteners like nails or screws for added support in high-stress areas. This step ensures your built-ins last for years without sagging or failing.
Learn from a Hands-On Experience
During my last cabinet project, I unintentionally used too much glue, which oozed out and created a mess. I cleaned it up promptly with a damp cloth before it dried, preventing discoloration. Practical application cements your understanding, and every project teaches a vital lesson.
If you want your custom cabinetry or built-ins to stand the test of time, never skimp on the adhesive quality or surface preparation. For more innovative ideas on maximizing storage, check out this resource on maximizing space with smart solutions. Taking these steps ensures a professional finish that combines beauty and durability.
Many DIY enthusiasts and homeowners assume that selecting trendy finishes or premium hardware is the key to successful built-ins and storage solutions. However, the real challenge often lies in understanding the intricate details of construction techniques and material choices that influence longevity and functionality. For example, a common misconception is that all wood types perform equally in built-in applications. In reality, seasoned experts know that high humidity zones demand species like cedar or teak, while softwoods like pine may warp or swell over time. This nuance can make or break a project, yet it’s frequently overlooked in favor of aesthetic preferences.
Another often-missed point is the importance of proper framing and anchoring, especially when dealing with heavy cabinets or media centers. Many assume that mounting into drywall suffices, but even the most beautiful built-ins can become hazards if not anchored into studs or reinforced with specialized brackets. This oversight is a typical trap that leads to sagging or detachment over time, prompting expensive repairs. To avoid this, consult resources like expert advice on secure installation techniques.
What Advanced Homeowners Overlook About Ventilation and Material Compatibility?
Let’s dig into a subtler issue: the interplay between ventilation and material compatibility. Many assume that sealing built-in cabinets creates a perfect environment, but trapped moisture can accelerate warping, mold growth, or delamination—especially if ventilation isn’t properly planned. For instance, integrating passive vents or ensuring sufficient clearance from exterior walls can dramatically extend the lifespan of custom cabinetry. Experts like those at the craftsman community emphasize that neglecting these nuances is a common pitfall.
Furthermore, advanced users recognize that even small details, such as the type of screws used—fluted or coated for corrosion resistance—can influence durability, particularly in kitchens or bathrooms. This fine attention to detail distinguishes amateur projects from professional-grade results. Incorporating these insights can prevent issues like rust stains or joint failures years down the line.
By challenging the popular belief that just picking trendy looks guarantees success, seasoned builders focus on these overlooked nuances—material selection, anchoring methods, ventilation, and component compatibility—that directly impact performance and lifespan. If you’re contemplating a custom built-in, consider consulting comprehensive guides or professionals to catch these hidden traps early. Do you feel like you might have overlooked a subtle factor in your current or future project? Let me know in the comments, and let’s elevate your craftsmanship!Proper maintenance and the right tools are essential to keep your built-ins, storage solutions, and custom cabinets functioning flawlessly over time. I rely heavily on a few specialized tools that make the ongoing upkeep manageable and precise, ensuring your investment lasts for decades. One of my go-to items is a high-precision digital moisture meter. Humidity fluctuations can cause materials like plywood and certain finishes to warp or delaminate, especially in kitchens and bathrooms. Using a moisture meter regularly helps me catch potential issues early before they escalate, aligning with advice from woodworking expert Steve Krenz, who emphasizes moisture monitoring as a critical step in preserving cabinet integrity.
Another vital tool is a cordless detail sander equipped with fine-grit sandpaper. Over time, surfaces like door edges or trim may develop tiny nicks or scratches. I use the sander to smooth these out swiftly, maintaining a professional look without the hassle of manual sanding. It’s especially handy when refinishing or touch-up work, making small repairs less time-consuming.
A quality impact driver is indispensable for periodically tightening hardware, especially soft-close hinges and drawer slides. Regular check-ups ensure that hardware remains secure, preventing misalignment or malfunction. I prefer models with adjustable torque controls to avoid overtightening delicate components. This proactive approach extends their lifespan and maintains smooth operation.
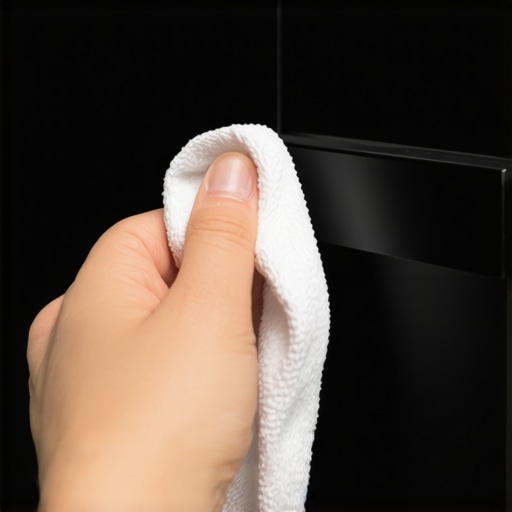
For long-term results, establishing a routine cleaning schedule is key. I recommend using a microfiber cloth combined with gentle, cabinet-specific cleaning solutions. Avoid harsh chemicals that could damage finishes, as detailed in professional cabinetry maintenance guides. Protecting your surfaces from scratches and stains helps keep your cabinets looking pristine.
Looking ahead, I predict that automation and smart maintenance tools will become more integrated into cabinet upkeep. Imagine sensors embedded in your cabinetry that alert you when moisture levels are high or hardware needs tightening, right through a smartphone app. This proactive approach could prevent costly repairs and extend your cabinets’ lifespan.
If you want to simplify ongoing maintenance, try incorporating periodic checks with a moisture meter and tightening hardware once a year. These small steps, combined with the right tools, will pay dividends in durability and aesthetics.
How do I maintain built-ins and custom cabinets over time? Regularly inspecting for moisture intrusion and hardware stability is my secret to longevity. For more detailed advice on preserving your cabinetry, visit our dedicated maintenance guide or contact us with your specific concerns.
What I Wish I Knew Before Starting My Built-In Journey
One of the biggest revelations was realizing that choosing high-quality adhesives and materials upfront can make or break the durability of my cabinets. I used to think that hardware and finishes mattered more, but now I understand that foundational decisions about glue and substrates set the stage for success or failure.
Another lesson was the importance of meticulous surface prep and proper clamping techniques. Skipping these steps led to misalignments and reduced the lifespan of my projects. Taking the time to learn these details early saved me from costly fixes later on.
Finally, I discovered that small upgrades—like integrating passive ventilation and using moisture-resistant materials—can significantly extend the life of built-ins, especially in humid environments. These insights transformed my approach from reactive repairs to proactive maintenance.
Curated Resources That Elevated My Craft
- Fine Woodworking Magazine: Offers in-depth guidance on adhesives and finishing techniques that have improved my project quality immeasurably.
- The Wood Whisperer YouTube Channel: Provides practical tutorials on woodworking tools, assembly, and troubleshooting that I trust for clear, actionable advice.
- Artisan Cabinetry Guides: Their detailed articles and tips help me understand nuanced material choices and installation methods, especially in challenging spaces.
- Professional Tool Brands: Investing in reliable tools like impact drivers and moisture meters has been worth every penny, ensuring precision and longevity in my work.
Your Turn to Elevate Built-In Projects
Remember, the most lasting and beautiful built-ins are crafted with attention to detail, quality materials, and a willingness to learn from every project. Embrace the process, invest in the right tools, and let each build be a step toward mastery. If you’re eager to discover more about creating storage solutions that truly transform your space, check out our innovative storage ideas or explore modern kitchen remodels with custom cabinetry. What’s the biggest lesson you’ve learned from your own built-in projects? Share below and let’s grow together!