How to Scribe a Built-In Bookshelf to a Crooked Stone Wall
I vividly recall spending hours building a custom bookshelf only to realize it didn’t sit flush against my uneven stone wall. That lightbulb moment hit hard—how could something as seemingly straightforward as scribing a bookshelf become such a daunting challenge? If you’ve ever faced the frustration of gaps, uneven lines, or the dreaded wobble after installation, you’re not alone. Overcoming these hurdles is possible, and today, I promise to guide you through the process of expertly scribing a built-in bookshelf to even the most crooked stone walls.
Why Precision Matters When Fitting Shelves to Uneven Walls
Living in an older home or a rustic cottage often means dealing with stone or brick walls that aren’t perfectly level or straight. While these aesthetic quirks add character, they can turn a simple bookshelf installation into a maddening puzzle. Skipping proper scribing can lead to gaps that not only look unprofessional but also compromise the stability of your shelves. That’s why paying attention to detail during this step is crucial—it ensures your built-ins are not only beautiful but also durable.
Is Scribing Worth the Extra Effort? Common Concerns Answered
I’ll admit, early in my DIY journey, I underestimated the importance of meticulous scribing. I thought a quick fill and paint could hide minor imperfections. The mistake? Those small gaps became noticeable over time, and it often felt like I was fighting an uphill battle to get everything perfect. Trust me, taking the time now to zero in on your wall’s irregularities saves headaches down the line. If you’re worried about the complexity, remember that with patience and the right tools, scribing can be straightforward. For more ideas on customizing your storage solutions, check out this article on [smart storage ideas to maximize kitchen space](https://artisancabinetworkz.com/smart-storage-ideas-to-maximize-your-kitchen-space-this-year).
Now, let’s explore how to approach scribing your built-in bookshelf to ensure a seamless fit, even against the most crooked of walls. Whether you’re revamping a single room or undertaking a full kitchen remodel, mastering this skill elevates your craftsmanship and results. Ready to get started? Let’s dive into the steps that will make your next project look professionally finished.
Prepare Your Tools and Workspace
Gather a flexible contour gauge, a sharp pencil, a saw, a level, and a drill. Clear the area around your wall to work comfortably. As I did during my last project, lay down a drop cloth to catch sawdust and keep your space tidy. Having all your tools ready ensures a smooth workflow and prevents interruptions that can lead to inaccuracies.
Measure and Mark the Starting Point
Decide where the shelf will sit—single or multiple units—and mark the top edge accurately with a level line. Use a tape measure to determine the height and width, then mark these dimensions on the wall. This initial guide acts as a foundation for your scribing, much like sketching a rough outline before detailed carving.
Use a Contour Gauge to Capture Wall Irregularities
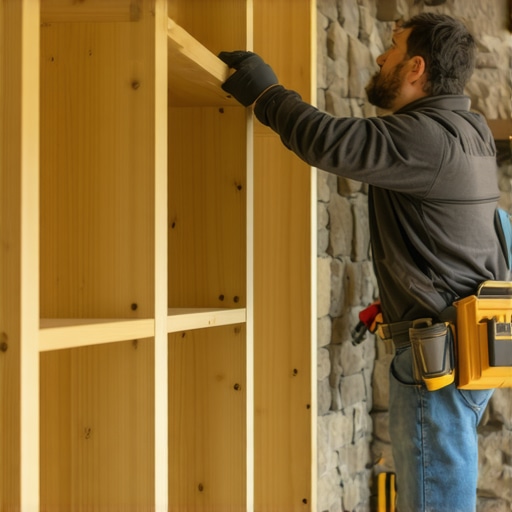
Press the flexible contour gauge firmly against the wall along the edge where the shelf meets. Carefully trace the ridges onto your template board or directly onto the shelf’s back. This step captures the exact shape of the uneven wall. I remember pinning the gauge temporarily, then transferring the profile onto a piece of scrap plywood—this gave me a precise template to cut against.
Refine Your Template for a Precise Fit
Transfer the traced profile onto your chosen shelf material with a pencil. Use a jigsaw or a fine-tooth saw to cut along this line, creating a custom-fitting edge. Test fit by pressing the cut shelf against the wall; it should sit snugly without gaps. Small adjustments can be made by sanding the edge or trimming the profile. This iterative process reminds me of tuning a musical instrument—small tweaks yield perfect harmony.
Attach and Finish the Shelf
Once satisfied with the fit, secure the shelf with appropriate fasteners. Use clamps if necessary to hold the shelf firmly against the wall during fastening. Finish with paint or stain to match your decor, and install any additional trims or edge banding for a polished look. Clear, precise scribing prevents gaps that can collect dust or weaken the structure. For additional ideas on enhancing your storage, visit built-ins that elevate your living room’s functionality. Achieving a seamless fit against an uneven wall might take patience, but mastering it transforms your project from amateurish to professional. Remember, verifying each step with a level ensures your shelves are not only beautifully fitted but also structurally sound, providing safety and stability for years to come.Many homeowners and DIY enthusiasts believe that choosing the most popular storage options or following trendy cabinet styles guarantees a successful remodel. However, in my experience, there’s a common misconception that more storage space or flashy designs automatically lead to functional and long-lasting solutions. The truth is, many get caught up in the aesthetics without considering the nuanced fundamentals that make storage truly effective. For instance, overly relying on standard-sized cabinets without accounting for specific room dimensions often results in wasted space and awkward access, despite the promise of maximized capacity.
Why do so many assume bigger is better when it comes to built-ins and cabinets?
This belief can be a trap. Larger cabinets or over-the-top storage units might look impressive but can complicate accessibility and clutter your space, defeating their purpose. Experts warn that such approaches often ignore practical considerations like user habits, ease of reach, and the kitchen’s workflow. Furthermore, misconceptions about material durability can lead homeowners to select cheaper options that warp or degrade faster, particularly in humid environments.
Another common mistake involves overlooking the importance of tailored solutions. For example, blindly installing pre-fabricated cabinetry without customizing for specific needs or room irregularities frequently results in gaps, uneven alignments, or compromised structural integrity. Custom solutions, like those detailed in the ultimate guide to custom cabinets, often provide a better long-term investment by addressing unique quirks and ensuring seamless integration.
Make sure you’re not falling into the trap of assuming that all storage fittings serve every space equally well; understanding advanced nuances can dramatically improve your remodel’s outcome. For example, integrating built-ins that consider your daily routines, such as pull-out spice racks or hidden charging stations, enhances both functionality and aesthetics, as discussed in these built-in hacks.
Are you considering customized options but worried about the complexity? Think again.
Modern solutions are more accessible than ever, especially with expert guidance and innovative designs tailored to your space. Avoid the common myth that standard solutions are sufficient; instead, plan with precision by evaluating how you actually use your storage. This attention to detail can prevent pitfalls like cluttered counters, difficult-to-reach shelves, or wasted space behind cabinetry. Remember, the goal isn’t just to fill your room with storage but to create a system that works flawlessly to support your lifestyle. Finally, keep in mind that there’s a fine line between high-quality craftsmanship and cheap shortcuts. Selecting material options carefully—such as opting for real wood over particleboard in high-humidity areas—can save you money and headaches in the long run. Don’t forget, effective storage solutions involve more than just maximizing volume; they require thoughtful customization, material consideration, and an understanding of practical use. Have you ever fallen into this trap? Let me know in the comments. For more insights on designing your ideal space, explore smart storage ideas or check out seamless built-in solutions for modern kitchens.Maintaining your custom storage solutions and built-ins requires more than just installation prowess; it hinges on the right tools and ongoing care. I personally rely on a few specialized equipment pieces to keep everything in top shape—these aren’t your average DIY tools. A high-quality orbital sander like the DEWALT Random Orbit Sander offers smooth finishing and helps prevent scratches and uneven surfaces. It’s essential for refining edges after cutting custom profiles, ensuring tight fits and professional-looking results. Additionally, I swear by a digital measuring tape such as the Bosch GLM 50 C. Its laser precision allows me to double-check dimensions periodically, catching shifts or settling that may occur over time, especially with heavy cabinets or shelves. For software, I recommend SketchUp for planning and visualizing future upgrades; its user-friendly interface makes it easy to experiment with scale changes or new storage ideas before committing physically. These tools help maintain accuracy and streamline adjustments, crucial when scaling or modifying existing built-ins.
How do I maintain my custom cabinets over time?
Regular inspections are key. Check hinges, sliders, and fasteners every six months. Tighten loose screws and lubricate moving parts with a silicone-based lubricant to keep drawers and doors operating smoothly. Clean surfaces gently with a damp cloth—harsh chemicals can damage finishes, especially on natural wood. If you notice any warping or adhesive failure, address it promptly to prevent further damage. Tracking these aspects consistently prolongs the lifespan of your investments and preserves the aesthetic appeal. As trends in storage evolve, integrating smart maintenance routines ensures your system adapts seamlessly, whether scaling up or refining existing arrangements. For instance, when expanding a kitchen remodel, I find that adding modular components using outlined methods makes future adjustments simple and cost-effective. Applied correctly, these practices greatly reduce the need for full replacements, saving you time and money in the long run. Remember, maintenance isn’t just about fixing issues; it’s about proactive care. Incorporate scheduled check-ins and use quality tools, and you’ll enjoy durable storage solutions that stand the test of time. Want to explore some innovative ways to keep your built-ins smart and efficient? Take a look at the latest ideas in maximizing space with innovative storage solutions. Ready to make your storage last? Try calibrating your laser measure to regularly verify wall and shelf dimensions—small investments of time now lead to big payoffs in durability and appearance.
Three Hard-Learned Truths About Fitting Built-Ins on Crooked Walls
One of the most profound lessons I’ve discovered is that meticulous measurement and patience trump rushed jobs every time. Skipping the fine details may seem tempting in the moment, but those gaps and misalignments often require costly fixes later. Additionally, embracing the irregularities of your walls—rather than fighting them—can transform a frustrating project into an opportunity for creative expression. Lastly, investing in the right tools, like a contour gauge and laser measure, dramatically elevates your craftsmanship and ensures your built-ins not only look polished but also stand the test of time.
My Go-To Resources for Storage Success
Over the years, I’ve come to rely on specific tools and guides that make custom cabinetry and built-in projects more manageable. For precise measurements, I trust the Bosch GLM 50 C laser measure—its accuracy saves me from costly errors. When designing and visualizing, SketchUp remains my favorite software to experiment with layouts and styles before physical work begins. For inspiration and advanced techniques, I highly recommend reading the ultimate guide to custom cabinets, which offers invaluable insights into achieving both beauty and function in your storage projects. Finally, staying updated with tips on maintenance, like using silicone lubricants on hinges, prolongs the life of your built-ins and keeps them looking sharp.
Your Turn to Elevate Your Space
Remember, crafting custom storage solutions that fit even the most crooked walls is an art that combines patience, precision, and a bit of creative flair. With the right knowledge and tools, you can turn a challenging space into a stunning, functional feature of your home. Don’t shy away from experimenting—every mistake is a step toward mastery. Are you ready to tackle your next built-in project with confidence? Share your thoughts or questions below, and let’s build a space you’ll love for years to come.
,