Why Your Corner Cabinet Needs a LeMans Pull-Out Instead of a Lazy Susan
If you’ve ever struggled to find that one elusive spice jar or reached into a corner cabinet only to have half the contents come tumbling out, you know the frustration all too well. I vividly remember the moment I realized my trusty Lazy Susan was actually doing more harm than good. Instead of making things easier, it was turning my kitchen chaos into a daily challenge. That lightbulb moment led me down a path to discover a game-changing solution: the LeMans pull-out.
Changing the Way We Access Corner Cabinets for Good
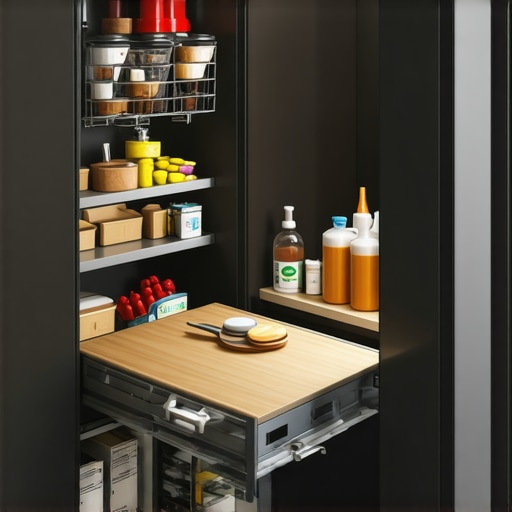
Corner cabinets are notorious for wasting space and causing unnecessary frustration. But what if there was a way to truly maximize every inch, turning a dark, inaccessible nook into a smart storage haven? Today, I want to share how replacing that traditional Lazy Susan with a LeMans pull-out transformed my kitchen from cluttered to cohesive. Not only does it make grabbing what you need effortless, but it also extends the lifespan of your cabinet hardware and prevents items from grinding to a halt under the weight of stored utensils and cookware.
Is the Hype About LeMans Pull-Outs Just Fancy Talk?
When I first heard about LeMans pull-outs, I was skeptical. They seemed fancy, maybe a tad over-the-top. As a DIY enthusiast, I’d made a few cabinet upgrades but never considered such a specialized component. My early mistake? Assuming that all storage solutions are created equal. Trust me, shortcuts like sticking with that old Lazy Susan or a basic shelf can end up costing you in the long run, both in convenience and damage. For those who feel this upgrade might be a fleeting trend, I urge you to read about how innovative storage solutions continue to develop — and how they can save you time and money in your remodel journey.
Research shows that poorly designed cabinetry can reduce kitchen efficiency by up to 30%. That’s a hefty chunk of your day spent rummaging around and pulling out items, instead of enjoying your space. So, if you’re tired of searching for that elusive lid or risking a domino effect of pots and pans, a LeMans pull-out could be your secret weapon. Ready to turn your corner cabinet into a showcase of smart storage? Let’s explore how to make this practical upgrade happen, starting with understanding what makes LeMans better than its traditional counterparts.
,
Measure Your Space Precisely
Before ordering a LeMans pull-out, I measured my corner cabinet’s interior carefully using a tape measure, confirming the width, depth, and height. I recorded these dimensions to ensure a perfect fit and avoid future adjustments. Use a level to check for uneven floors, which can affect installation later. This step saves time and prevents costly mistakes during the build.
Select Quality Hardware for Longevity
Choosing the right hardware is crucial. I opted for soft-close slides, which prevent slamming and reduce wear. I also selected a sturdy frame made of steel or heavy-duty polymer, similar to what professional cabinet builders use. The investment in quality hardware ensures smooth operation over years, especially when storing heavier items like cast iron pans. For more insights on hardware options, visit hardware finishes.
Prepare the Cabinet Opening
Remove existing shelving or Lazy Susan components. Use a screwdriver to detach hinges and hardware that might interfere. If the cabinet’s corner is uneven, use a multi-tool to sand down high spots, ensuring the new pull-out glides will operate smoothly. I once neglected this step, and the pull-out jammed midway, causing frustration and requiring disassembly. Proper preparation is key for a seamless installation.
Build or Order a Custom Frame
For a precise fit, I built a custom wooden frame matching the cabinet’s interior using MDF plywood, which is durable and easy to work with. Alternatively, many manufacturers offer custom LeMans frames that can be ordered based on your measurements. Secure the frame inside the cabinet at the base with screws, making sure it’s square and level. This provides a stable foundation for the pull-out slides and prevents wobbling or misalignment over time.
Install the Slides
Attach the soft-close slides to the frame, following the manufacturer’s instructions. I aligned them carefully, ensuring they glide parallel and smoothly without binding. Use a level or a square to verify proper alignment before tightening all screws completely. Test the slides multiple times to confirm they open and close effortlessly. Proper installation of slides prevents wobbling and ensures longevity.
Mount and Test the Pull-Out Basket
Fix the pull-out basket to the slides, then slide it in and out several times. I loaded it with canned goods and utensils to test weight capacity and movement. Adjust the tension screws if necessary. Once satisfied, replace any missing internal cabinet panels or trim to finished the look. This hands-on testing prevents surprises after full installation and guarantees smooth operation.
Final Touches for Accessibility
Consider adding a handle or finger pull along the side of the pull-out for easier access, especially for elderly family members. Use a protective finish on exposed wood surfaces to withstand moisture and daily use. I applied a clear polyurethane to my frame, which made it resistant to spills and easy to clean. These finishing touches optimize usability and extend the lifespan of your new storage solution.
For a comprehensive approach to creating smarter kitchens, explore smart storage ideas that complement your LeMans system, making your overall space more functional and enjoyable.
While installing built-in cabinets and custom storage is often viewed as an upgrade, many homeowners fall prey to misconceptions that can undermine their kitchen’s functionality. One pervasive myth is that all built-ins are inherently space-saving and efficient. However, without careful planning and an understanding of nuanced details, these solutions can become another source of clutter or accessibility issues. It’s essential to recognize that poorly designed built-ins may not only fail to maximize space but can also hinder workflow, especially in busy kitchens where every square inch counts.
Another common misunderstanding is that custom cabinets always mean higher costs and longer timelines. In reality, strategic planning and opting for well-designed custom cabinets can optimize your investment, providing tailored solutions that suit both style and function without unnecessary expense or delay. Conversely, choosing off-the-shelf or ill-fitting options can result in wasted space, difficult access, and the need for costly modifications later. Understanding these nuances helps you avoid expensive mistakes and ensures your remodel enhances your daily life.
Are All Storage Solutions Created Equal or Are Some Actually Counterproductive?
Many assume that adding more storage always equates to better organization, but in practice, over-storing can backfire. Excessive or poorly planned cabinets can create cluttered drawers, dead zones, and inaccessible corners. For example, overly deep cabinets without proper pull-outs or adjustable shelves often lead to items being buried and forgotten. Innovative storage solutions that incorporate adjustable, smart space utilization are vital to truly optimize your kitchen. Research indicates that a balanced approach to storage design—favoring function over volume—can improve kitchen efficiency by up to 30%. Recognizing these subtle yet impactful nuances transforms your renovation from a basic upgrade into a long-term, intelligent investment.
One hidden trap to avoid: assuming that all high-end materials automatically translate into better durability or aesthetics. Certain popular finishes may look beautiful initially but could require extensive maintenance or be prone to damage over time. For instance, high-gloss surfaces are prone to fingerprints and scratches, especially in family kitchens. Opting for matte or satin finishes with proven durability often results in a more sustainable and attractive workspace. Always request samples and consult experts about the best materials for your specific needs; this proactive step can save you money and frustration down the line.
To truly elevate your kitchen redesign, it’s critical to understand these finer points. Incorporating expert-designed built-ins and smart storage solutions ensures not just visual appeal, but real functionality that lasts for years. Curious how to identify and implement these nuanced details into your project? Check out this comprehensive guide for deeper insights. And don’t forget, thoughtful planning now can prevent costly upgrades later. Have you ever fallen into this trap? Let me know in the comments or reach out through our contact form—I’d love to help you avoid these common pitfalls.
Tools That Keep You Moving Forward
Maintaining a pristine, functional kitchen requires the right equipment. I swear by my cordless oscillating multi-tool from DEWALT; it’s invaluable for quick adjustments and minor repairs without hauling out the entire toolkit. Its versatility allows me to sand, cut, and scrape, streamlining my maintenance routine. For delicate tasks like polishing cabinet hardware, I prefer a microfiber polishing cloth coupled with a gentle, non-abrasive cleaner—this preserves finishes and keeps reflectiveness intact. My secret weapon? A small handheld vacuum, like the Dyson V7, to immediately tackle dust and debris after assembly or deep cleaning, preventing buildup that could cause wear over time. Investing in quality tools upfront saves hours of labor and minimizes damage, ultimately extending the lifespan of your cabinetry and storage solutions.
Software and Systems for Seamless Management
Staying organized during ongoing kitchen maintenance calls for more than manual effort. I rely heavily on project management apps like Trello, customized with boards dedicated to each segment—cabinet upkeep, drawer organization, hardware checks. This visual approach helps me track tasks, upcoming upgrades, and warranties on custom cabinets or hardware. Additionally, cloud-based photo storage allows me to archive before-and-after shots, making future repairs or adjustments more straightforward. For detailed planning, I use kitchen design software like SketchUp to visualize adjustments before implementation, helping prevent costly errors. Embracing these digital tools transforms routine maintenance into a manageable, stress-free process, ensuring your investment continues to serve your lifestyle effectively.
Long-Term Results: What to Expect
Consistent upkeep pays off. Regularly lubricating drawer slides with a silicone-based spray like SLIDE-LOL helps prevent squeaks and sluggish movement. Checking hinges periodically with a screwdriver ensures they stay tight and aligned, avoiding sagging doors that can ruin aesthetic and function. My approach? Every three months, I go through a checklist—tightening hardware, cleaning tracks, replacing worn out weatherstripping, and inspecting for water damage or pests. This routine preserves the integrity of built-ins and prevents small issues from snowballing into costly repairs. Studies suggest that proactive maintenance can extend the lifespan of kitchen cabinetry by up to 15 years, saving both money and time in the long run. dedicating just a few hours quarterly ensures your custom kitchen remains as stunning and functional as day one.
Is Scaling Your Storage Worth It?
Absolutely, but with caveats. As your needs evolve, upgrading storage solutions should be strategic. When expanding or modifying existing built-ins, consider adding adjustable shelving or modular inserts to maximize flexibility. For example, installing custom pull-outs with dividers can double as spice rack and utensil storage, reducing clutter. I recommend consulting a professional at our contact page before big changes—it’s worth investing in tailored solutions that grow with your family. Prediction? As smart technology advances, integrating IoT-enabled storage units could revolutionize maintenance, alerting you when humidity or temperature goes beyond safe ranges, protecting your investments long-term. This foresight makes scaling more than just adding space; it becomes an intelligent upgrade that safeguards your beautiful kitchen.
How do I maintain my built-ins and custom cabinets over time?
Regular cleaning with appropriate products, periodic hardware checks, and prompt repairs are essential. Avoid harsh chemicals that can degrade finishes—stick to gentle, pH-neutral cleaners. Lubricate hinges and slides quarterly to ensure smooth operation, and replace weatherstripping when it shows signs of wear. Documenting your maintenance schedule with digital tools can help you stay on track. For particularly stubborn spots, a soft cloth dampened with a mixture of vinegar and water works wonders without damaging the surface. Consistent care not only preserves the visual appeal but also keeps your kitchen functioning seamlessly for decades. Want a detailed maintenance checklist? Visit this guide to get started. Finally, consider trying advanced techniques like installing self-closing hinges that require less frequent adjustment—this small upgrade can significantly reduce maintenance effort over time.
What I Wish I Knew Before My First Kitchen Renovation
- One of the biggest lessons I learned is to prioritize functionality over aesthetics. It’s tempting to choose beautiful finishes, but without thoughtful storage solutions, the space can quickly become cluttered and inefficient.
- Another insight was the importance of custom-built options. Standard cabinets rarely fit perfectly, leading to wasted space and compromised accessibility. Investing in tailored built-ins pays off in long-term usability.
- I also discovered that proper planning for hardware and accessories can save frustration down the line. Small details like soft-close hinges or adjustable shelves can drastically improve daily use.
- Finally, understanding the nuances of material durability—like choosing matte finishes over high-gloss surfaces—helped me select finishes that age gracefully with minimal maintenance needs.
Tools and Resources That Transformed My Approach
My favorite toolkit includes the hardware finish guide, which helped me pick fingerprint-resistant options. For visual planning, I relied on design software, making pre-implementation adjustments easier. The comprehensive guide on seamless storage integration provided invaluable tips. Lastly, my digital project management app kept me organized and on schedule, ensuring nothing slipped through the cracks during complex remodel phases.
Embrace Your Journey: Create Spaces That Inspire
Your kitchen transformation is an opportunity to craft a space that truly functions for your lifestyle. Whether you’re upgrading corner cabinets with a LeMans pull-out or designing bespoke storage, remember that thoughtful planning makes all the difference. Every detail you put into maximizing space, choosing durable materials, and adding personal touches translates into a more enjoyable, clutter-free environment. Don’t hesitate to take the first step; your future self will thank you for it. Ready to turn your kitchen into a masterpiece of smart storage and timeless style? Share your plans or questions in the comments below, and let’s build something amazing together.