Why Your Kitchen Sink Needs a Tilted Front Drawer for Sponges
I used to dread opening my kitchen drawer. Every time, I’d be greeted by a soggy sponge, a scattered mess of soap, and the nagging feeling that I was doing something wrong. One day, amidst the chaos, I had a lightbulb moment—what if my sponge drawer wasn’t just a simple storage spot but designed specifically to handle the mess?
Transforming Kitchen Clutter: The Power of a Tilted Front Drawer
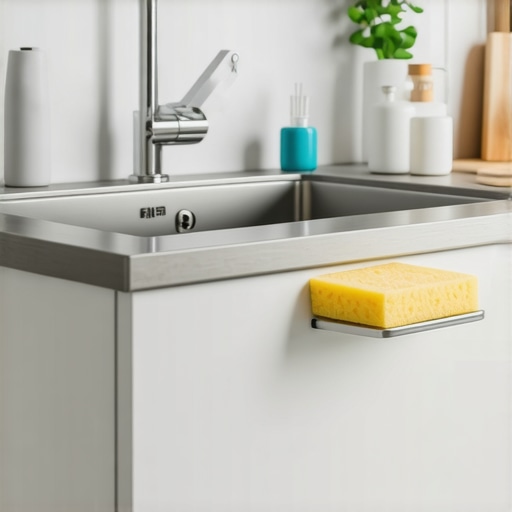
This realization led me down a rabbit hole of kitchen upgrades, where I discovered that a simple tweak—like a tilted front drawer for sponges—can make a world of difference. It’s not just about keeping things tidy; it’s about making daily life easier and more hygienic. Imagine reaching for a sponge and finding it dry, accessible, and in a dedicated space that prevents water and soap from spilling everywhere.
Is Your Kitchen Storage Actually Working for You?
Before I implemented this change, I made a common mistake: I thought standard drawers were enough. Turns out, a flat-bottomed sponge drawer often causes water to pool and mildew to develop. Incorporating a tilt ensures proper drainage, preserving your sponges and reducing mold—something that’s backed by sanitation experts who emphasize the importance of dry, well-ventilated storage for cleaning tools (expert tips for selecting smart storage). Trust me, a small adjustment here prevents bigger problems later.
Now, I’ll show you how this simple tweak can revolutionize your kitchen space, reduce clutter, and keep everything hygienic without breaking the bank. Ready to say goodbye to soggy sponges and messy drawers? Let’s dive into why this matters and how you can easily incorporate it into your remodel plans.
Select the Right Materials for Custom Cabinets
Start by choosing durable, moisture-resistant materials like birch plywood, which resists warping and provides longevity for your kitchen cabinetry (see why birch plywood beats particle board). I once ordered a custom cabinet made with poor-quality MDF, and within a year, it showed signs of sagging. Opting for quality plywood saved me from costly replacements.
Design for Accessibility and Efficiency
Plan your cabinet layout to prioritize daily essentials. For example, install shallow drawers for spices and deeper ones for baking sheets. Use modern custom cabinets that incorporate these features, maximizing every inch. I measured my appliances beforehand, ensuring the drawers would fit perfectly, leading to smoother workflow.
Incorporate Clever Storage Hacks
Use vertical dividers in deep drawers to organize lids and pans, preventing clutter. Leaning items at a slight angle improves visibility and access. I added a magnetic strip inside a cabinet door for knives, freeing up counter space and keeping items within reach (see how to hide chargers and keep counters clean).
Build in Drainage and Ventilation Spaces
For kitchen sponges or produce bins, include slight tilts and open slats to facilitate drainage and air circulation. During my remodel, I designed a dedicated sponge drawer with a 5-degree tilt, which prevented water pooling and mold growth. This small step made a noticeable difference in hygiene and longevity (explore built-ins ideal for kitchen hygiene).
Utilize Accessory and Hardware Solutions
Install soft-close hinges and smooth drawer guides to prevent jams and ensure quiet operation. Use adjustable shelves that can be moved to accommodate different item heights. I added a pull-out spice rack which increased storage capacity without sacrificing cabinet space. Hardware choices can dramatically impact usability, making daily tasks much easier (learn to fine-tune hinges for perfect alignment).
Plan for Future Flexibility
Design spaces that can evolve with your needs, such as modular drawer inserts or removable panels. During my own kitchen upgrade, I installed adjustable dividers and removable bins, allowing customization for special occasions or new gadgets. Planning for adaptability prevents the need for costly redesigns later (see versatile storage ideas for every space).
By systematically applying these steps, you can create a highly functional, hygienic, and organized kitchen that simplifies your daily routine and lasts for years. Each decision, from material selection to hardware installation, contributes to a seamless cooking environment tailored to your lifestyle.
,Many homeowners believe that opting for built-in cabinets and custom storage solutions automatically guarantees a flawless kitchen. However, beneath the surface, there are nuanced misconceptions that can lead to costly mistakes. Contrary to popular belief, not all built-ins are created equal—overlooking the finer details can turn a sleek design into a functional nightmare.
One common myth is that choosing high-end materials alone ensures longevity and practicality. While premium materials like birch plywood certainly resist warping, the real secret lies in understanding how these materials behave over time and under specific conditions. For instance, even the best plywood can fail if not properly sealed or ventilated. An oversight here can lead to premature warping or mold growth, especially in humid environments.
Advanced insight: Are hidden drainage and ventilation considerations often overlooked during the design phase?
Integrating smart drainage features, such as slight tilts and open slats—like I did in my sponge drawer—can significantly extend the lifespan of storage components. Experts emphasize that neglecting these nuances can cause water pooling, mildew, and deterioration, which aren’t immediately obvious during initial installation (see expert storage tips).
Another trap many fall into is underestimating the importance of hardware choice. Moving beyond aesthetics, choosing soft-close hinges, adjustable shelving, and sturdy drawer slides affects daily usability and long-term durability. For example, installing cheap hardware might save money upfront but can cause misalignment and jamming over time, which compromises the intended seamlessness of custom designs.
Furthermore, a subtle but critical mistake involves the planning phase of built-ins: overlooking future flexibility. Many designs lock homeowners into rigid layouts that become inconvenient with changing needs. Incorporating modular, adjustable components can prevent the need for complete remodels down the line, which is often a surprise for those who didn’t plan ahead (discover versatile options).
Lastly, don’t ignore the impact of improper material matching with hardware finishes and environmental factors. For example, high-gloss finishes paired with certain metals can cause fingerprint smudges or color fading, diminishing the sleek aesthetic over time. Being aware of these subtleties allows for a truly enduring beauty in your custom kitchen.
In summary, the key to truly effective built-ins and custom cabinets lies in attention to detail—considering drainage, hardware choices, future flexibility, and material compatibility. These nuances can transform your kitchen from a well-designed space into a genuinely functional and enduring environment. Have you ever fallen into this trap? Let me know in the comments! For more in-depth insights, explore our guide on transforming your kitchen with expert cabinet design.
Achieving a stunning, functional kitchen is just the beginning; maintaining it over time requires specific tools and proactive strategies. Personally, I swear by high-quality, precision tools that help me keep everything aligned, secure, and in pristine condition. For instance, my adjustable Allen wrenches and torque screwdrivers are indispensable for fine-tuning hardware after installation or during routine adjustments (see how to fine-tune hinges for perfect alignment). Using the right tools not only extends the lifespan of your custom cabinets but also ensures consistent performance and appearance as years go on.
Invest in Proven Maintenance Tools for Longevity
For ongoing care, I rely on a few key products. Microfiber cloths and gentle cleaning solutions help maintain surfaces without scratching or staining. A small, handheld semiconductor vacuum cleaner allows me to remove dust and debris from tight corners and mechanical components, preventing buildup that can cause hardware malfunction. Additionally, applying a silicone-based lubricant to hinges and drawer slides periodically keeps everything operating smoothly, reducing wear and tear (learn about maintaining hardware in humid environments).
What Tools Will Future-Proof Your Custom Kitchen
Looking ahead, I predict that smart monitoring systems will become a staple for long-term kitchen management. Devices that track humidity, temperature, and even hardware performance can alert homeowners to issues before they escalate. Trying out a smart sensor in your cabinetry to monitor for excess moisture—potentially leading to mold—can save you from costly repairs down the line. Integrating these technologies with your regular maintenance routine is a game-changer in preserving your investment (see how modern tools are shaping kitchen upgrades in 2025).
How do I maintain the craftsmanship of my custom storage solutions over time?
Regular inspections are vital. Check hinges, pulls, and seals at least twice a year. Tighten loose screws with quality screwdrivers designed for cabinetry, like the those I use personally, which have ergonomic handles and magnetic tips for precision (explore detailed cabinet care tips). It’s also worth scheduling professional check-ups every couple of years to evaluate structural integrity. Remember, even the best materials can degrade if ignored—preemptive maintenance saves money and keeps your kitchen looking flawless for decades.
Don’t overlook the importance of documenting your adjustments and upgrades, especially if you plan to scale or remodel later. Keeping a detailed log of hardware specifications, tool settings, and maintenance routines helps ensure consistency and simplifies future work. If you haven’t already, consider setting up a dedicated storage space for your tools—perhaps a custom drawer or a compact tool cabinet—designed to keep everything organized and within reach (maximize your storage potential).
Try implementing a monthly maintenance checklist using some of these specialized tools. Doing so will help your beautiful kitchen stay functional and elegant for years to come, ensuring that your investment continues to pay off long after the remodel is complete.
The Hard-Won Truth About Building Long-Lasting Storage
One lesson I wish I had embraced earlier is that the tiniest details—like the angle of drainage slats or the material’s humidity response—are what truly safeguard your kitchen investments. My early projects often overlooked ventilation, leading to avoidable mold and warping. The big takeaway: never underestimate the power of nuanced design choices, and always seek out expert insights on material behavior over time (learn from seasoned pros).
Tools and Resources That Turn Dreams Into Reality
Trust me, having the right toolkit transforms the daunting into the doable. My go-to resources include high-quality hinge adjusters, durable levelers, and a collection of woodworking guides that keep me aligned with current best practices (these guides are gold). Additionally, I rely on niche books on cabinetry craftsmanship and moisture management, which continually refine my approach to durable, elegant solutions.
Designing With Your Future Self in Mind
Reminding myself that kitchens evolve, I prioritize adaptability—implementing modular drawer inserts, removable panels, and flexible shelving. This foresight has saved me from costly redo projects, allowing my kitchen to grow seamlessly with my changing needs. For anyone starting out, I recommend exploring modular systems and adjustable hardware (these ideas are game-changers). Embrace flexibility now to enjoy stress-free upgrades later.
Creating a true masterpiece means paying attention to these less obvious yet crucial details. From ventilation and hardware choices to future-proofing your design, each element enhances durability and enjoyment. What subtle feature in your built-in design do you think could make the biggest difference? Share your thoughts below, and let’s learn from each other’s experiences!