Why Your Soft-Close Slides Are Failing and the Quick Cleaning Fix
I stood in my kitchen, clutching a warm mug of coffee, and watched in horror as my ‘silent’ silverware drawer bounced off the frame with a metallic clang. Only six months ago, I’d bragged to my brother about these custom cabinets and how they’d make our home feel like a high-end retreat. Now, they sounded like a high school locker room. It’s incredibly frustrating when you invest in built-ins that are supposed to elevate your life, only to have them fail because of a little kitchen dust. I used to think I had to replace the whole mechanism, but I’ve learned the hard way that a little maintenance goes a lot further than a credit card swipe. Today, we are going to get those drawers gliding like butter again.
Stop the Slam Without Buying New Hardware
We often assume that if the soft-close stops working, the internal hydraulic piston is shot. I certainly did. In my early days of obsessing over kitchen hardware, I actually threw away a perfectly good set of slides because I thought they were ‘blown.’ I replaced them with expensive new ones, only to have the same thing happen three months later. That was my big realization: it wasn’t the hardware failing; it was the environment. Modern storage solutions are precision-engineered, which means they have very little tolerance for the flour, pet hair, and general grit that lives in a busy kitchen. According to the Kitchen Cabinet Manufacturers Association (KCMA), most ‘mechanical’ failures in residential cabinetry are actually caused by debris interfering with moving parts rather than actual structural breakage. I’m going to show you how to revive that silence in about five minutes flat.
Is your hardware actually broken or just dirty?
I know what you’re thinking: ‘Surely a bit of dust can’t stop a steel slide.’ But it absolutely does. The reason your slow close drawers still slam is usually that the catch mechanism is gummed up, preventing the piston from engaging properly. Have you noticed your drawers getting ‘sticky’ or requiring a bit more force to pull open lately? If so, you’re likely dealing with a cleaning issue rather than a hardware failure. Before you go searching for a screwdriver, look for the ‘gunk’ factor. Have you ever tried to lubricate your slides with a standard spray oil only to find they got worse a week later? I made that mistake early on, and it turned my drawer tracks into a magnet for every crumb in the house. Let’s talk about the right way to clear the path for a silent close.
The Five-Minute Restoration for Your Drawer Slides
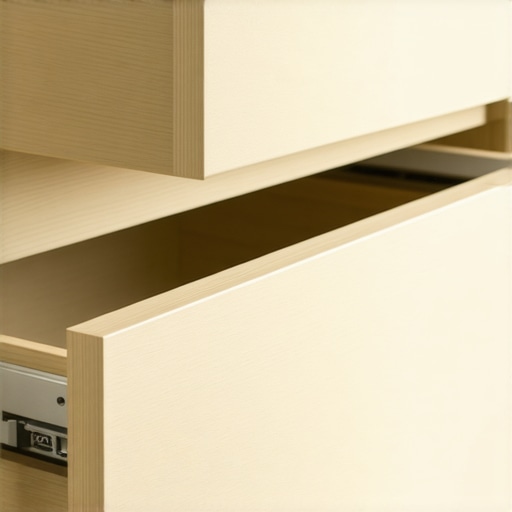
To start, you need to pull the drawer completely out of the cabinet. This isn’t just about visibility; it’s about physics. Most modern slides have a release lever underneath that allows the drawer box to pop right off. Once it’s out, you can finally see the mechanical highway that your drawer travels on every day. Think of your drawer slides like a high-speed train track: even a tiny pebble on the rail can cause a jarring stop. This is where most people go wrong—they see a little resistance and immediately reach for a screwdriver when they should be reaching for a vacuum. Working with expert tips on selecting storage solutions for a perfect kitchen upgrade has taught me that the best hardware is only as good as its cleanliness.
Clear the Debris Before You Touch a Tool
I once spent an entire Saturday morning convinced that our main cutlery drawer had a ‘blown’ piston. I’d been doing some heavy baking the night before, and a fine mist of flour had settled into the tracks. Instead of cleaning it, I just kept forcing it shut, which packed that flour into a hard, crusty wedge. By the time I took the drawer out, the mechanism was completely jammed. I used a stiff-bristled toothbrush and a canister vacuum to suck out every speck of grit. It’s amazing how a few crumbs can act like a brake pad on a precision instrument.
Why You Should Ditch the Greasy Lubricants
After you’ve vacuumed, you might be tempted to spray some WD-40 or heavy grease on the tracks. Don’t do it. I made this mistake early on in my DIY journey, and within a week, the grease had turned into a thick, grey paste that attracted every bit of dog hair and dust in the house. If you must lubricate, use a dry silicone spray or a PTFE-based lubricant. These provide a slick surface without the ‘tackiness’ that invites gunk to move back in. Keeping things clean is the foundation of the 3-step fix for drawer slides that wont stay closed. While you have the drawer out, it’s also a great time to evaluate your internal organization; sometimes a heavy, shifting load is the real culprit, which is why many homeowners now use 7 drawer dividers that finally tame your junk drawer to keep the weight balanced.
The Invisible Reset Trick for Stubborn Catch Mechanisms
The real magic often happens when you manually reset the trigger. On the back of your drawer slides, there is usually a small plastic ‘catch’ or ‘dog’ that engages with the soft-close piston. If you’ve ever pulled a drawer open too fast or if it got jammed, this catch might have tripped into the ‘closed’ position while the drawer was still open. When you try to close it, the drawer just hits a wall and slams. Use your finger or a small flathead screwdriver to pull that plastic catch forward until it ‘clicks’ into the ready position. This simple reset fixes about 80% of slamming issues instantly.
Align the Track to Save the Piston
If the drawer is still slamming or catching, check the mounting screws. If a screw has backed out even a millimeter, it can snag the rolling carriage. Over time, these screws can loosen and enlarge the hole they sit in. If you find a screw that just spins and won’t tighten, you’ll need to know how to repair a stripped screw hole in a cabinet door or frame using the toothpick-and-glue method. Ensuring the track is perfectly level and tight against the cabinet wall ensures the piston can engage at the correct angle, preventing the jarring metallic clang that started this whole process.Moving past the surface-level grime, there is a deeper level of cabinet maintenance that most homeowners—and even some general contractors—get completely wrong. We’ve been conditioned to believe that ‘solid wood’ is the ultimate sign of quality in any custom cabinets as a game changer in your kitchen remodel journey. But here is the contrarian truth that high-end cabinet makers often whisper: solid wood can actually be your worst enemy in a kitchen environment. I’ve seen expensive kitchens look like a funhouse mirror after one humid summer because the owner insisted on solid wood panels rather than high-quality plywood or MDF cores. Wood is a hygroscopic material, meaning it’s a living, breathing entity that reacts to every pot of boiling pasta. When you realize why solid wood doors warp and how to prevent it, you start to see the value in engineered materials that stay flat when the weather turns.
Solid Wood Isn’t Always the Gold Standard
Most people assume that if they pay for luxury, they are getting a material that never moves. In reality, the more ‘natural’ the wood, the more it moves. This is where the ‘oops’ factor usually kicks in for DIYers and inexperienced renovators. The biggest trap is the butcher block countertop. I cannot tell you how many times I have been called to fix a split countertop because someone committed the butcher block mistake by bolting it directly to the cabinet frames. According to the USDA Forest Products Laboratory, wood can expand and contract significantly across its grain with just a 5% change in relative humidity. If you pin that wood down with standard wood screws, the internal tension has nowhere to go but out—resulting in a loud ‘crack’ in the middle of the night that sounds like a gunshot.
How do you handle seasonal expansion without ruining your alignment?
If you have chosen a high-end look, you are likely dealing with the inset cabinet gap, which requires precision alignment. When the seasons shift from a humid summer to a dry, heated winter, those gaps will change. A sophisticated reader knows that you don’t fix this by moving the cabinet; you fix it at the hinge. This is the main reason why European hinges are the only way to get a zero-gap look. They offer three-way adjustability that allows you to compensate for the house settling or the wood breathing without ever taking a drill to your beautiful frames. If your doors are suddenly hitting each other in the middle, it’s not a hardware failure—it’s just the wood doing what nature intended. Mastering these innovative storage solutions for modern kitchen remodels means learning to work with the material, not against it. Have you ever fallen into this trap where your ‘quality’ wood ended up causing more headaches than the cheap stuff? Let me know in the comments.
Maintaining your investment isn’t about deep cleaning once a year; it’s about having the right kit stashed in your utility drawer. I keep a #2 Pozi-drive screwdriver specifically for hinge adjustments because standard Phillips heads will eventually strip the soft metal of high-end hardware. If you’ve ever wondered how to adjust European hinges when your doors are crooked, you know that a quarter-turn makes all the difference. For the tracks, I swear by a dry PTFE spray. Unlike traditional grease, it doesn’t attract pet hair or flour. I’ve seen 20-year-old innovative storage solutions for modern kitchen remodels that still operate perfectly simply because the owner spent sixty seconds vacuuming the rails twice a year. It’s the difference between a kitchen that ages gracefully and one that starts rattling by year three.
The Maintenance Kit You Actually Need
Beyond the screwdriver, you need a high-quality digital level. Houses settle, and when they do, your built-ins that elevate your living rooms functionality might shift just enough to make a door rub. You don’t need a contractor for this. If you catch a rub early, you can adjust it out before it wears through the finish. I also recommend keeping a small container of matching wax fill sticks. Even the most careful chef will eventually drop a heavy pot. If you seal a chip immediately, you prevent moisture from getting into the substrate, which is the number one cause of long-term cabinet failure. According to Blum’s Technical Manual for Dynamic Load Capacities, most modern runners are tested for 100,000 open/close cycles, but those ratings assume the drawer stays aligned within a 1.5mm tolerance. Stray beyond that, and the hardware starts fighting itself.
How do I keep my storage solutions working like new for a decade?
The secret is flexibility. I always push for the built-in bookcase trick when designing any vertical storage. Using adjustable pins instead of fixed shelves is the only way your storage survives your next hobby or tech upgrade. If you lock yourself into fixed heights, you’ll find yourself frustrated in three years when the next ‘must-have’ kitchen appliance doesn’t fit. Long-term results also depend on weight distribution. Overloading a single drawer with cast iron is a recipe for a bent slide. This is why I suggest 7 drawer dividers that finally tame your junk drawer to distribute weight more evenly. By spreading the load, you protect the integrity of the dovetails and the glides simultaneously.
Predicting the High-Tech Future of Built-ins
Where is this all going? I predict we are moving toward ‘sensor-driven’ maintenance in the luxury space. In the next few years, high-end cabinet slides will likely incorporate haptic sensors that can ping your phone when they detect abnormal friction from dust or a lack of lubrication. We are already seeing touch-to-open technology become standard in custom cabinets as a game changer in your kitchen remodel journey, so the leap to self-diagnosing hardware isn’t far off. For now, the best tool you have is your ears. If a drawer makes a sound, don’t ignore it. Reset the trigger on your soft-close mechanism today and see if it doesn’t immediately restore that ‘expensive’ feel. Go ahead, try that manual reset trick right now—it’s the most satisfying five-minute fix you’ll ever do.
Lessons I Learned While Chasing the Perfect Zero-Gap Look
After years of installing high-end cabinetry, I’ve realized that the most expensive kitchen isn’t the one with the rarest wood—it’s the one that is maintained with the most care. One of my biggest lightbulb moments was realizing that you can’t fight Mother Nature. If you find your cabinet doors hit each other in the middle during a humid week, it’s not a defect; it’s a sign that your wood is healthy and reacting to the environment. The trick is knowing when to adjust the hinge and when to just wait for the dryer air of autumn to arrive. Another lesson? Don’t over-tighten everything. I used to crank down every screw until my knuckles turned white, only to find that I was stripping the very mechanisms meant to keep things aligned. Modern smart storage solutions for small kitchens rely on subtle tension, not brute force. Give your hardware room to breathe.
The Survival Kit for Every High-End Kitchen Owner
If you want to keep your kitchen feeling like a showroom, you need a specific set of tools tucked away in a utility drawer. First, get a dedicated Pozidriv screwdriver; using a standard Phillips on European hinges is a recipe for frustration and stripped heads. Second, I always recommend keeping a bottle of dry PTFE lubricant nearby—it’s the secret to keeping those slides gliding without turning them into a magnet for crumbs. For more guidance on setting up your space, I often point people toward expert tips on selecting storage solutions to ensure their hardware choices match their lifestyle. Finally, a simple handheld vacuum is your best friend for track maintenance. If you keep the grit out, the hardware will last a lifetime.
#IMAGE_PLACEHOLDER_E#
Why the Small Wins Make the Remodel Worth It
It’s easy to get overwhelmed by the scope of modern kitchen remodels featuring custom cabinets and built-ins, but the real joy comes from the tiny details. Fixing a single slamming drawer might seem small, but it’s the difference between a kitchen that feels ‘broken’ and one that feels like a sanctuary. You’ve invested the time and money into a beautiful space—don’t let a little dust rob you of that quiet luxury. Take five minutes this weekend to reset those triggers and vacuum those tracks. Your ears (and your sanity) will thank you. What’s the most annoying sound in your kitchen right now—is it a slamming drawer or a squeaky hinge? Let me know in the comments!