3 Ways to Hide a Microwave Without Creating a Fire Hazard
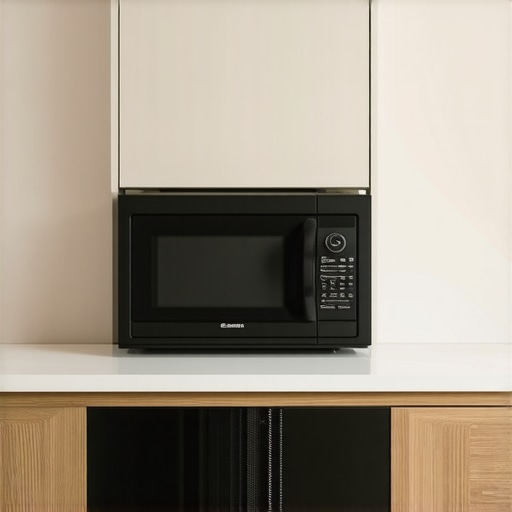
I’ll never forget the day I decided to remodel my kitchen. After tearing out the old cabinets and installing sleek new built-ins, I eagerly looked forward to a modern, clutter-free space. But there was one nagging issue—my microwave. Plopping it onto the counter felt out of place, and hiding it behind cabinet doors seemed like a quick fix. However, the next morning, I realized I’d made a rookie mistake: obstructing ventilation can be a serious fire hazard. This lightbulb moment prompted me to find safer, smarter ways to conceal appliances like the microwave while keeping my kitchen both stylish and functional.
Why Hiding Your Microwave Matters More Than Ever
In today’s kitchen designs, figure and function go hand in hand. No longer are appliances left sitting openly on countertops—it’s all about seamless integration. But years of experience have shown me that blindly hiding appliances without considering safety can backfire. The microwave, in particular, needs proper ventilation to prevent overheating and potential fires. According to the U.S. Fire Administration, kitchen appliances are among the leading causes of household fires, and one common mistake is blocking ventilation openings—something I learned the hard way early in my renovation journey.
If you’ve ever struggled with an awkwardly positioned microwave or hesitated to hide it for fear of fire hazards, you’re not alone. The good news is that with a bit of creativity and understanding of safe design principles, you can conceal your microwave stylishly without risking safety. Today, I’ll share three tried-and-true ways that I’ve personally used and refined, transforming my cluttered countertop into a sleek, safe, and functional area. For more ideas on integrating storage solutions seamlessly into your kitchen, check out these built-in storage tips.
Is My Microwave Safe Behind a Cabinet? The Truth About Ventilation
One mistake I made early on was assuming that any cabinet would do. Safety is paramount, especially with heat-generating appliances like microwaves. If you decide to hide yours, make sure it’s installed in a space that allows for adequate airflow. Failing to do so can lead to overheating and, worse, fires. Always consult your manufacturer’s guidelines and ensure there are ventilation slots or open spaces to let heat escape properly. This step is crucial—and I learned this lesson the hard way after experiencing a slight overheating that caused a day of panic and a few sleepless nights. For more insights on selecting storage solutions that work, visit expert tips on storage options.
Now, with safety in mind, let’s dive into some practical, stylish solutions that can keep your kitchen safe and looking great. Ready to banish the microwave clutter and make your kitchen more functional? Let’s explore the options that balance form and function perfectly.
Measure and Plan Before Jumping In
Start by assessing the space where the microwave will be hidden. Use a tape measure to determine the exact dimensions of your appliance, including width, height, and depth. Sketch a rough layout of your cabinet or built-in area, ensuring there’s enough clearance for proper ventilation. Think of it like laying out a blueprint for a custom wardrobe; precision here prevents headaches later. I once hurried through measurements for a built-in above my oven, only to realize the opening was slightly too narrow. It was a messy fix that took hours—learn from that mistake by double-checking all measurements before proceeding.
Design Ventilation Into Your Concealed Space
Ventilation is critical. Unlike a decorative box, a microwave generates heat that needs an escape route. Incorporate dedicated vents or open slats into your design—imagine it like the grille on a car that allows the engine to breathe. If you’re building a cabinet, consider installing vent panels or leaving gaps at the top and bottom. For existing cabinetry, small, discreet vent covers can do the trick. I once created a concealed microwave setup with a custom cabinet that included a 2-inch gap at the back and side panels with perforated metal—it kept the appliance cool and safe. Check these expert tips for more on integrating ventilation into storage.
Choose the Right Materials for Durability and Safety
Opt for heat-resistant materials like MDF with moisture barriers or veneered plywood. Avoid standard particleboard, which can swell or warp under heat and moisture. Think of it as choosing the right armor for your appliances. When I remodeled my kitchen, I used moisture-proof MDF for the cabinet surrounds—this prevented warping and ensured longevity. Also, incorporate a heat-resistant finish, such as high-quality paint or laminate, to maintain a sleek look that withstands daily use. For inspiration on durable cabinet ideas, see custom cabinet ideas.
Install the Microwave in a Secure, Level Position
Once the space and materials are ready, carefully install the microwave ensuring it’s level and firmly anchored if necessary. Use a spirit level to verify horizontal alignment; similar to setting a picture frame, perfect leveling prevents door misalignment and operational issues. When I installed my microwave in a built-in unit, I used adjustable mounting brackets to achieve a flawless level. This not only ensured safety but also improved the appliance’s lifespan and usability. Remember, a crooked microwave can cause uneven door seals and hinder heat circulation. Detailed guides like this shelving guide can assist with precise installation techniques.
Test the Setup Before Finalizing
Before closing up or sealing your cabinetry, run a test cycle on the microwave. Observe for signs of overheating, unusual noise, or airflow blockages. This step is akin to a test drive; it ensures everything functions smoothly. If you notice any issues, adjust vents or spacing as needed. In my own experience, a quick test run revealed that my vent cover was blocking airflow, prompting me to make a small adjustment. This proactive step saved me from future hazards and costly repairs down the line.
When it comes to kitchen remodeling, many homeowners fall prey to misconceptions that can cost time, money, and frustration. Everyone’s heard that installing built-ins saves space, but what isn’t often discussed is how critical proper planning and understanding your specific needs are to truly maximize efficiency. A common myth is that custom cabinets always cost more; in reality, they can be more cost-effective in the long run because of their durability and tailored fit, avoiding the need for frequent replacements. Additionally, many believe that any storage solution fits all kitchens, but mistaken assumptions about sizing and access can turn a sleek design into a functional nightmare. Advanced design isn’t just about aesthetics—it’s about expert implementation that considers your workflow and lifestyle. For instance, incorporating pull-out shelves or corner optimizers can transform awkward spaces into everyday conveniences. One mistake I observe frequently is the underestimation of ventilation needs when concealing appliances; neglecting this can lead to overheating and fire hazards. Always consult with experienced professionals, like those who specialize in seamless built-ins, to ensure safety and style go hand-in-hand. Curious about how to avoid these traps? Check out these innovative storage techniques for inspiration.
Why do some built-in designs hinder accessibility and functionality for advanced users?
Many homeowners overlook the importance of ergonomic placement and access when customizing their kitchens. For example, installing high cabinets without considering adjustable shelves or reach-in depths can make everyday tasks cumbersome. Experts emphasize the importance of planning for future needs, including gear for aging-in-place or accommodating changing family dynamics. Studies show that user-centered design significantly enhances satisfaction and reduces strain—so don’t just focus on looks. Want a smarter approach? Explore these expert tips to refine your storage solutions. Remember, treating your kitchen as a dynamic space rather than a static showpiece yields the best results. Have you ever fallen into this trap? Let me know in the comments.Maintaining a beautifully remodeled kitchen involves more than just initial setup; it requires consistent care and the right tools to ensure long-term functionality. I personally rely on high-quality, precision tools like a digital angle finder and a registry square to guarantee that cabinets and built-ins stay perfectly aligned over time. These tools help me achieve professional-level craftsmanship during installation and adjustments, preserving the sleek aesthetic of custom cabinetry. Additionally, a reliable cordless drill with a variety of driver bits speeds up routine tasks such as replacing hardware or tightening loose fittings, making upkeep less of a chore. When it comes to software, I use project management apps like Trello to track maintenance schedules, especially when overseeing complex installations or repairs that involve electrical or plumbing components. Keeping detailed records helps me anticipate when to replace worn seals or service ventilation systems before issues escalate. Prediction-wise, this trend toward integrated maintenance tools will likely grow, emphasizing smart home features that monitor appliance health and alert homeowners proactively. For instance, future kitchen remodels may include Wi-Fi-enabled appliances that send diagnostic reports directly to your smartphone, simplifying ongoing care. To extend the lifespan of your investments, regularly inspect ventilation pathways behind your cabinets and clean them with a soft brush; neglecting this can lead to overheating hazards, as highlighted in a comprehensive safety report from the U.S. Fire Administration. Curious about how to manage these maintenance tasks efficiently? Incorporate a dedicated maintenance toolkit with specialized screwdrivers, a microfiber cloth, and a flexible inspection mirror to make routine checks straightforward. Remember, a little preventative care now can save you from costly repairs later, so set monthly reminders to review your built-ins and ensure all hardware remains secure and appliances operate smoothly. For detailed strategies on selecting tools tailored for custom cabinetry upkeep, visit this helpful guide. Try dedicating time this weekend to clean and inspect your ventilation and hardware—your future self will thank you for the investment in your kitchen’s longevity.
Throughout my kitchen remodeling journey, I realized that the real magic lies in blending safety, functionality, and style seamlessly. One key lesson I learned is that concealment isn’t just about aesthetics; it requires a deep understanding of appliance safety and proper ventilation. Ignoring these details can turn a sleek design into a hazard, which is a mistake I urge you to avoid. By prioritizing ventilation and choosing the right materials, you ensure your kitchen remains a beautiful, safe haven.
Lessons That Changed My Approach to Kitchen Built-Ins
- Ventilation is Non-Negotiable: Concealed microwaves must have dedicated airflow paths. I once underestimated this and faced overheating issues—an experience that taught me to plan ventilation first.
- Measure Twice, Install Once: Precise measurements prevent costly mistakes. A miscalculation in cabinet dimensions can cause delays and frustration, so double-check before cutting or assembling.
- Materials Matter for Longevity: Investing in moisture-resistant, heat-proof materials protects your cabinetry from warping and damage over time, making your kitchen both beautiful and durable.
- Test Before Sealing: Always run appliance tests post-installation. This simple step can reveal airflow or operational issues early, saving you headaches later.
Tools and Resources That Transformed My Kitchen
- Creative storage guides: These inspired me to think beyond traditional layouts, maximizing space and accessibility.
- Expert advice on storage: Trusted tips helped me select options that combine safety, style, and practicality effortlessly.
- Seamless remolding techniques: These strategies improved my design flow, making concealed appliances look natural and integrated.
Your Next Move in Perfecting Your Kitchen Sanctuary
Your kitchen journey is uniquely yours, and every step taken with care pays off in safety and satisfaction. Embrace the nuances of concealed appliances, invest in the right materials, and plan meticulously—you’ll create a space that is not only stunning but also safe for years to come. Remember, the key is to blend craftsmanship with mindful design, turning your kitchen into a true haven of style and function.