Why Side-Mount Drawer Slides Fail and the Case for Undermounts
It was a frustrating morning in my workshop when a drawer I’d recently installed suddenly slid open on its own, spilling utensils and utensils everywhere. That lightbulb moment made me realize how fragile our built-in storage solutions can be, especially when relying on side-mount drawer slides. Over time, I’ve come to understand that these common hardware choices often fail just when you need them most, leaving homeowners and DIYers equally irritated.
The Hidden Flaws of Side-Mount Drawer Slides
For years, many have favored side-mount slides because they seem straightforward and cost-effective. But as my experience grew, I uncovered their Achilles’ heel: durability and support. Side-mount slides tend to wear out faster, especially in busy kitchens or drawers holding heavy items. This frequent malfunction results in annoying sticking, misalignment, or even total collapse. I recall replacing a set in my own kitchen after just a year—proof that not all hardware stands the test of time.
Moreover, the aesthetic compromise can’t be ignored. These slides often require side clearance, which can limit the design flexibility of your cabinets. That’s why I started exploring alternative options that combine support, longevity, and sleek aesthetics. This led me into the world of undermount slides—something I’ll delve into shortly.
Are Undermount Slides Really Worth the Hype?
Initially, I was skeptical about switching. Cost and installation complexity seemed like hurdles. But I made a mistake early on my renovation journey: choosing the cheapest side-mount hardware without considering long-term performance. I learned the hard way that the initial savings often mean more frequent repairs down the line. That’s when I discovered that undermount slides could offer a sustainable, smooth experience. Recent industry insights even show that undermount slides can hold up to 100% more weight than their side-mounted counterparts, ensuring your drawers stay aligned and functional longer (source: The Ultimate Guide to Custom Cabinets).
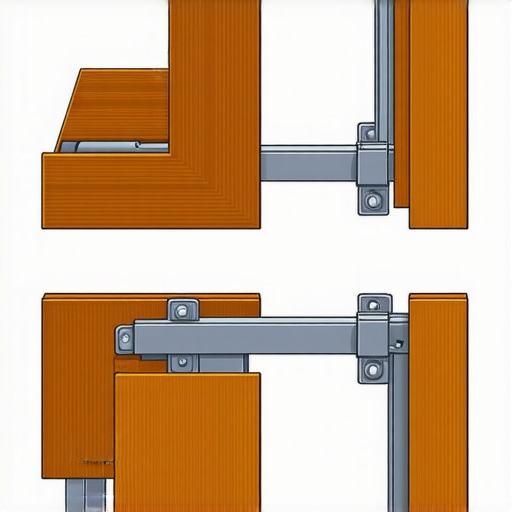
Why should you consider undermount slides? Well, they not only elevate your cabinet’s support system but also give a cleaner look since the hardware is hidden beneath the drawer. This is especially beneficial if you’re aiming for a sleek, modern kitchen remodel. Today, I’ll guide you through understanding why this change can be transformative and how to avoid the pitfalls that often plague DIY installations.
Choose the Right Materials and Tools for Installation
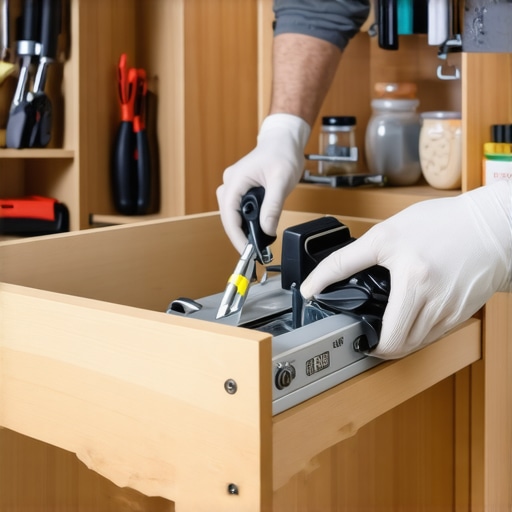
Begin by selecting high-quality undermount slides designed for your drawer weight and size. Gather tools such as a drill, screwdriver, measuring tape, level, and clamps. Think of this preparation as laying the foundation before building a sturdy house—precision here ensures long-term success. I once skipped this step, rushing into installation, which led to misaligned drawers and extra work. Learning from that, I always double-check my materials and tools before starting a project.
Accurately Measure and Mark Mounting Points
Use your measuring tape and a pencil to mark the exact areas on the cabinet and drawer sides where the slides will attach. This is similar to plotting a route on a map—small errors here can lead to big misalignments later. Carefully measure from the edges and ensure symmetry on both sides. I remember one time I misplaced a mark by a millimeter, causing the drawer to tilt slightly, which I fixed by redrilling the holes. Patience during this step saves time during assembly.
Separate and Attach Slides to Drawer and Cabinet
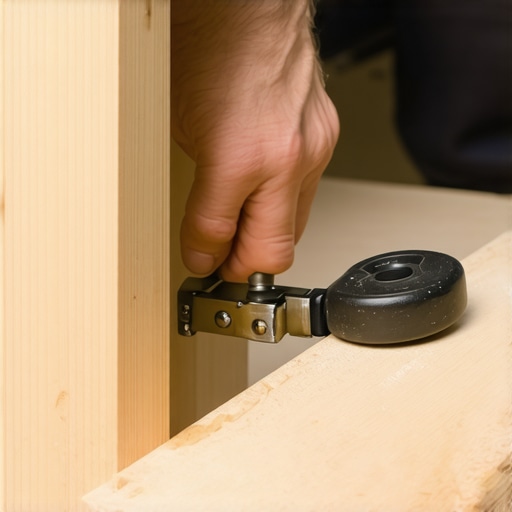
Follow the manufacturer’s instructions to attach the slides to the drawer and cabinet. Typically, this involves securing the slides with screws at pre-marked points. Lock the slides in the extended position, then align and screw them into the drawer sides first, then mount the cabinet brackets. Think of this like attaching a rail to a train—smooth operation depends on precise alignment. I once had an experience where improper screw placement caused the drawer to stick; paying close attention here makes all the difference.
Ensure Proper Alignment During Mounting
After attaching the slides, slide the drawer into the cabinet to test movement. Use a level to verify that the drawer sits perfectly horizontal, adjusting mounting screws if necessary. This step is akin to tuning a musical instrument—small tweaks yield harmonious operation. During my initial attempts, I overlooked this, resulting in uneven drawers that I had to re-adjust. Take your time to ensure smooth operation before proceeding.
Test and Fine-tune the Drawer Functionality
Once installed, open and close the drawer several times to check for smoothness and alignment. Apply adjustments to the slides if needed, tightening or loosening screws as required. Imagine this as fine-tuning a camera lens for clarity. I found that this step prevents future issues like sticking or sagging, prolonging the drawer’s lifespan. Regular testing during installation enhances the overall quality of your built-ins.
Incorporate Support and Aesthetic Considerations
Finally, review the drawer’s support capacity—undermount slides often support more weight, allowing for sturdier storage. Also, since the hardware is hidden, it creates a cleaner look, making your space feel more modern. This is comparable to hiding the wiring in a home theater system—functionality without sacrificing style. I once upgraded to undermount slides in my kitchen, and the transformation in both support and appearance was remarkable, inspiring me to rework other cabinets for consistency.
By following these concrete steps—careful measurement, precise mounting, thorough testing—you’ll create drawers that function smoothly and look seamless. It’s a meticulous process, but the results are well worth the effort, especially when your kitchen gains both support and style that last for years.
When it comes to designing built-in storage solutions or undertaking a kitchen remodel, many assume that sticking to popular trends and standard practices guarantees success. However, this complacency often causes overlooked pitfalls that can compromise functionality and aesthetics in unexpected ways. Let’s dig deeper into what most people get wrong about these projects and uncover nuances even seasoned professionals sometimes miss.
Myth: Bigger Is Always Better for Storage
A common misconception is that increasing cabinet size or adding more shelves automatically enhances storage capacity. But in reality, overstuffed cabinets hinder accessibility and can lead to uneven weight distribution, stressing the cabinetry and hardware. For example, ultra-deep drawers without proper support can sag over time. To optimize, focus on intelligent organization—like vertical dividers or smart hidden compartments—rather than merely enlarging storage spaces. For advanced planning, consider consulting expert insights on innovative storage options tailored for your space.
Common Trap: Ignoring the Nuance of Material Selection
Many underestimate how critical material choice is, often defaulting to standard plywood or MDF for ease and cost-saving. Yet, these materials may not withstand the demands of everyday use or moisture exposure, leading to warping, swelling, and eventual failure. High-quality materials like solid hardwood or moisture-resistant veneers offer longevity but are sometimes dismissed as too expensive or difficult to work with. The truth is, investing in superior materials pays off through durability and a premium look. A recent industry study emphasizes that thoughtful material selection can extend cabinet lifespan by up to 50% (see full guide).
Detail That Trips Up Even Experts: The Overlooked Importance of Precise Measurements
In my experience, the most subtle mistake is neglecting meticulous measurement, especially when customizing built-ins for awkward spaces or vintage homes with uneven floors. Small miscalculations in the placement of support brackets or finish heights can result in crooked cabinets or doors that don’t line up. Advanced installers often use laser levels or scribing techniques to ensure perfect fit—something DIYers might overlook. If you want to dodge costly adjustments later, learn the art of precise measurement and fitting from experienced craftspeople. For more tips on seamless installation, check out seamless built-in solutions.
Why Do Custom Cabinets Make a Difference?
Many believe off-the-shelf solutions are sufficient, but the difference lies in tailoring every detail to your space and lifestyle. Custom cabinets allow for smarter use of corners, varied heights for specific items, and integrated lighting or hidden compartments that reveal the true potential of your kitchen. Overlooking these nuances can lead to wasted space or inconvenient access. Real experts understand that an investment in custom cabinetry is an investment in long-term convenience and style, transforming your kitchen into a personalized haven. Learn more about the advantages at custom cabinets as a game changer.
To ensure your custom kitchen cabinets and built-in storage solutions remain functional and aesthetically pleasing for years to come, investing in the right tools and establishing a routine maintenance plan is crucial. I personally rely on a high-quality cordless drill, such as the Makita XFD10Z, which offers portability and sufficient torque for tasks like adjusting hinges or installing hardware. Pair it with a precision screwdriver set to tackle screw-tightening in tight spaces without damaging delicate finishes. Additionally, a digital level, like the Bosch CrossLine Green Beam, guarantees that your installations are perfectly aligned—an often overlooked detail that impacts long-term operation.
For software solutions, I suggest using a detailed project management app like Trello or Asana to track maintenance schedules, repair deadlines, and upcoming upgrades. These platforms help organize tasks methodically, ensuring nothing slips through the cracks, especially as your storage needs scale with your home. Regularly updating documentation of hardware specifications, material lõasts, and tools used can streamline future repairs or remodels.
In terms of methodology, always conduct visual inspections at least twice a year. Check for loose screws, hinge wear, or any signs of material degradation, particularly in moisture-prone areas such as under sinks or near dishwashers. Applying protective finishes or sealants—like Osmo Polyx-Oil for wooden surfaces—can significantly extend cabinet lifespan by preventing moisture and stain penetration. Implementing these simple but effective maintenance routines can save you considerable time and money.
Looking ahead, the trend in kitchen storage management is moving towards automation and smart sensors. Imagine automatic hinge adjustments that self-calibrate to keep drawers perfectly aligned with minimal effort, or moisture sensors that alert you before wood starts warping. Embracing these advancements could soon become standard practice, further simplifying maintenance.
How Do I Keep My Custom Cabinets in Top Shape Over Time?
The key lies in routine inspections paired with proactive repairs. For example, if you notice a hinge starting to squeak or a drawer not closing smoothly, addressing it immediately with a hinge adjustment or lubrication prevents further deterioration. Use a product like WD-40 Specialist Silicone Spray to lubricate hinges without attracting dust. Conduct thorough cleaning using a damp microfiber cloth and avoid harsh chemical cleaners that may damage finishes. Regularly replacing worn hardware keeps your cabinets functioning seamlessly and maintains their visual appeal.
In a future where built-ins and storage solutions are increasingly integrated with smart technology, staying equipped with versatile tools will be essential. Investing in adjustable wrenches, high-precision screwdrivers, and moisture meters will allow you to handle both routine maintenance and unexpected repairs confidently. Remember, the longevity of your investment depends on consistent upkeep—think of it as tending a garden where regular care yields the best results.
Start this season by scheduling a detailed inspection of your cabinetry hardware and sealing any gaps or cracks. Carry a basic toolkit—like a multi-bit screwdriver, a soft cloth, and some mineral oil—to perform quick fixes before issues escalate. This proactive approach ensures that your custom cabinets and built-in storage remain reliable and beautiful, effortlessly adapting to your evolving needs.
What I Wish I Learned Sooner About Built-Ins and Storage
- Embracing patience during installation saves endless frustration; rushing often leads to misaligned drawers or skewed cabinets that require rework. Trust me, taking a moment to double-check every measurement is always worth the effort.
- Investing in quality materials, even if they seem pricier upfront, pays dividends in durability and aesthetic appeal—cheaper isn’t always better when it comes to lasting beauty and function.
- Hidden hardware isn’t just about sleek looks; it significantly improves cabinet support, making your built-ins more resilient under everyday use. This nuance can transform your space’s longevity.
- Routine maintenance routines, like lubricating hinges and cleaning tracks, are your best allies for keeping custom storage solutions performing smoothly over the years without unexpected hiccups.
- Understanding the subtleties of precise measurement and level alignment can prevent costly corrections later, especially when fitting cabinetry into vintage or uneven spaces.
Tools and Resources That Changed My Approach
- Makita XFD10Z Cordless Drill – Reliable, portable, and powerful for countless installation tasks, avoiding delays caused by tool failure.
- Laser Level from Bosch – Ensures everything from cabinet heights to alignments is spot-on, reducing guesswork and rework.
- The Ultimate Guide to Custom Cabinets – This resource deepened my understanding of materials, hardware, and placement strategies, elevating my projects beyond basic DIY.
- Trello Project Management – Organizing tasks, measurements, and maintenance routines has kept my work systematic and less stressful, especially on larger remodels.
Your Next Move Begins Today
Embracing these insights can make your built-in and storage projects smoother and more rewarding. Remember, meticulous planning and regular upkeep are the secret ingredients to long-lasting beauty and functionality. Don’t wait for a future project—start applying these lessons now, and watch your space transform with confidence.
What’s the biggest challenge you’ve faced when installing or maintaining built-in storage? Share your experience below—I’d love to hear your story!