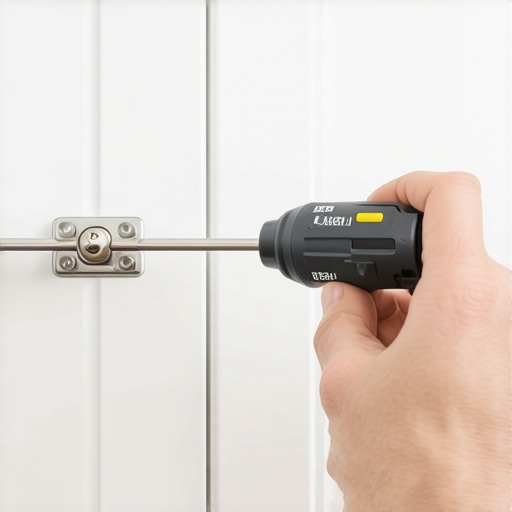
How to Adjust Concealed Hinges to Finally Level Your Uneven Cabinet Doors
Ever spent hours trying to align your kitchen cabinets only to end up frustrated and still dealing with uneven doors? I’ve been there. One weekend, after a DIY remodel, I thought I had everything perfect—until I noticed my cabinet doors looked like they were auditioning for a crooked line in a cartoon. That lightbulb moment hit hard: I was neglecting a small but crucial detail—the concealed hinges adjustment. From that point on, I realized countless homeowners face this same problem, often wasting time and money on solutions that don’t stick.
Why Your Kitchen Cabinets Keep Misaligning and How to Fix Them
When I first installed my cabinet doors, I underestimated how tiny adjustments could make a huge difference. When I finally figured out how to tweak those concealed hinges, everything changed. The doors aligned seamlessly, and my kitchen looked professionally finished. If you’ve ever felt like your cabinets are fighting against you—either sagging, uneven, or misaligned—trust me, you’re not alone. The good news? With a few simple adjustments, you can finally get those doors to sit perfectly—a total game-changer for your space and confidence.
Is Adjusting Concealed Hinges Really Worth the Effort?
Initially, I thought adjusting hinges was a complicated, painstaking process best left to the pros. Well, I made that mistake early on—thinking I needed special tools or skills I didn’t have. As it turns out, adjusting concealed hinges is surprisingly straightforward once you know what to look for. Plus, doing it yourself is incredibly satisfying—and saves a good chunk of money. If you’re skeptical, I get it. But once you see how simple it is, you’ll wonder why you didn’t fix those misaligned doors years ago. For tips on how to get started and avoid common pitfalls, check out this comprehensive guide on heavy-duty hinge fixes.
If you’ve faced the frustration of uneven cabinet doors, stay tuned. We’re about to dive into easy, step-by-step techniques to master hinge adjustments and finally achieve that perfect, level look. It’s easier than you think—and the transformation is worth every minute.
Start with the Right Tools and Setup
Before you begin tweaking your hinges, gather a Phillips screwdriver, a small level, and a flashlight. I once tried adjusting my cabinet doors in dim light, leading to missed screws and a longer process. Setting up a well-lit workspace with your tools within arm’s reach streamlines the adjustment process and helps you see every tiny detail clearly.
Identify the Specific Issue
Determine whether your cabinet doors are too high, low, or misaligned horizontally. I remember sitting in my kitchen, looking at a pair of crooked doors, and realizing I needed to adjust both the vertical and horizontal planes. Pinpointing the exact problem ensures you apply the correct adjustment, saving time and avoiding unnecessary twists.
Locate the Adjustment Screws
Most concealed hinges have three screws: one for vertical adjustment, one for horizontal, and one for depth. For example, when I worked on my upper cabinets, I found a small screw on the side of the hinge—turning it clockwise moved the door inward, while counter-clockwise moved it outward. Understanding which screw controls what is key to precise alignment. Check out this guide on heavy-duty hinge fixes for more details.
Make Small, Incremental Adjustments
Turn the adjustment screw in tiny increments—¼ turn at a time—and check the door alignment after each turn. I once over-adjusted and created a new imbalance, so I learned to make small adjustments and test frequently. This cautious approach prevents overcorrecting and ensures your doors sit perfectly flush. Using a level or a straight edge can help you verify the alignment visually.
Adjusting Vertical Alignment
To raise or lower a door, turn the screw designated for vertical adjustment. When I had a door that sagged slightly, I turned this screw clockwise to lift it, then checked the fit against neighboring doors. Repeating small turns until the door was perfectly level made a noticeable difference. Doing this ensures consistent gaps and a uniform appearance across your cabinetry.
Correct Horizontal Misalignments
For side-to-side adjustments, manipulate the screw that shifts the door horizontally. I remember fixing a cabinet where the door was slightly off-center; a few turns of this screw corrected the issue. Aligning doors horizontally creates a seamless look, much like the finish in professionally remodeled kitchens. To explore more advanced storage ideas, visit custom cabinets ideas.
Address Depth Issues
If a door sticks out or is recessed, adjust the screw controlling depth. I once struggled with a stubborn door that refused to close properly—adjusting the depth screw a quarter turn cured the problem. Proper depth adjustment ensures your doors close snugly without gaps or resistance.
Final Checks and Fine-Tuning
After each adjustment, close and open the door several times to assess the fit. Pay attention to gaps, clearances, and how smoothly the door swings. I recommend stepping back and visually inspecting the alignment from different angles—what looks good from above might differ from your waist level. Small tweaks can make all the difference, turning a crooked door into a model of perfection.
Maintenance and Preventing Future Misalignments
Over time, hinges can shift due to wood expansion or regular use. Regularly checking and re-adjusting ensures your cabinets stay aligned. Also, consider upgrading to heavier-duty hinges if your doors are consistently sagging, as discussed in heavy-duty hinge fixes.
When embarking on a kitchen remodel, many homeowners fall prey to oversimplified advice such as “more cabinets mean better storage,” but the reality is far more nuanced. Truly effective storage solutions require understanding the subtle interplay between design, functionality, and spatial dynamics. For example, a common misconception is that installing larger cabinets automatically solves clutter issues, yet without considering internal organization—like vertical dividers or specialized pull-outs—you may still face chaos. Experts like those at Artisan Cabinetry emphasize that customized shelving and built-ins are not just aesthetic luxuries but essential for maximizing efficiency; their recent study highlights that tailored solutions can improve space utilization by up to 30%.
Maintaining your custom kitchen cabinets and storage solutions over time can be a game-changer for longevity and functionality. One of my top recommendations is investing in a high-quality, magnetic screwdriver set. Unlike standard screwdrivers, magnetic tools allow for easier placement and retrieval of tiny adjustment screws, especially when working in tight spots or awkward angles. I personally use the Wiha Precision Screwdriver Set because its magnetic tips and ergonomic handle make detailed hinge adjustments and fine-tuning much smoother. Regular inspection and minor tweaks—at least twice a year—are vital to prevent misalignments caused by wood expansion or daily wear and tear. Overlooking routine maintenance could lead to sagging doors or uneven shelves, which are costly and time-consuming to fix later. As technology advances, I predict more homeowners will turn to smart tools that can digitally assist in calibration and alignment, streamlining upkeep even further. For now, though, mastering basic tools like a quality magnetic screwdriver and keeping a checklist for periodic checks can sustain your kitchen’s beauty and function.
How do I maintain my kitchen storage and cabinetry over the years?
One effective method is to use guided inspection routines and proper cleaning techniques tailored for your cabinet materials. For example, I recommend using a soft microfiber cloth and gentle cleaning solutions compatible with your cabinet finish—quartz, laminate, or wood—to prevent damage. Additionally, implementing adjustable storage accessories, such as those found in space-maximizing solutions, makes it easier to adapt your storage as needs evolve. Remember, scheduled maintenance not only preserves the appearance but also extends the lifespan of your investment. Looking ahead, integrating smart sensors that monitor cabinet humidity and hinge wear could become common in future remodels, providing early warnings before issues develop. Don’t forget—if you notice persistent misalignments or hardware fatigue, consulting professionals through experts in custom cabinetry ensures durable, long-term results. Try setting a bi-annual maintenance routine that includes checking hinges, drawer slides, and seals, and you’ll keep your kitchen functioning flawlessly for years to come.
The Surprising Lesson That Changed My Approach to Custom Cabinets
One of the most eye-opening lessons I learned was that perfecting cabinet alignment isn’t solely about tools—it’s about patience, attention to tiny details, and understanding your hinges. I realized that even a small misadjustment can throw off the entire look, and rushing through these adjustments only complicates things. Since adopting a meticulous, step-by-step approach, my cabinetry projects have looked remarkably professional, saving me time and frustration.
Tools That Make Adjustments Feel Like a Breeze
Investing in quality, magnetic screwdrivers and a reliable small level transformed my hinge tweaking process. These tools allow precise, effortless adjustments, especially in tight spots or awkward angles common in custom kitchens. Once you experience the ease they bring, you’ll wonder how you ever managed without them, and your cabinets will thank you with flawless alignment.
Holding onto Storage Success with Routine Checkups
I’ve found that periodic inspections—using simple routines like a quick hinge check every six months—keep my cabinets in top shape. Using gentle cleaning methods and adjusting hinges proactively prevents sagging and misalignment, ensuring lasting functionality. Now, you’ll want to integrate thoughtful maintenance into your renovation plan, possibly even exploring innovative solutions like smart hinges that monitor wear over time, as discussed in these advanced storage options.