Why Solid Wood Center Panels Warp in High-Humidity Zones
One summer afternoon, I opened my kitchen cabinet and was greeted not by the smooth finish I had carefully chosen, but by a warped, swollen panel staring back at me. It was like my cabinets had developed a mind of their own, twisting in ways I hadn’t anticipated. That lightbulb moment made me realize: I’d fallen into the trap of assuming ‘solid wood’ was always the foolproof choice, regardless of where I lived. If you’ve ever faced similar surprises—warped panels, swollen doors, or uneven surfaces—you know just how frustrating and costly these issues can be. But here’s the good news: understanding the root cause helps us make smarter choices and avoid these costly mishaps.
Moisture Woes: The Hidden Enemy of Solid Wood Panels
High-humidity environments are like a slow poison for solid wood center panels. Unlike engineered materials, solid wood is porous and expands with moisture. When humidity levels soar—think humid summers or consistently damp basements—these panels absorb water, causing them to swell and warp. Over time, this leads to distorted door fronts, uneven surfaces, and a cabinet that looks more like a roller coaster than a sleek piece of furniture. I learned this the hard way early in my remodeling journey, when a single season turned my perfect kitchen into a war zone of warped wood.
The key to avoiding this misfortune lies in choosing the right materials and construction methods. For high-humidity zones, options like moisture-resistant MDF or plywood with proper sealing are more stable choices. Also, proper ventilation and dehumidification can make a huge difference in maintaining consistent moisture levels. Want to explore more innovative storage solutions that stand the test of time? Check out this post on maximizing space.
Are Solid Wood Panels Really Worth the Hype?
I used to believe that all solid wood was inherently superior. Early in my project, I made the mistake of assuming that thicker panels meant better quality, ignoring the effects of humidity. That misconception nearly doubled my renovation costs and left me feeling pretty disillusioned. The truth is, solid wood’s beauty and durability depend greatly on where you live and how well it’s treated. If you’re in an area prone to high humidity, you might want to consider alternative materials or specific treatments to keep your cabinets looking pristine.
In the next sections, we’ll explore proven strategies to prevent warping, choose the best materials for your environment, and ensure your built-ins stay beautiful and functional for years to come. If you’ve faced this problem or want to avoid it, keep reading—you’re about to learn how to make smarter choices in your kitchen remodel.
,
Select the Right Materials to Prevent Warping
Start by assessing your environment. In humid areas, opt for moisture-resistant plywood or MDF, not traditional solid wood panels. I learned this firsthand when I chose oak for a damp basement kitchen, thinking its beauty would last. Within months, warping and swelling set in, and I had to redo the entire cabinet framework. To avoid this, specify moisture-resistant materials during your build, and ensure they’re sealed properly with high-quality finishes. For inspiration, explore modern custom kitchens that incorporate these resilient materials.
Plan Your Storage Strategically
Think of your kitchen like a well-organized toolbox. Each item needs a dedicated space for quick access. Use vertical pull-outs for baking sheets and cutting boards to save deep cabinet space. I personally added a vertical spice rack inside a narrow drawer—massively boosted my efficiency and cleared counter clutter. Implement clear labeling and partitioning to keep everything visible and reachable. Visit this guide on maximizing space to see how smart storage transforms a chaotic kitchen into a functional haven.
Choose Hardware That Supports Heavy Use
Heavy-duty hinges and slides are the backbone of durable cabinets. I replaced standard hinges with soft-close, heavy-duty versions after my early frustration with slamming doors. For thick stone countertops or heavy pantry doors, use heavy-duty slides like the ones discussed here. Install multiple support points to distribute weight evenly, preventing sagging over time. Remember, quality hardware reduces wear and tear, keeping your cabinets functioning smoothly for years.
Seal and Finish Properly to Combat Moisture
Apply a high-quality water-resistant sealant to all exposed surfaces of your cabinets, especially in humid environments. I ignored this step on a whim, and within a year, moisture caused paint to bubble and wood to swell. Now, I use marine-grade finish on all surface edges, creating a barrier against humidity. This simple step can double your cabinets’ lifespan and maintain their appearance. For detailed procedures, explore this resource.
Incorporate Built-In Features for Efficiency
Built-ins like pull-out trash bins, spice racks, or concealed appliance garages streamline kitchen workflow. I added a hidden coffee station with a retractable countertop that folds out when needed—saving space and reducing countertop chaos. To plan your own custom features, check this article on built-ins. Proper planning ensures each element adds convenience without cluttering the space.
Pay Attention to Wall and Floor Details
Uneven walls or floors require precise scribing and shimming. I once encountered a wall with a noticeable warp, causing a gap that looked sloppy. I used a scribing technique—recorded in this step-by-step guide—to achieve a seamless fit. Similarly, reinforcing the floor with adjustable shims under cabinets prevents future sagging and unevenness. These small adjustments create a high-end appearance and improve durability.
Optimize for Accessibility and Safety
Design your built-ins with user accessibility in mind. Use push-to-open latches for high cabinets to avoid strenuous reaching, especially for children or elderly family members. Install soft-close hinges to prevent slamming, which can cause damage and noise—see this fix guide. Keep frequently used items near the countertop level, freeing up higher shelves for seldom-used appliances. These steps ensure safety and practicality in daily use.
Test and Fine-Tune Your Installation
Once furniture is installed, test all moving parts—doors, drawers, and pull-outs—to catch misalignments early. I once installed a set of drawers and only realized they weren’t properly aligned after months of use. Using a Phillips-head screwdriver, I adjusted the hinges and slides to level everything, referencing this technique. Fine-tuning is crucial for a professional feel and longevity of your cabinetry.
Many homeowners and designers assume that opting for custom-built cabinets and innovative storage solutions automatically ensures a long-lasting, efficient space. However, a prevalent misconception is that once the design is executed perfectly—think seamless built-ins or sleek custom cabinetry—the project is foolproof. In reality, the devil lies in the details, and overlooking certain nuances can lead to costly regrets. For instance, the common belief that all hardware and materials age uniformly is false; many hardware options look sturdy but wear down quickly if they aren’t suited for your environment. Additionally, some assume that standard installation techniques are sufficient, but improper support or alignment can cause doors to sag or drawers to stick over time, especially in high-use areas.
Let’s challenge the myth that durability is solely about choosing ‘premium materials.’ In fact, even the finest woods or MDFs can falter if installation and finishing aren’t meticulously executed. For example, sealing and finishing are often underappreciated; inadequate sealing in humid environments can result in warped panels despite top-tier material choice. This is supported by research from the Wood Products Association, which emphasizes that proper finishing extends the lifespan of wood components significantly.
Moreover, many underestimate the importance of future-proofing. A common mistake is designing built-ins without considering access for maintenance or repairs. Silent flaws like hard-to-reach screws or unsupported overhangs often lead to frustration and expensive fixes later. For example, unsupported heavy countertops or overhanging shelves can sag, which not only diminishes aesthetic appeal but also compromises safety.
Another trap involves neglecting environmental factors during material selection. In high-humidity areas, using untreated solid wood or particleboard can cause swelling and warping, despite their initial appeal. Instead, materials like moisture-resistant plywood or HMR MDF should be prioritized, as they maintain stability—saving homeowners from the common ‘oops’ of warped doors and swollen panels.
So, how can you avoid these pitfalls? Focus on supporting every element with detailed planning—like reinforced framing, strategic hardware placement, and proper sealing techniques— ensuring your custom designs stand the test of time. If you’re interested in exploring advanced strategies, check out modern custom kitchens that incorporate these principles. Remember, a truly durable built-in looks fantastic today and performs reliably for decades.
Have you ever fallen into this trap? Let me know in the comments.
Keeping It Working: Smart Maintenance Strategies for Built-Ins
A well-designed kitchen or storage area isn’t just about aesthetics—its longevity depends heavily on proactive maintenance. Regularly inspecting hinges, slides, and finishes prevents minor issues from escalating into costly repairs. I personally schedule biannual checks, lubricating door hinges with silicone spray and tightening loose screws. This simple routine keeps everything functioning smoothly and preserves the craftsmanship of my custom cabinets.
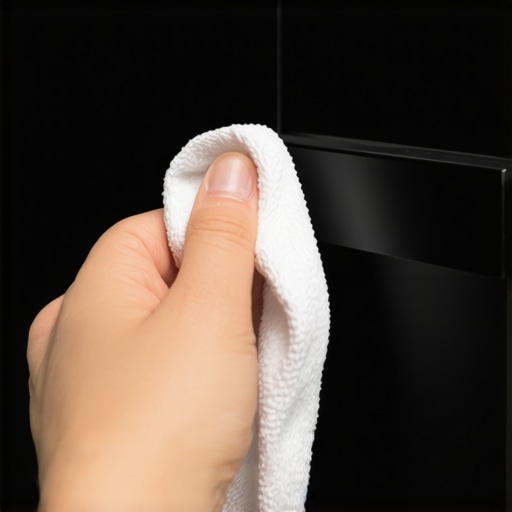
One of my go-to tools for maintenance is a high-quality cordless drill with a magnetic bit holder. It speeds up the process of adjusting hinges or installing new hardware. For delicate finishes, a microfiber cloth and gentle glass cleaner maintain a pristine look without streaks. Investing in these tools upfront saves time and ensures your built-ins remain beautiful and functional over the years.
Looking ahead, I predict that smart, sensor-based maintenance tools—such as hinge monitors that alert you to misalignments—will become more prevalent. These innovations will allow homeowners and professionals alike to address issues before they affect daily use, prolonging the life of custom cabinetry even further.
How do I maintain my built-ins over time?
Establish a routine inspection schedule, use the right lubricants for moving parts, and keep surfaces clean with gentle products. Additionally, applying a high-quality finish periodically will protect against humidity and wear. For more advanced tips on protecting your investment, visit this article on modern kitchen remodels.
Don’t forget to leverage specialized tools like a magnetic screwdriver set or a fine-tipped paintbrush for touch-ups. For example, I use a flexible pry tool to gently realign cabinet panels without damaging the finish, which is especially helpful after seasonal humidity changes. Mastering these maintenance techniques will ensure your built-ins continue to impress for decades.
For long-term durability, consider consulting with a professional on sealing techniques—such as using marine-grade sealants in humid environments. This extra step can significantly reduce warping and swelling, especially if your storage solutions incorporate customized cabinetry or built-ins. To explore advanced strategies, check this post on built-ins.
Remember, consistent upkeep not only preserves appearance but also prevents small problems from turning into expensive fixes. Use your toolkit wisely, schedule regular check-ins, and stay vigilant—your built-ins will reward your care with long-lasting performance and beauty.
Lessons That Changed How I Approach Built-Ins
One of the biggest surprises I encountered was realizing that high-end materials aren’t a guarantee against future issues. The luckiest move I made was understanding the importance of moisture control and proper sealing, which many overlook. I also learned that even simple tweaks—like reinforcing supports or choosing the right hardware—can extend the life of a custom project exponentially. My lightbulb moment was acknowledging that precision during installation and attention to environmental factors are crucial for long-term success.
Tools and Resources That Made the Difference
To ensure my built-ins stand the test of time, I rely on a curated toolkit—including quality hinge adjusters, moisture-resistant finishes, and laser leveling tools. I trust this resource on modern kitchen remodels for latest design ideas that blend durability with style. For materials, I prefer moisture-resistant plywood because it offers stability in humid environments. And when it comes to hardware, I swear by heavy-duty slides and hinges that support everyday use without squeaking or sagging.
Embrace Your Building Journey With Confidence
Constructing built-ins that endure isn’t just about fancy features; it’s a mindset. Your careful planning and proactive maintenance can turn what seems like a complicated task into a rewarding DIY adventure. Remember, every small adjustment—like sealing edges properly or reinforcing unsupported sections—is an investment in future comfort and style. Don’t be discouraged by setbacks; instead, see them as stepping stones to mastery. Your dream storage solution is within reach, and with the right knowledge, you’ll create a space that’s beautiful, functional, and resilient for years to come. Ready to elevate your custom cabinetry game? Share your plans below and let’s get started.