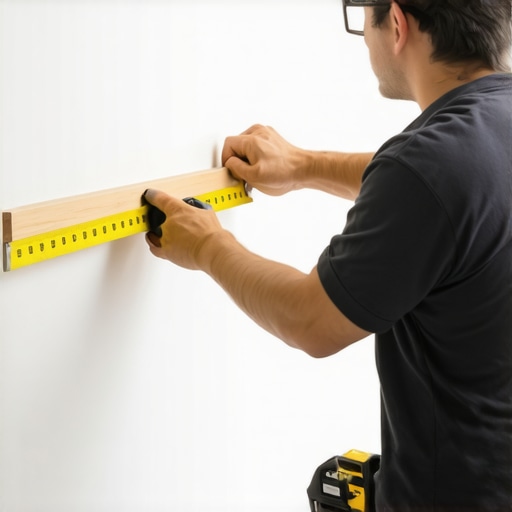
How to Scribe a Cabinet Filler Strip to an Uneven Wall
I remember the moment vividly—standing in my kitchen after a weekend renovation, frustrated because those pesky filler strips wouldn’t sit flush against my uneven wall. No matter how carefully I measured or cut, there was always a stubborn gap, making the whole project look amateurish. It was a lightbulb moment for me: if I wanted a seamless, professional finish, I needed to learn how to scribe those filler strips properly.
The Secret to a Perfect Fit: Scribing Filler Strips to Uneven Walls
Let’s face it, walls aren’t always perfectly flat. Whether it’s new drywall, old plaster, or settling foundation shifts, uneven surfaces pose a real challenge when installing cabinetry. Filler strips are essential for hiding gaps and achieving a clean look, but their effectiveness depends entirely on how well they fit the wall contours.
In this post, I’ll guide you through a straightforward, proven method to scribe your cabinet filler strips to match any uneven wall. No more guesswork, no more gaps—just a clean, flawless finish that makes your cabinets look like they came straight out of a magazine.
Is Scribing Really Worth the Effort?
You might be skeptical—”Is all this fuss about scribing really necessary?” Believe me, I thought the same at first. Early on, I made the mistake of simply trimming filler strips with a regular miter saw, expecting them to magically fit. Spoiler alert: they didn’t. The gaps were glaring, and I ended up having to redo the entire job.
What I didn’t realize back then is that taking the time to scribe accurately can save you frustration and ensure a professional look. Plus, it’s easier than you think! And if you’re concerned about whether this technique holds up in the real world, know that seasoned carpenters and cabinet makers swear by scribing for high-quality finishes (source: “Modern Kitchen Remodels,” Artisan Cabinetry).
Now that I’ve shared my own fail—and the valuable lesson it taught me—let’s dive into the tools and steps that will turn you into a scribing pro, making your filler strips sit perfectly against any wall surface.
Gather Your Tools for Precision
To start, assemble a sharp utility knife, a fine-tooth handsaw or trim saw, a pencil, a flexible contour gauge, and clamps if needed. I once tried to scribe without clamps, resulting in shaky cuts that made the filler look jagged. Clamping the filler to the wall ensures it stays stable during marking and cuts, leading to cleaner edges.
Match the Wall Profile
Press the flexible contour gauge firmly against the wall at the area where the filler will sit. Trace the contours onto the edge of the filler strip with a pencil. I remember spending extra time adjusting the gauge to capture every curve of my uneven drywall, which paid off with a perfect template for cutting.
Transfer the Profile to Your Filler Strip
Use the traced contour as a guide. Clamp the filler strip securely to a work surface, aligning the marked edge where you’ll make the cut. Drawing a line along the contour with a straightedge helps ensure accuracy. This step eliminates guesses and prevents mismatched gaps.
Cutting the Filler to Fit
Use a fine-tooth saw or utility knife to carefully cut along your drawn line. For more intricate curves, a sander or rasp can smooth the cut further. I once snipped too much off and had to glue a small piece back; this experience taught me to cut slightly oversize and sand to fit perfectly.
Test and Fine-Tune the Fit
Place the cut filler against the wall. It should sit snugly, following the wall’s contours without forcing. If there’s a gap, gently sand the high spots or trim a tiny sliver until it fits seamlessly. I once spent an entire afternoon refining a filler strip, but the resulting gapless finish was worth every minute.
Seal and Install
Apply a thin bead of caulk along the edges to fill any micro-gaps, then fasten the filler strip with nails or screws. Use shims if needed to ensure the filler sits flush. This method creates a seamless transition, almost like the filler was molded directly onto the wall.
Integrating these steps into your renovation routine elevates your craftsmanship. Remember, patience during scribing leads to professional results. If you want to explore more advanced cabinet techniques, check out https://artisancabinetworkz.com/custom-cabinets-ideas-that-transform-your-homes-style or https://artisancabinetworkz.com/modern-kitchen-remodels-featuring-custom-cabinets-and-built-ins for inspiration.Many DIY enthusiasts and even some professionals often cling to common myths about built-ins and kitchen remodels, believing that straightforward solutions are always sufficient. However, this oversimplification can lead to costly mistakes and design flaws. For instance, a widespread misconception is that standard-sized cabinets and storage solutions fit all spaces, but in reality, every room and wall contour has its unique nuances that demand custom tailoring. Ignoring these nuances can result in inefficient use of space or compromised aesthetics.
Why Do We Keep Falling for Oversimplified Tips?
One of the most persistent myths is that cheaper or off-the-shelf components will save money without sacrificing quality. In truth, this often leads to rework, which increases overall costs and delays project completion. Experts recommend investing in custom solutions that thoughtfully account for your specific space, usage, and aesthetic goals. According to a recent study by the National Kitchen & Bath Association, customized cabinetry and smart storage integrations significantly enhance long-term satisfaction and functionality, especially when tailored to the homeowner’s habits and spatial constraints. The trap many fall into is neglecting the importance of detailed planning and nuanced execution. For example, in tight corners or irregular wall surfaces, standard corner cabinets or plain filler panels can cause gaps or obstruction issues. Advanced techniques like incorporating blind corner pull-outs or angled filler strips can transform these problem areas into highly functional storage spaces. Failing to recognize these nuances means missing out on optimizing every inch of your kitchen.
How to Avoid the Most Common Pitfalls When Upgrading Your Kitchen
One nuanced mistake is overlooking the importance of precise measurements and wall irregularities before ordering or building custom cabinets. Many assume they can make adjustments during installation, but small errors in measurement can propagate into visual gaps and alignment issues, especially with high-end finishes or intricate moldings. Implementing tools like laser levels, contour gauges, and detailed site measurements can prevent these errors. It’s also crucial to keep communication open with your cabinetmaker or designer—sharing detailed wall irregularities or obstructions helps in planning for solutions like custom filler strips or modified hinges that accommodate your specific needs.
Another crucial point is understanding that functionality often hinges on the quality of hardware—like drawer slides, hinges, and pull-out mechanisms. Investing in heavy-duty hardware tailored to your storage demands can prevent sagging or jamming over time, an issue that many underestimate during initial planning. For deeper insight, you might explore expert recommendations for load-bearing hardware that supports your unique usage patterns, especially for heavy cookware or pantry items.
Likewise, integration of smart storage solutions isn’t just a trend; it’s about realizing the full potential of your space. Innovative pull-outs, hidden compartments, and multi-purpose modules can make a dramatic difference, but only if they are thoughtfully designed to match your lifestyle. This is the nuance many miss—an extra inch here or a well-placed corner pull-out can simplify daily routines significantly. Check out examples of modern kitchen remodels featuring custom cabinetry that maximizes space and usability, such as those offered by Artisan Cabinetry.
Remember, the key is in the details. Pay attention to the specific contours of your walls, invest in customized hardware, and plan your storage comprehensively. Doing so elevates your renovation from a mere facelift to a masterpiece of practical design. Don’t be discouraged by initial missteps—embracing the nuances and advanced techniques ensures your investment pays off in long-term satisfaction. Have you ever fallen into this trap? Let me know in the comments.Achieving a professional finish in your kitchen renovation relies heavily on the right tools and methods to ensure longevity and ease of maintenance. One highly recommended tool I personally use is the Digital Angle Finder by Empire Level. This device allows for precise measurement of cabinet and filler strip angles, especially when dealing with uneven walls. Its digital readout reduces guesswork, ensuring each cut is accurate so that filler strips and cabinetry fit seamlessly, minimizing future gaps or shifting.
Another indispensable tool in my arsenal is the Contour Gauge, which I use to record wall irregularities with remarkable fidelity. Unlike traditional templates, the flexible pins of a contour gauge conform perfectly to complex wall curves, giving me an exact profile to transfer onto MDF or other materials. This accuracy is crucial for maintaining tight, gap-free fits in long-term installations.
When it comes to software, I rely heavily on Cabinet Vision’s suite for designing custom storage solutions. Its parametric modeling features allow me to simulate storage space utilization and evaluate various configurations before committing to fabrication. This proactive approach drastically reduces costly rework and ensures the solutions are optimized for long-term use.
Maintaining your built-ins and cabinetry requires regular inspection and care. A practical tip I follow is scheduling seasonal checks, especially before the humidity spikes in summer or winter. For hardware, I use a small, high-quality silicone-based lubricant such as Super Lube to keep hinges and slides operating smoothly. This lubrication prevents squeaks and wear, extending the lifespan of hardware components, which are often overlooked but vital for sustained functionality.
What’s the best way to keep your cabinetry systems running smoothly over time?”
Investing in good hardware like Blum soft-close hinges, paired with these tools, enhances durability and user experience. For instance, regularly tightening screws and lubricating moving parts can prevent sagging and sticking problems down the line. In the future, advancements in smart hardware and environmental sensors may offer even more proactive maintenance solutions, alerting homeowners when a hinge or slide needs attention before issues become visible.
For a comprehensive storage upgrade, consider incorporating innovative pull-out systems that leverage new hardware technology. I recommend exploring the latest in drawer slide designs and safety features to ensure smooth operation even after years of use. Check out https://artisancabinetworkz.com/modern-kitchen-remodels-featuring-custom-cabinets-and-built-ins for modern ideas on combining form and function effectively.
Remember, the secret to lasting cabinetry isn’t just in the initial installation but how you maintain and adapt it over time. Regular checks, high-quality hardware, and precise measurements using tools like the Digital Angle Finder and Contour Gauge are essential. Try integrating these methods into your next project and experience the difference they can make in the durability and appearance of your kitchen.<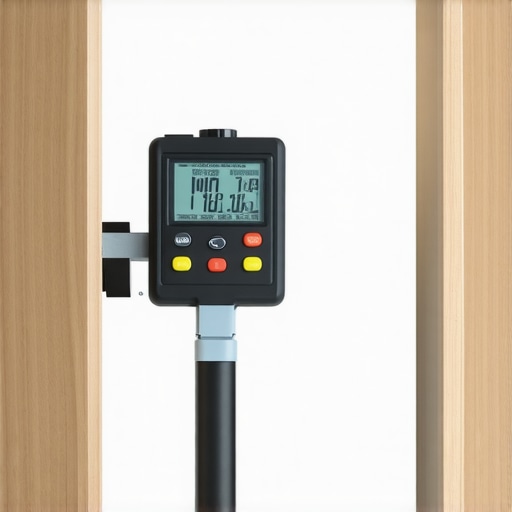 >
>
Over the years of transforming kitchens, I’ve realized that the smallest details often make the biggest difference—especially when it comes to fitting filler strips against uneven walls. The lessons learned through trial, error, and countless projects have taught me that precision in scribing isn’t just a technique; it’s the bridge between good-looking cabinetry and truly professional finishes.
What I Wish I Knew When I Started Crafting Built-ins
- Measure more than once, cut once: I used to rely on estimations, but accurate tools like contour gauges saved me from redoing entire sections. Every irregular wall demands tailored solutions, and rushing leads to gaps and misalignments.
- Scribing is an art of patience: It’s tempting to cut quickly, but taking the time to trace wall contours with a flexible gauge ensures a snug fit. This approach transforms awkward angles into nearly seamless joins.
- Oversize before trimming: Cutting filler strips slightly larger and then sanding or trimming to fit offers control and reduces mistakes. This technique prevents waste and frustration.
- Mark, cut, test, refine: Place the piece against the wall after each cut. If there’s a gap, make small adjustments rather than forcing the fit. The final look depends on this iterative process.
- Quality hardware and proper support are essential: Clamps and supports stabilize your filler during cutting and installation, ensuring smooth edges and reliable adhesion.
My Go-To Resources for Flawless Cabinetry and Storage Solutions
- Consult with experts: Personal guidance is unbeatable when tackling complex wall contours or designing custom storage. Having a pro review your measurements can prevent costly errors.
- Innovative storage ideas: Exploring creative solutions helps you maximize every inch, turning corners and awkward spaces into functional assets.
- Design inspiration: Modern kitchen remodels showcase how tailored filler strips and perfect scribing elevate the overall aesthetic, inspiring your next project.
- Built-in functionality tips: Learning from existing masterpieces can guide you toward results that impress and last.
Time to Bring Your Built-ins to Life with Confidence
Embarking on a cabinetry upgrade or a kitchen remodel might seem daunting, but the right approach to scribing and filler fitting makes all the difference. Think of it as adding the final brushstrokes to a masterpiece—small details that define the entire look. With patience, the right tools, and a willingness to learn, you’ll craft spaces that not only look amazing but also feel tailor-made for your home.
So, what has been your biggest challenge in fitting custom cabinetry or fillers? Share your experiences below—I’d love to hear your stories and offer guidance!
,