The Built-In Media Console Design That Hides Every Cord
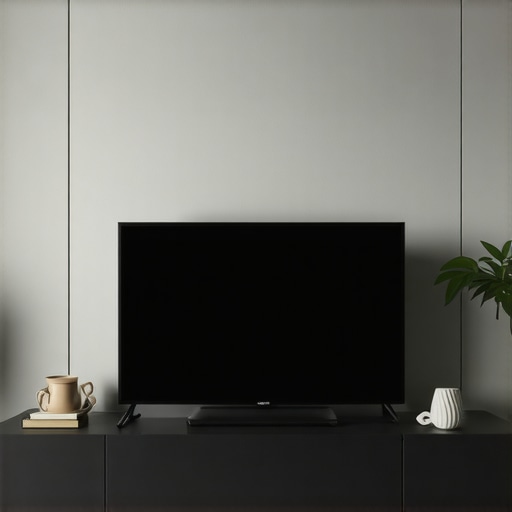
It was a typical Saturday when I finally acknowledged the chaos behind my entertainment setup. Cables sprawled across the floor, power strips teetering on the edge, and a constant battle to keep everything organized. That lightbulb moment hit me—what if I could design a built-in media console that hides every cord and creates a sleek, uncluttered look? Since then, I’ve been on a mission to perfect this solution, and I want to share what I’ve learned.
Why a Cord-Hiding Built-In Media Console Matters More Than Ever
In my experience, a living space isn’t truly polished until those unsightly cords are out of sight. An exposed tangle not only looks messy but also increases safety risks—trips, falls, and potential fires. Moreover, with the rise of smart devices, charging stations, and streaming gear, the cable mess can quickly become overwhelming. Installing a custom-built media console that conceals every cable transforms your space from cluttered chaos to serene sophistication. It’s about creating an environment where technology enhances your lifestyle—not detracts from your décor.
Have You Faced This Cable Conundrum?
Many homeowners tell me they feel frustrated every time they see their tangled cords just behind their entertainment center. Sound familiar? If so, you’re not alone. I made a critical mistake early on—underestimating how complex it could be to hide all those wires—and it led to more frustration than triumph. But, trust me, with the right design tricks and some insider know-how, you can avoid my pitfalls.
Let’s dive into the core reasons why a built-in media console designed to hide cords is a game-changer—and how you can achieve it in your own home.
Design the Perfect Frame for Your Components
Start by measuring your TV, sound system, and streaming gadgets to determine the necessary space. Use these measurements as the blueprint for your built-in. I once sketched out dimensions on scrap paper, then built a practice frame with inexpensive plywood to test fit before committing. This step ensures your console will accommodate all devices without overcrowding.
Create Concealed Wiring Channels for a Clean Look
Next, outline channels within the cabinet for cables. Think of it like a highway system hidden behind walls. Use a hot glue gun to attach small clips along the interior walls, organizing cords from individual devices to a central power strip. I once installed a dedicated power strip inside the cabinet, mounted it on a shelf, and drilled holes for cords to pass through, which kept everything tidy and accessible.
Choose the Right Materials for Durability and Style
Select materials like plywood or MDF with a veneer finish for a sleek appearance. For heavy components, reinforce shelves with solid plywood to prevent sagging—especially important for items like game consoles or AV equipment. Remember, particleboard may look cost-effective but can deteriorate under heavy use. I opted for plywood, which proved much sturdier and longer-lasting.
Build the Frame with Precision and Care
Use a level and clamps when assembling the frame to ensure square corners. Pre-drill holes to avoid splitting the wood. During my build, I secured the structure to the wall using straps instead of anchors, providing extra stability—similar to how you might hang heavy upper cabinets on metal studs. This method guarantees your console will stay put, even with frequent access or movement.
Integrate Hidden Access Panels and Storage
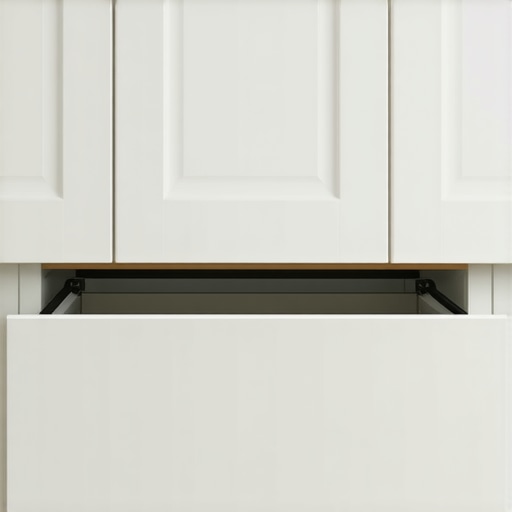
Incorporate pull-out panels or doors that mask cables and devices when not in use. Think of these as your secret compartments—like the trick to hiding a mess behind a false drawer front. I installed soft-close hinges, which made opening and closing seamless and prevented slamming. For insulations or dust protection, seal the edges with weatherstripping. To maximize storage, consider adding toe-kick drawers for remotes or cables—check out methods like toe-kick tricks for more ideas.
Finish with Style and Function
Paint or veneer your console to match your room decor, ensuring a seamless look. Use specific finish techniques for durable surfaces—such as high-quality varnish or lacquer—to withstand everyday wear. I personally painted mine with semi-gloss for easy cleaning and a polished aesthetic. Incorporate sleek handles or keep hardware concealed for a minimalist vibe, like in custom cabinets ideas.
Test Fit and Adjust for Flawless Operation
Once assembled, test the opening of doors and drawers, adjusting hinges as needed. For heavy doors, utilize specialized hardware like pocket doors or soft-close hinges to prevent slamming and ensure smooth operation. During my last project, fine-tuning hinges allowed me to achieve a flush, professional look and effortless access to all components.
Many homeowners believe that choosing widely available prefab solutions or copying popular styles guarantees a functional and timeless kitchen, but in my experience, this approach often leads to hidden pitfalls. One common myth is that more storage is always better, which can result in overstuffed cabinets that compromise accessibility and aesthetics. Instead, it’s crucial to tailor storage to your specific needs—think innovative pull-outs and vertical dividers that optimize space without sacrificing usability.
Additionally, there’s a misconception that standard hardware and assembly techniques are sufficient for heavy or complex loads. Relying on low-grade materials or generic hardware can cause sagging or failure over time—particularly in high-humidity zones or with heavy cookware. For example, choosing high-quality plywood for shelves and reinforced hardware saves you money and hassle in the long run and adds to the durability of your built-ins.
Are We Overlooking the Nuances in Material Selection and Hardware Support?
Many assume that budget materials or mass-market hinges will suffice, but according to a study by the Hardwood Plywood & Veneer Association, high-grade plywood provides 30% greater stability and longevity than particleboard, especially in moisture-prone environments. This nuance can make a significant difference in the longevity of your cabinetry.
If you want to avoid sneaky design failures, be cautious with anything that seems too perfect or easy. For instance, relying solely on face-frame cabinets without considering the structural support needed for corner units or heavy appliances can backfire. Structural reinforcements, like steel brackets for large overhangs or floor-to-ceiling supports for tall cabinets, are often overlooked yet critical details that ensure lasting performance. You can learn more about these advanced supports in detailed guides like this article about countertop supports.
Furthermore, advanced projects demand precision in hinge adjustments and alignment. Simple misalignments can result in doors that won’t close properly, leading to gaps and dust accumulation. The secret lies in meticulous measurement and using specialized hardware like European hinges, which allow for multiple adjustments—saving time and frustration. Details like these often go unnoticed by DIYers but make a tremendous difference, especially in integrated built-ins designed for sleek aesthetics. For more on perfecting inset doors and hinges, check out this comprehensive guide.
By understanding these nuanced aspects—material quality, structural reinforcements, and hardware adjustments—you can elevate your project from good to exceptional. Remember, in custom cabinetry and built-ins, the devil is in the details. Have you ever fallen into this trap? Let me know in the comments.Maintaining your custom-built cabinetry and remodels requires more than just regular cleaning; it demands the right tools and a systematic approach to ensure longevity and sustained beauty. Over the years, I’ve refined my toolkit to include specific equipment and software that streamline the process and improve the quality of workmanship. For example, my adjustable impact driver, the Milwaukee M18 Fuel, has been indispensable for its torque precision and battery life, making installation and adjustments much quicker than with traditional screwdrivers. Additionally, I rely on a digital measuring tape, like the Bosch GLM 50 C, which connects via Bluetooth to my smartphone, allowing me to record measurements accurately and avoid costly errors during modifications or future scaling efforts.
Beyond tools, staying on top of maintenance involves understanding the nuances of material wear and hardware performance. I recommend using specialized lubricants like Teflon spray for hinges and sliding mechanisms, which prevents squeaks and ensures smooth operation over time. Also, periodically inspect fasteners and reinforcements—especially in high-humidity areas or with heavy loads—to address issues before they escalate. For instance, reinforcing shelves with steel brackets, as discussed in this article, can significantly extend your built-ins’ lifespan.
Looking ahead, the trend in kitchen and cabinetry maintenance is moving toward smart technology integration. Predictive maintenance software, like using a mobile app to track hardware lifespan and suggest timely replacements, is gaining popularity. This proactive approach minimizes unexpected breakdowns and keeps your workspace and living areas functioning flawlessly.
How do I keep my built-ins performing — the secret lies in regular, targeted maintenance. Incorporate routine inspections of hardware, clean and lubricate moving parts seasonally, and stay updated with the latest tools designed for precision and durability. Investing in quality hardware and materials upfront, paired with these maintenance practices, will save you headaches and costs in the long run.
Try adding a silicone-based spray to your hinges and sliding tracks today, and experience the difference in smoothness and noise reduction. This simple step can make your cabinetry feel brand new and extend its functional life significantly. For more expert tips on maintaining your kitchen remodel, visit our modern remodels page.
The Hidden Pitfalls That Caught Me Off Guard
One of the biggest lessons I learned was how overlooked structural support plays a crucial role in durability. Rushing through reinforcement can lead to sagging shelves or misaligned doors down the line. Investing time early on in solid supports like steel brackets or proper wall anchoring can save you headaches later. Additionally, I underestimated the importance of material quality; using high-grade plywood for shelves and panels significantly extended the lifespan of my built-ins. Finally, adjusting hardware meticulously – like hinges and slides – at the end of the project made all the difference in achieving a professional, seamless look that feels effortless to operate.
Tools and Resources That Elevated My Project
For anyone diving into custom cabinetry or built-ins, I recommend tools like the Milwaukee M18 Fuel impact driver for its torque and battery life, which makes assembly smoother. A Bluetooth-connected digital measuring tape, such as the Bosch GLM 50 C, helps ensure precision without the hassle of manual record-keeping. When selecting materials, high-quality plywood from reputable suppliers prevents sagging and warping, a common issue with particleboard. For design inspiration and detailed techniques, I relied heavily on websites like this resource on modern kitchen remodels and these built-in ideas that elevate utility and style.
Embrace Your Creative Side Now
Building custom cabinetry and hidden storage solutions isn’t just about function—it’s about transforming your space into a sanctuary tailored to your lifestyle. Each project teaches patience and precision, but the satisfaction of a clutter-free, sleek environment makes every effort worth it. I encourage you to start small—perhaps with a toe-kick drawer or a hidden charging station—and then expand as your confidence grows. Remember, the best built-ins reflect your personal needs and design taste. So, why wait? Grab your tools, sketch your ideas, and turn your dream storage solutions into reality. Your perfect space is just a project away.