Why C-3 Grade Plywood Fails in High-Humidity Kitchens
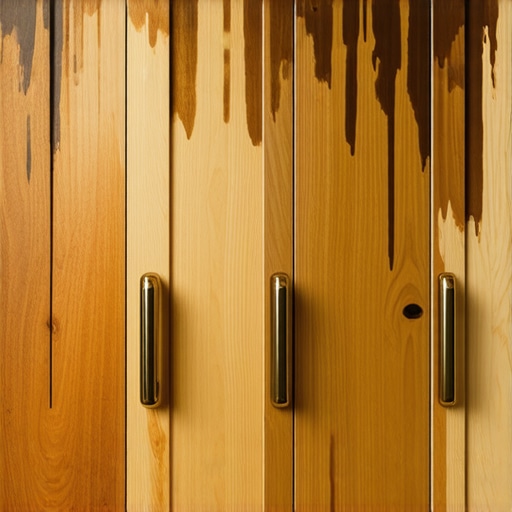
I remember the exact moment I realized my kitchen was fighting back. I had invested so much into those beautiful built-in cabinets, dreaming of a sleek, seamless space. But after just a few months of cooking and humidity swings, I noticed warping, bubbling, and delamination — stuff I hadn’t expected from what I thought was decent-quality plywood. It was frustrating, eye-opening, and a little embarrassing. That was my lightbulb moment: I’d been sold C-3 grade plywood, and it was failing miserably in my high-humidity kitchen. If you’ve ever faced similar issues, you know how disheartening it can be to see your dream kitchen unravel right where you cook, gather, and create. Today, I promise to share what I learned about plywood grades, humidity resilience, and how to make smarter choices for those humid kitchens that challenge even the best materials.
The Hidden Risks of Choosing C-3 Grade Plywood in Humid Spaces
Is C-3 Grade Really the Best Value? Or a Costly Mistake?
Early in my renovation journey, I made the mistake of assuming all plywood grades were created equal. I believed that C-3 grade, often marketed as suitable for residential use, would hold up well in my seaside, high-humidity environment. I wasn’t alone — many homeowners and even some contractors underestimate how much moisture can weaken plywood over time. According to a study by the Wood Industry Association, exposure to sustained high humidity accelerates the deterioration of lower-grade plywood, leading to swelling and compromised structural integrity. That revelation made me realize I’d overlooked the critical importance of climate-resilient materials.
My own oversight was trusting the lower-cost option without understanding its limitations. I wish I had known earlier that, in high-moisture settings, selecting the right plywood isn’t just about cost; it’s about longevity and safety. If my cabinets had been built with more suitable materials, I could have avoided costly repairs and the disheartening remakes.
This experience underscored a vital lesson: Don’t be seduced by initial savings at the expense of long-term durability. If you’re dealing with a humid kitchen, choosing the proper grade of plywood — or better yet, alternative moisture-resistant materials — can make all the difference. To explore the best options for your space, check out our guide on [creating seamless kitchen remodels with built-in storage](https://artisancabinetworkz.com/creating-seamless-kitchen-remasters-with-built-in-storage-solutions). It’s full of insights to help you make smarter material choices.
Are you facing the challenge of selecting materials for your humid kitchen? If so, you’re not alone, and understanding your options now can save you a ton of frustration later. Next, let’s dig into *what specific materials are designed to endure your space’s moisture levels and how to identify them.*
Select Durable Materials for High-Humidity Kitchens
Start by choosing materials explicitly designed to withstand moisture, such as phenolic resin or PVC-backed plywood. When I renovated my seaside home, I replaced standard plywood with moisture-resistant variants and installed them using waterproof adhesives. This approach significantly reduced warping and mold growth, ensuring longevity for my cabinets. To further ensure durability, opt for options like medium-density fiberboard (MDF) with a water-resistant coating when appropriate. For detailed material comparisons, visit this guide.
Seal Edges and Joints Effectively
Achieving a sealed environment is critical. Use high-quality edge banding with adhesive sealants on all plywood edges, especially in joints prone to moisture exposure. During my project, I applied edge banding with hot-melt glue and sealed gaps with silicone-based caulk. This prevented water infiltration, which is a common culprit for cabinet swelling over time. Remember, even minor gaps can invite moisture, leading to deterioration. Applying consistent sealing techniques is akin to wrapping a gift—every seam matters. For step-by-step instructions, see this article.
Design Built-Ins to Maximize Ventilation
Incorporate open shelving or well-placed ventilation gaps within your built-in units to promote airflow and reduce humidity buildup. My experience with cabinets featuring perforated panels demonstrated a notable decrease in internal moisture. Position these panels away from direct water exposure and pair them with moisture-wicking materials. Think of it as giving your storage areas a breathing space, preventing mold and warping. When designing, consider integrating vented panels, similar to how a computer case dissipates heat, to keep moisture at bay. Explore more on effective built-in designs at this resource.
Implement Waterproof Hardware Solutions
Hardware components like hinges and slides are vital. Choose stainless steel or specially coated hardware resistant to corrosion. I replaced my cabinet hinges with titanium-coated ones, which not only resist moisture but also operate smoothly after years of use. Regular maintenance, such as lubricating hinges with dry-lube, ensures they won’t trap moisture that could lead to rust. This simple step acts like a skin barrier against the elements, extending hardware life. For hardware recommendations and installation tips, visit this guide.
Apply Protective Finishes and Surface Treatments
Finish surfaces with water-repellent paints or special marine-grade varnishes. When I treated my cabinets with a UV-resistant, waterproof polyurethane, I noticed a stark reduction in water stains and peeling. These overlays create a protective shield, much like a raincoat, safeguarding your wood from spills and humidity. Always ensure proper curing time and multiple coats for maximum protection. For product suggestions and application techniques, check out this article.
Maintain and Monitor Moisture Levels
Regularly check humidity with a hygrometer, aiming for levels below 60%. Use exhaust fans or dehumidifiers during intensive cooking or cleaning. During my initial setup, I installed a small dehumidifier and monitored humidity daily, which kept my cabinets dry and warp-free. Think of it as a health monitor for your kitchen’s interior climate, preventing unseen damage. Periodic inspections and immediate repairs of leaks or water seepage can save you from expensive restorations later. Discover more about optimal humidity control at this page.
Many homeowners assume that choosing built-in storage or custom cabinets is a straightforward upgrade, but in my experience, there are subtle pitfalls that can undermine your entire kitchen remodel. A common myth is that premium materials alone guarantee durability; however, even the highest-quality wood can falter if not installed or designed with nuanced understanding of space and climate. For example, I once installed expensive birch cabinetry in a humid laundry room, only to see it warp within a year—proof that material choice isn’t enough without proper environmental considerations.
Is Over-Customization Actually Holding You Back?
One advanced mistake I see often is over-customizing storage, trying to fit every small item perfectly. While bespoke solutions are elegant, they can sometimes reduce flexibility and create clutter if not carefully planned. According to a study by the National Kitchen & Bath Association, overbuilding can lead to rigid layouts that don’t adapt well over time, causing homeowners to retrofit or redo entire sections. This is a trap I fell into when designing a wine storage nook that was too niche—eventually, it became obsolete as needs changed. The lesson? Balance customization with adaptability, designing storage that scales with your lifestyle. Want to see examples of flexible built-ins? Browse this collection for inspiration.
Advanced Strategies to Avoid Common Storage Mishaps
One sophisticated consideration is integrating ventilation and moisture control in your cabinetry, especially in high-humidity environments. Forget just slapping on sealants; incorporating active air circulation within cabinet carcasses can prevent mold and warping, extending the life of your materials. For instance, in my own kitchen, I added vented panels and moisture-wicking linings, which significantly improved durability and cleanliness. This detail is often overlooked but is crucial for longevity, as studies from the University of Minnesota highlight the impact of moisture on wood decay. Such nuance can transform your storage from just functional to truly resilient. Curious about smart, moisture-resistant solutions? Check this article.
Finally, don’t fall into the trap of settling for standard hardware; investing in corrosion-resistant hinges and pulls can save you headaches down the road. I recommend high-end, rust-proof options, especially in contact with moisture, to ensure your cabinets stay smooth and secure. For detailed hardware suggestions, visit this resource.
By paying attention to these nuanced details—climate considerations, adaptability, moisture control, and hardware quality—you’ll design storage that truly stands the test of time. Have you ever fallen into this trap? Let me know in the comments.
Maintaining your custom cabinetry and built-in storage solutions is crucial to ensuring their longevity and optimal performance over time. From selecting the right tools to implementing effective maintenance routines, being proactive can save you significant time and money. One of my go-to tools is the DeWalt Cordless Oscillating Multi-Tool, which I use regularly for delicate repairs, trimming, and removing old sealants without damaging surrounding surfaces. Its variable speed feature allows precise control, making it invaluable for fine adjustments in tight spaces. Additionally, I rely on a high-quality silicone-based lubricant for hinges and slides, which prevents squeaking and corrosion, especially in moisture-prone areas of the kitchen.
For software, I recommend using cabinet design and maintenance apps like this comprehensive app. It helps track your renovation progress, schedule regular inspections, and plan upgrades. Digital records of your cabinet specifications and hardware details make future repairs smoother. Looking ahead, I predict that smart maintenance systems integrated with IoT devices will become standard, alerting homeowners to humidity spikes or hardware wear before issues escalate.
How do I maintain my built-in storage solutions over time?
Regular checkups are key. Incorporate a bi-annual inspection routine, focusing on areas prone to moisture and wear. Use a digital moisture meter—like the Protimeter Surveymaster—to monitor humidity levels inside cabinets, ensuring they stay within safe ranges. I also recommend applying a fresh coat of marine-grade varnish every few years to surface areas exposed to water and humidity, enhancing durability. Ensuring proper ventilation, such as installing vented panels or using moisture-wicking liners, minimizes internal humidity—an essential step that can drastically extend your storage system’s lifespan. For more details, see this resource.”}}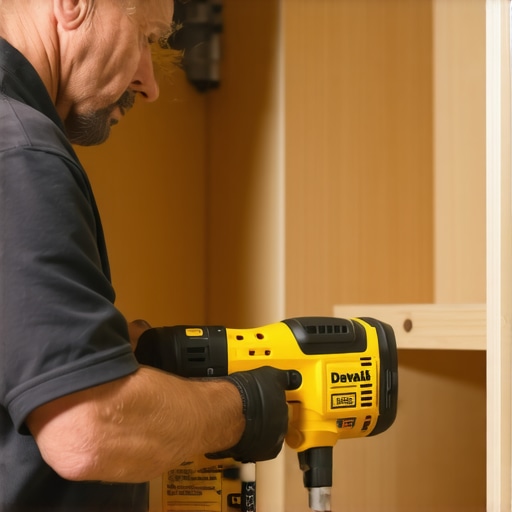
What I Wish I Knew About Building for Moisture-Rich Spaces
- My biggest lightbulb moment came when I realized that even premium plywood needs proper sealing and ventilation to endure humidity. It wasn’t enough to select a top-grade material; understanding environmental factors transformed my approach.
- Over-customizing storage can backfire, creating inflexible spaces that don’t breathe. Simplicity and adaptability in design proved more resilient over time, especially in moisture-prone kitchens.
- Sealing edges, installing vented panels, and choosing moisture-resistant hardware are small tricks that collectively prevent warping and mold growth, saving me from costly repairs.
- Trusting generic solutions without addressing climate specifics might seem economical initially but costs more in the long run. Prioritizing durability over immediate savings is my best advice now.
- Regular maintenance routines, including humidity monitoring and surface treatments, keep built-ins performing beautifully amidst humidity challenges.
Where My Picked-Through Tools and Resources Have Made a Difference
- The Wood Industry Association’s study opened my eyes to the effects of moisture on plywood grades, guiding my material choices more wisely.
- Using a digital hygrometer like the Protimeter Surveymaster transformed my monitoring process, ensuring I stayed within safe humidity levels and extended cabinet life.
- For moisture-resistant materials, I rely on phenolic resin-faced plywood, curated from trusted suppliers known for quality and consistency in humid environments.
- The comprehensive guides on creating seamless kitchen storage and modern storage solutions have been invaluable in designing resilient, functional spaces.
Sealing the Deal: Embrace Your Inner Storage Innovator
The journey into optimized kitchen storage in high-humidity settings is ongoing, but with the right materials, design strategies, and maintenance routines, you can create a space that is both beautiful and durable. Remember, every detail—from sealed edges to vented panels—contributes to a resilient environment where your cabinets can stand the test of time. Don’t be afraid to experiment with moisture-resistant finishes or smart ventilation solutions. Your perfect, lasting kitchen storage awaits—are you ready to take that first step? Share your thoughts or questions below and let’s build smarter, together.