Why Your Corner Sink Needs a Custom Angled Base for Comfort
I remember the day I finally realized why my kitchen sink felt so uncomfortable every morning. It wasn’t just because of the daily hustle or the mountain of dishes—though those certainly didn’t help. No, it was the naively designed corner base, perfectly square and uniform, that made me stretch every time I reached for the faucet. That lightbulb moment led me down a rabbit hole of remodeling ideas that changed the way I use my space—and I bet it could do the same for you.
Transforming the Corner: Comfort Comes from Thoughtful Design
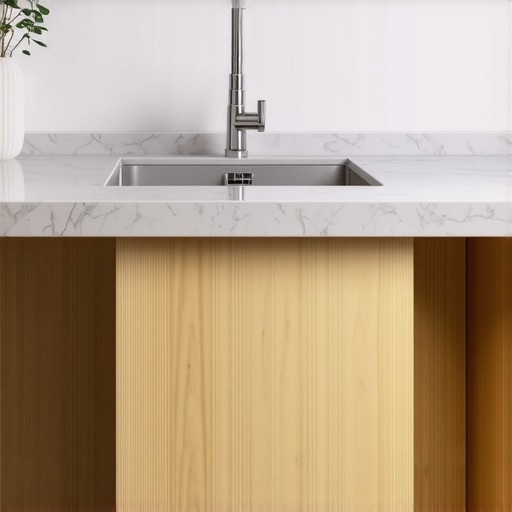
When renovating or updating your kitchen, the focus often falls on cabinets, countertops, and appliances. But one detail often overlooked is the base of your corner sink. A standard rectangular or square base may look neat, but it can become a literal pain—forcing awkward postures and creating cluttered nooks. Imagine having a base specially angled to match the bend of your sink, crafted for your comfort. That’s the power of a custom angled base, which allows for easier reach, better ergonomics, and a more seamless aesthetic. If you’re curious about how to elevate your space with tailored solutions, check out custom cabinets that can adapt to your needs.
Could this simple tweak be the game-changer you need in your kitchen?
Early in my project, I made the mistake of assuming off-the-shelf solutions would suffice. That meant stubborn corners and cramped drawers, forcing me to bend and reach in unnatural ways. It wasn’t until I considered custom-crafted bases that everything fell into place. This experience taught me a valuable lesson: small details, like the angle of a base, can have a huge impact on your daily comfort and efficiency. Want to ensure you’re not missing out on similar improvements? Explore built-in storage solutions and smart designs that make life easier.
Stay tuned, because in the next section, I’ll walk you through the key factors to consider when designing your perfect corner sink base—so you can enjoy both style and comfort in your kitchen every day.
,
Measure Your Space Precisely
Start by measuring the exact dimensions of your corner area, including the angles and reach zones. Use a flexible tape measure and a protractor to determine the precise angles needed for your custom base. I once failed to account for the slight slant of my wall, which caused my first prototype to wobble—learning this the hard way. Always double-check dimensions with multiple measurements to avoid costly mistakes.
Create a Design Plan Focused on Ergonomics
Sketch Your Ideal Reach Zones
Draw a scale plan of your kitchen corner, marking where you frequently reach. Think of your workspace like a well-organized toolbox—every tool should be within arm’s reach without strain. This step ensures your custom base accommodates natural movement, reducing unnecessary bending or stretching. I used painter’s tape on the wall to visualize my hands’ natural path, which revealed I needed a slightly angled design for comfort.
Select Materials That Match Your Style and Durability Needs
Opt for moisture-resistant plywood or MDF with a sealed finish for longevity. For my project, I chose marine-grade plywood because of the high humidity in my kitchen. Think of your materials like the tires on a car—choose the right type for the terrain to prevent premature wear. To keep the project manageable, I ordered samples from local suppliers, testing their weight and finish before making a final decision.
Build the Custom Base with Precision
Transfer your design measurements onto your chosen material, then cut carefully using a saw with a guide for straight edges. Use clamps to hold pieces steady, like a steady hand during a delicate surgery—accuracy matters. I found that marking cut lines with a carpenter’s pencil and then cutting with a fine-tipped saw reduced errors. Remember to sand all edges smoothly to prevent splinters and prepare for finishing.
Assemble and Secure Your Base
Join the pieces with waterproof wood glue and reinforce with pocket screws or nails, ensuring the angles stay tight. Think of this like putting together a sturdy puzzle—every joint needs to be tight for stability. I used a drill with a level attachment to keep everything aligned, which prevented uneven surfaces that could cause discomfort or functional issues. Consider adding corner brackets for extra support if your base will bear heavy loads.
Integrate with Your Existing Cabinets and Fixtures
Fit the assembled base into your corner, making adjustments with a sander or planer if needed. Seal all joints with a water-resistant finish to protect against moisture. I used a semi-gloss polyurethane to enhance durability and easy cleaning. Think of this process as tailoring a suit—the final fit is crucial for both appearance and comfort. Once installed, test every reach and make minor adjustments to optimize ergonomics.
Fine-Tune for Ultimate Comfort
After installation, observe how you interact with the new base during daily chores. Take note of any awkward spots or tight angles and sand or re-seal these areas as needed. Small tweaks, like adding a soft pad or adjusting the angle slightly, can make a significant difference. My own small adjustment—slightly angling the front edge—dramatically improved my reach and reduced fatigue during extended use.
By meticulously measuring, designing thoughtfully, and executing with precision, you’ll create a corner sink base that enhances both comfort and style. Remember, the key is in the details—overlooking them can lead to more work down the line, but paying attention yields a seamless, personalized finish.
Many homeowners believe that installing built-ins or custom cabinets is a straightforward way to maximize space and improve aesthetics, but this assumption often leads to overlooked nuances that can cause costly mistakes. One pervasive myth is that ‘one-size-fits-all’ solutions are sufficient for every space. In reality, ignoring the unique architectural features of your home and the specific functional needs can result in a mismatch between form and function. For instance, some assume that custom cabinets are simply an expensive version of stock options, but in truth, they offer tailored solutions that can prevent common issues like wasted space or awkward access. For advanced remodelers, understanding the importance of precise measurements and material choices is crucial—details that often distinguish a good project from a great one. An expert like builder and designer Michael Anschel stresses that “integrating built-ins seamlessly into existing architecture requires a nuanced understanding of structural support, material behavior, and finishes” (source: *Pro Remodeler*). A common trap is opting for trendy finishes or hardware without considering longevity and maintenance, which can lead to premature wear and the need for costly replacements. Moreover, many miss the opportunity to leverage hidden storage niches or integrated lighting—details that elevate the space from ordinary to extraordinary. Have you ever fallen into this trap? Let me know in the comments. Incorporate these advanced considerations into your next project by consulting expert guides like this resource on custom cabinets and avoid the pitfalls that trap so many homeowners.
Investing in Precision: Essential Tools for Built-In Success
When it comes to custom cabinetry and seamless built-ins, the devil is in the details. I personally rely on a high-quality adjustable framing square because it ensures every cabinet aligns perfectly, preventing wobbling or gaps that can be tricky to correct later. Laser distance measurers are indispensable—they allow me to double-check dimensions instantly, reducing costly mistakes, especially in irregular corner spaces. For creating accurate cuts and joints, I swear by a plunge router with multiple templates; it offers consistency when shaping intricate mouldings or edge profiles, saving significant time and effort. Additionally, a cordless brad nailer has become my go-to for assembling parts on-site, giving me control and reducing strain during long sessions. These tools together streamline the process, making custom features look professional and polished.
The Right Software Makes a Difference
Beyond physical tools, I utilize CAD design software tailored for kitchen and cabinetry layouts. Programs like SketchUp or 20-20 Design let me visualize space to scale, experiment with different configurations, and share detailed plans with clients, ensuring everyone is on the same page. This upfront investment in digital planning prevents misunderstandings and tweaks during the build, which can add up in time and budget. Predicting future needs, I foresee a trend towards integrated virtual reality walkthroughs, giving homeowners an even more immersive preview of their renovated space before construction begins.
Methodologies That Elevate Your Craft
Precision is everything, so I follow a phased workflow: starting with meticulous measurements, then creating detailed shop drawings, followed by pre-assembling components off-site. This approach minimizes surprises during installation. I also recommend applying a moisture-resistant primer and finish to all surfaces before assembly, ensuring longevity especially in humid kitchens. Regularly maintaining your tools, like cleaning router bits and calibrating laser measurers, guarantees accurate results over the long haul. As expert builder Michael Anschel notes in this resource, maintaining your equipment is as crucial as the initial design, extending their lifespan and precision.
How do I keep my tools and methods running smoothly over time?
Consistent maintenance and calibration are key. I schedule weekly cleanup sessions for my power tools, using manufacturer-recommended lubricants and parts replacements. Storing tools properly—away from moisture and extreme temperatures—helps prevent rust and degradation. Updating software and firmware for design programs ensures compatibility and access to new features. Paying attention to these details keeps my workflow efficient and my results top-notch. For those serious about precision, considering a calibration checklist inspired by professional standards, like the one from this guide, is invaluable. Try establishing a regular maintenance routine—you’ll notice the difference in the quality and consistency of your projects.
Three Myths About Built-ins That Delayed My Dream Kitchen
One of the most stubborn misconceptions I encountered was the belief that off-the-shelf cabinets could fit every space perfectly. It wasn’t until I invested in tailored designs that I realized how much these myths hindered my progress—from awkward gaps to wasted space. Understanding that every corner is unique taught me the value of personalized solutions; it’s the difference between a good remodel and a truly functional space. Want to avoid these pitfalls? Explore this comprehensive guide on custom cabinets and take control of your design journey.
My Toolkit for Flawless Built-ins
I trust a few key tools that have become my secret weapon—like a high-precision laser measurer to ensure every inch is perfect, and a versatile plunge router for shaping intricate moldings. These tools help me match every piece to my design, preventing costly mistakes and ensuring longevity. For aspiring remodelers, investing in reliable equipment pays off in quality results. Discover more about my essential tools at this trusted resource.
Turning Dreams into Reality: The Power of Personal Touch
While software and tools are vital, the true magic happens when you infuse your design with personal insights gained from experience. Every challenge, like my struggle with uneven walls, became a lesson that sharpened my skills. My advice? Embrace imperfections as learning opportunities—they’ll make your qualifications as a craftsman more authentic and your projects more successful. Feeling inspired? Take the first step with this inspiring guide and start transforming your space today.
Your Turn to Embrace the Art of Built-ins
Every custom corner solution I’ve learned from my journey underscores a simple truth: thoughtful design and personal effort create spaces that truly serve us. Don’t wait for perfection—start small, learn as you go, and watch your kitchen evolve into a masterpiece tailored just for you. Are you ready to take the plunge and implement your own built-in solutions? Share your plans or questions below—I’d love to hear your story!