Why Most Soft-Close Hinges Stiffen in Winter and How to Adjust Them
One chilly morning, I reached for a cabinet door in my kitchen, only to be met with a stubborn, squeaky hinge instead of the smooth, whisper-quiet close I was used to. It was a lightbulb moment—these hinges, which I thought were high-quality and maintenance-free, had suddenly become my wintertime nemeses. If you’ve noticed your soft-close hinges resisting or squeaking once the temperatures drop, you’re not alone. This frustrating phenomenon can turn an elegant kitchen into a noisy battlefield overnight. But here’s the good news: understanding why this happens is half the battle won. Today, I want to share what I’ve learned from my own mishaps and how you can keep your hinges performing flawlessly, year-round.
Don’t Let Winter Stiffen Your Cabinets: Here’s What You Need to Know
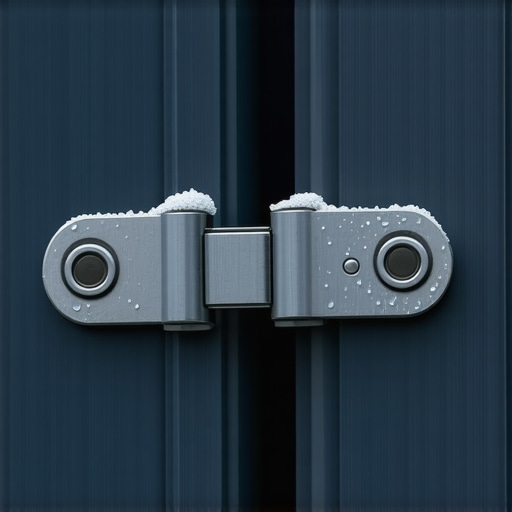
Many people believe that hardware issues like stiff hinges are a manufacturing flaw or lack of maintenance. The truth is more nuanced. Soft-close hinges rely on precise adjustments, lubrication, and sometimes, the right environmental conditions. During colder months, temperature fluctuations cause materials to contract and expand, affecting hinge performance. These changes can make hinges less responsive, causingdelay or resistance in closing. My early mistake was dismissing this issue as a minor fluke—until it persisted and became a daily annoyance. I found that adjusting the hinge settings and ensuring proper lubrication made all the difference. If your hinges are acting up, it’s likely a simple fix and not a sign you need a complete replacement. Want to learn how to restore their smooth operation? Let’s dive into the causes and solutions.
Is This Hardware Issue Really Worth Fixing?
Initially, I wondered whether spending time fiddling with my hinges was worth it or if I should just call a professional. I found that many online guides, including [this comprehensive resource](https://artisancabinetworkz.com/revolutionize-your-kitchen-remodel-using-built-ins-and-creative-storage), emphasize cost-effective DIY adjustments. Plus, ignoring the problem can lead to further hardware wear or even damage to your cabinets. To build trust, I must admit my first mistake was ignoring the manufacturer’s adjustment instructions, thinking I could fix everything with oil alone. That proved ineffective, and I learned that proper hinge setup is essential for longevity and functionality. So, if you’re tired of sticky, squeaking, or stubborn hinges during winter, stay with me. We’ll unravel the cause and fix it without breaking the bank or your patience. Ready to get your soft-close hinges back in shape? Let’s move on to the practical steps to solve this common winter woe.
Adjust Hinges for Immediate Results
During my DIY project, I discovered that a simple adjustment of the hinge settings dramatically improved performance. To do this, locate the adjustment screws on the hinge (usually on the side or back), and turn them clockwise to increase tension or counterclockwise to loosen. Trial and error are key—start with small turns and test repeatedly. Access the hinge with a Phillips screwdriver, and make small adjustments to see how the door responds. This fine-tuning helped eliminate resistance and squeaking without needing to replace the entire hardware.
Lubricate Properly to Keep Things Smooth
Using the right lubricant is crucial. I learned that a silicone-based spray or a high-quality hinge lubricant reduces friction effectively and withstands temperature fluctuations. First, clean the hinge areas thoroughly with a cloth to remove dust and old grease. Then, spray a small amount of lubricant onto the pivot points and moving parts, working it in with a cloth or brush. Avoid using heavy oils, which can attract dirt over time. Regular lubrication, especially before the cold season, maintains smooth operation and prevents squeaks.
Seal Gaps and Contractions with Adjustments
Temperature-induced contraction causes misalignment. I fixed this by slightly repositioning the hinges to compensate for gaps. Loosen the screws attaching the hinge to the cabinet or door, reposition the door to align flush, then retighten. Use a level to ensure perfect flushness. This step creates a snug fit that resists winter’s contraction forces. Remember, small tweaks can prevent larger issues down the road, especially with high-end cabinetry that demands precision. For ideas on optimizing your built-in storage seamlessly, check out these built-ins tips.
Consider Upgrading Hardware If Necessary
If adjustments and lubrication don’t restore performance, it may be time to upgrade to newer hinges better suited for colder environments. Modern soft-close hinges with steel components tend to perform more reliably in winter. When shopping, pay attention to the specifications about temperature tolerances. A professional consultation can also help, but many of these upgrades are straightforward DIY projects that save money compared to full replacements. For advice on selecting the perfect hardware, explore custom cabinets ideas.
Test and Fine-Tune Routinely
Post-adjustment, I found that regular testing prevents issues from escalating. Open and close the doors multiple times, checking for resistance or squeaks. If you notice signs of contraction, re-tighten or readjust hinges as needed. Creating a maintenance routine during seasonal changes helps keep your hinges and cabinets performing like new. For more innovative storage solutions that protect your investments, visit storage solutions for modern kitchens. Regular attention preserves both functionality and aesthetics, transforming your space into a smooth-operating masterpiece.
When it comes to built-ins and storage solutions, many homeowners are misled by common myths that can hinder their remodeling success. A widespread misconception is that all custom cabinets are inherently expensive and time-consuming, which isn’t always true. In reality, strategic planning and choosing the right materials can significantly reduce costs and lead times. Overlooking the importance of proper planning often results in storage inefficiencies or aesthetic mismatches. For example, rushing into a custom design without understanding your specific needs might generate unused space or awkward layouts. This can be avoided by leveraging expert guidance and detailed measurements, which ensure your storage solutions are both functional and tailored to your lifestyle.
Another frequent mistake is believing that all custom cabinets are supposed to look traditional or bulky. Modern custom cabinet designs embrace minimalism, sleek lines, and innovative materials. Clarifying your style preferences from the start can prevent costly revisions later. Moreover, many get caught in the trap of underestimating the importance of the hardware and finishing touches, which truly elevate the overall look and durability. Selecting high-quality finishes and hardware not only enhances aesthetics but also extends the lifespan of your cabinetry, especially in high-moisture areas like kitchens and bathrooms.
Why do even savvy remodelers often overlook environmental factors?
One nuanced aspect that many ignore is the impact of environmental conditions—like humidity and temperature fluctuations—on both built-ins and storage accessories. Without proper ventilation or material choices, wooden cabinets can warp, shelves may bow, and hardware can corrode faster. For instance, avoiding moisture-resistant materials or neglecting acclimation during installation could lead to long-term damage. Recognizing these factors is crucial for ensuring your investment withstands seasons of use. Experts advise consulting seasoned professionals who understand regional climate effects to optimize material selection and installation techniques—this is especially relevant if you’re considering a high-end remodel. For more on creating durable, stylish built-ins, it’s vital to think beyond initial design and consider environmental resilience.
Before you start your next project, be aware of these lesser-known pitfalls. Dismissing these nuances can turn an elegant upgrade into an ongoing maintenance headache. Instead, embrace a comprehensive approach that balances design, function, and environmental adaptability. Have you ever fallen into this trap? Let me know in the comments and share your experiences—your insights might help others avoid costly mistakes in their remodeling journey.
Building beautiful, functional built-ins and ensuring they stay that way over the years requires more than just good design—it hinges on the right tools and maintenance practices. Having invested in quality cabinetry and storage solutions, I’ve found that the secret to long-term satisfaction lies in using specialist equipment and adopting systematic upkeep routines. Today, I’ll share the tools I personally rely on to keep my kitchen remodel looking pristine, plus insights on how to scale these methods as your space evolves.
Why Invest in High-Quality Tools for Maintenance?
It’s tempting to overlook the importance of proper tools once your initial remodeling is complete. However, high-quality equipment not only streamlines routine upkeep but also prevents accidental damage. For example, I always keep a precision torque screwdriver in my toolbox. This allows me to tighten cabinet hinges just enough—avoiding over-tightening that can strip screws or warp doors. Similarly, a digital moisture meter helps me monitor humidity levels, which is critical in maintaining wooden cabinetry, especially in climates with seasonal fluctuations. Using legit tools ensures you’re not just fixing issues but preventing them altogether, which saves money and preserves your investment over time.
My Go-To Maintenance Essentials
Every handyman or homeowner serious about long-term results should prioritize a few key items. First, a high-quality, lint-free microfiber cloth is indispensable for cleaning without scratching surfaces. I prefer this over generic rags because it traps dust and debris effectively. Second, a silicone-based lubricant spray is my weapon of choice for hinges and sliding drawers; it endures temperature shifts better than traditional oils. Third, I swear by a cordless, compact drill with a precise torque setting—great for tightening or adjusting hardware in hard-to-reach spots. Combining these tools with regular checks helps me catch problems early. I suggest setting a seasonal reminder to inspect hinges, seals, and surfaces—think of it as preventive maintenance that keeps your remodel looking like new.
Preparing to Scale Your Storage and Built-Ins
As your needs change or your space expands, scalability becomes crucial. Planning for this means selecting modular components and flexible hardware that can adapt without a complete overhaul. For instance, utilizing adjustable shelf brackets allows you to fine-tune storage arrangements over time. When considering custom cabinetry, it’s wise to choose durable finishes and hardware that can withstand additional weight or frequent use. To stay ahead, I recommend exploring advanced organizing systems such as pull-out trays or hidden compartments—which I detail in this guide on seamless storage solutions. These innovations make it easy to upgrade your kitchen’s functionality without sacrificing style.
What About Moving Into the Future
The trend toward smart storage and maintenance automation continues to grow. I predict that more homeowners will embrace integrated systems—like moisture sensors that alert you to humidity spikes before damage occurs or app-controlled lighting that promotes better cabinet cleaning. Investing in modular, tech-enabled storage now sets your space up for effortless upgrades. To optimize your cabinets and built-ins further, I recommend exploring innovative solutions discussed in this post on smart storage ideas. Trying out one of these advanced tips will not only improve your current setup but also future-proof your remodeled kitchen.
How do I maintain my built-ins long-term?
Consistency is key. Schedule regular inspections of hinges, seals, and finishes—using your tools properly ensures you’re catching small issues early. For example, periodically lubricate hinges and check for any signs of warping or moisture buildup. Keep surfaces clean with microfiber cloths, and avoid abrasive cleaners that can damage finishes. By cultivating a routine, you’ll extend the lifespan of your cabinets and avoid costly repairs down the line. Remember, a well-maintained kitchen saves money and maintains resale value, making your remodeling effort worthwhile. Meanwhile, as technology advances, I believe smarter maintenance solutions will become more accessible, simplifying long-term care even further.
If you’re serious about keeping your built-in storage working flawlessly, I urge you to try assembling a maintenance kit that includes a torque screwdriver, silicone lubricant, microfiber cloths, and a moisture meter. Establishing a proactive upkeep schedule will pay dividends in preserving your investment and celebrating a beautiful kitchen for years to come. For more expert tips on selecting the right storage solutions and tools, don’t hesitate to consult detailed guides like this resource on storage upgrade strategies.
Three Surprising Lessons From My Kitchen Remodel Journey
One of my biggest realizations was that even top-tier built-in cabinets need seasonal TLC. I discovered that environmental factors, like humidity swings, can silently undermine your investments—it’s a lightbulb moment that changed how I approach maintenance. Another insight was that proactive adjustments and regular lubrication prevent small issues from snowballing, saving me from costly repairs later. Lastly, embracing modular, adaptable hardware means my storage solutions grow with my needs, turning a static remodel into an evolving, durable system. These lessons taught me that the true power lies not just in design but in ongoing care and environmental awareness, a perspective I wish I adopted sooner.
Tools and Tricks That Keep My Built-Ins Beautiful
Over the years, I’ve curated a toolkit tailored for long-term upkeep—things like a precision torque screwdriver to avoid over-tightening hinges, a moisture meter to catch humidity changes early, and high-quality silicone lubricants that withstand temperature shifts. Pairing these with regular inspections ensures my cabinets stay functional and stunning, preempting seasonal problems. For anyone serious about their remodel, I recommend building a maintenance kit that combines these essentials. It’s a small investment that pays off by preserving beauty and functionality, transforming routine upkeep from a chore into a celebration of craftsmanship.
Embracing Change: How To Watch Your Built-Ins Thrive
Thinking ahead and planning for scalability has been a game-changer. Adjustable shelves, flexible hardware, and smart organization systems mean my storage adapts seamlessly as my lifestyle evolves. Exploring innovative solutions, like pull-out trays or hidden compartments, keeps my kitchen feeling fresh and efficient without major overhauls. Plus, staying informed about future trends—such as smart storage or automation—prepares me to incorporate technology that simplifies maintenance and elevates design. The journey doesn’t end after installation; it’s an ongoing process that transforms your space from good to extraordinary.
Insider Wisdom for Built-In Brilliance
- Don’t dismiss seasonal environmental factors—they silently affect your cabinetry’s lifespan. I learned this the hard way when humidity caused warping, but a few simple adjustments and better material choices made all the difference.
- Regular, proactive maintenance isn’t just about looks; it’s about durability. Using the right tools—like a moisture meter and silicone lubricants—helps catch issues early and keeps everything running smoothly.
- Flexibility in hardware and design allows your storage solutions to evolve with your needs. Investing in modular, adjustable components today means less stress tomorrow when your requirements change.
- Being curious and resourceful unlocks new possibilities. For example, exploring innovative storage ideas can turn a basic cabinet into a hidden powerhouse of organization, like this smart storage guide suggests.
- Don’t forget environmental resilience—choosing materials and installation techniques that withstand climate swings will save you headaches and cost in the long run. This awareness ensures your remodel remains stunning season after season.
Tools That Turn Maintenance From Hassle to Habit
Investing in quality tools really transforms maintenance routines. A high-quality cordless drill with precise torque settings, a microfiber cloth that doesn’t scratch surfaces, and a reliable moisture meter are my essentials. These empower me to perform quick, effective checks—all of which extend the life of my cabinetry and keep everything looking pristine. Consider building a dedicated maintenance kit, and set seasonal reminders to inspect hinges and seals. It’s not just upkeep; it’s preservation—a practice that sustains both form and function for years.
Plan for Growth and Innovation
My approach to built-ins now emphasizes flexibility. Adjustable brackets, modular storage units, and smart organizational accessories ensure my kitchen adapts effortlessly to my evolving needs. Staying informed with ideas like hidden charging stations or pull-out spice racks, as discussed in this guide, makes future upgrades simple and stylish. The key is designing with expansion in mind—so your beautiful kitchen continues to serve you well over the years.
Shape Your Future with Confident Steps
The true secret to a long-lasting, functional built-in kitchen is ongoing attention paired with smart choices. Regular maintenance, environmental awareness, and embracing innovative solutions keep your space timeless. Remember, each season offers a chance to refresh your setup—and with the right mindset, you can prevent small issues from becoming big problems. Are you ready to commit to caring for your remodel and watch it thrive year after year? Your best kitchen is only a proactive step away.
What’s the one maintenance tip you wish you had known when you started your built-in project? Share below—I’d love to hear your stories and tips!
,