Why Your Pantry Shelves Sag and the Plywood Thickness That Fixes It
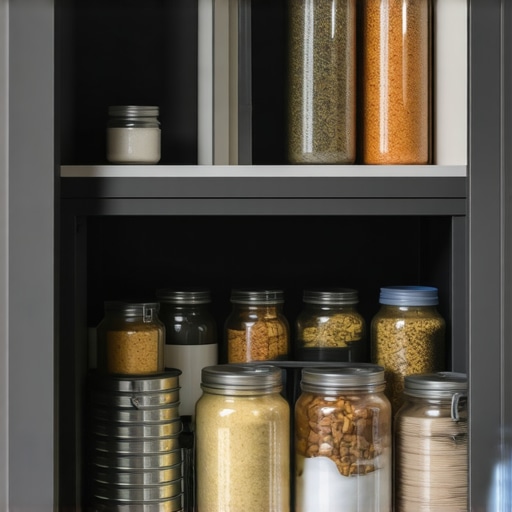
I remember the first time I reached for a can of soup on my pantry shelf, only to find my perfectly neat storage space sagging under the weight, the wood bowing just enough to make me worry about a shelf collapse. It was a lightbulb moment—those shelves are more than just decorative; they’re structural elements that need proper support to stay functional and safe. If your pantry shelves are starting to sag, it’s not just an eyesore; it’s a warning sign that your storage setup isn’t holding up to daily use.
Why Shelf Sagging Is More Than Just a Cosmetic Issue
Shelf sagging happens when the materials can’t bear the weight of your stored items over time. Often, this is due to using insufficiently thick plywood or flimsy construction techniques. I made the mistake early on of believing that a standard 1/2-inch plywood would do the trick—until I realized that heavier items, like bulk food containers or kitchen gadgets, started to bend the shelves downward. This isn’t just about aesthetics; sagging shelves can compromise your entire storage system, cause potential falls, or even damaging what’s stored.
Fortunately, the fix isn’t complicated once you understand the role of plywood thickness and proper support methods. I discovered that upgrading to thicker plywood made a significant difference, especially if you choose the right grade and thickness for your specific needs. This simple change can ensure your shelves stay level, sturdy, and safe for years to come.
Is Reinforcing Your Shelves Actually Worth the Effort?
The skepticism is real—I once doubted whether a thicker plywood would truly make a difference, underestimating the power of proper support. The early mistake I made was not researching the plywood grade and thickness that’s best suited for load-bearing shelves. After some trial and error, I found that using 3/4-inch plywood, especially when combined with additional support brackets, dramatically improved shelf durability.
If you’re tired of having your storage bags and cans bowing your shelves, keep reading. I’ll share the specific plywood thickness that fixes this problem reliably, backed by expert advice from [Artisan Cabinetry](https://artisancabinetworkz.com/the-plywood-grade-test-how-to-spot-voids-before-your-shelves-bow). Once you get your support system right, you’ll be surprised at how much more functional and long-lasting your pantry becomes.
Now, let’s move from the why to the how—here’s what you need to do next to stop your shelves from sagging permanently.
Start with Precise Measurements and Material Selection
Before you pick up that plywood, measure your shelves and evaluate the weight they need to support. I remember my first attempt—assessing a sagging shelf under the weight of canned goods—was messy, with tape measure in hand and drywall dust everywhere. I opted for 3/4-inch plywood, which is significantly sturdier than the standard 1/2-inch and provides better support for heavy loads. When selecting plywood, choose high-grade, void-free sheets to prevent weak spots that could cause future sagging. Consider also the grain direction; running plywood sheets perpendicular to the shelf edges adds extra strength, much like the reinforcement seen in [custom cabinets](https://artisancabinetworkz.com/transform-your-kitchen-with-custom-cabinets-expert-guide-for-2025).
Many homeowners believe that installing custom cabinets or built-ins automatically guarantees a flawless kitchen. However, a common mistake is assuming that one size fits all, ignoring the nuances of space, style, and long-term usability. For instance, opting for overly elaborate storage solutions without considering your cooking habits can lead to clutter and frustration. Experts emphasize the importance of tailoring storage to your lifestyle, which you can explore further in [expert tips on selecting storage solutions](https://artisancabinetworkz.com/expert-tips-on-selecting-storage-solutions-for-a-perfect-kitchen-upgrade). Another misconception is that high-end materials always translate to better durability; in reality, proper installation and support are often more critical than the material choice. The *hidden trap* here is neglecting support structures, which can cause cabinets to sag or doors to misalign over time. Moreover, many assume that built-ins can be added after the remodel for convenience, but integrating storage early in the design phase ensures seamless aesthetics and functionality, as discussed in [creating seamless kitchen remasters](https://artisancabinetworkz.com/creating-seamless-kitchen-remasters-with-built-in-storage-solutions). Advanced homeowners might question whether standard sizes truly maximize space or if custom solutions provide real advantages. The answer involves understanding your specific needs, like space for bulk items or appliance integration, which pushes beyond typical assumptions. Research from the National Kitchen and Bath Association indicates that customized approaches increase user satisfaction and long-term satisfaction. Don’t fall into the trap of wishing for a perfect, one-size-fits-all fix; instead, focus on *how* your storage solutions serve your lifestyle best. Have you ever fallen into this trap? Let me know in the comments. Upgrading your kitchen storage isn’t just about adding space—it’s about creating a system that works for you, ensuring your remodel is a wise investment rather than a missed opportunity.Achieving a beautiful and functional kitchen doesn’t end once the remodel is complete. Maintaining your custom cabinets, built-ins, and storage systems ensures they remain pristine and effective for years. I personally rely on specific tools and methods that make upkeep straightforward and reliable, saving me time and preventing costly repairs down the line.
For instance, I swear by the use of a high-quality cordless electric drill with specialized bits for tightening hinges and hardware periodically. The **DeWalt DCD996** has proven durable and precise, allowing me to perform quick adjustments without stripping screws or damaging wood. Regularly tightening hinges prevents misalignments that can lead to doors sticking or squeaking—common issues over time.
Another essential tool is a microfiber dusting cloth combined with a gentle wood cleaner like **Anthony’s Dust & Shine**. I make it a habit to wipe down surfaces weekly, which prevents dust buildup that can hamper the operation of hinges and sliding mechanisms. For delicate painted surfaces, I prefer using a soft-bristled brush to get into tight corners, especially around crown molding or inside custom cabinet niches.
Software plays a surprisingly vital role too. I rely on **SketchUp** for visualizing adjustments before making them. Whether I want to modify a built-in shelf or plan for future expansion, the ability to simulate changes minimizes trial-and-error and helps plan for support reinforcements. Predicting long-term needs can save money and prevent premature sagging or hardware failure.
Looking ahead, I believe the trend is toward smart maintenance solutions. Imagine installing sensors in critical support points that notify you when tension or alignment shifts beyond optimal thresholds. While this isn’t commonplace yet, advancements suggest it’ll be the future of long-term kitchen management.
How do I keep my storage functional over time? The key is proactive care. Schedule quarterly inspections to tighten hardware and examine support brackets, especially in high-use areas. Also, routinely inspect the integrity of support structures—like the plywood behind shelves—by gently pressing on surfaces to detect soft spots or potential sagging. Incorporate these checks into your regular cleaning routine, and you’ll extend the lifespan of your investments.
For a practical starting point, try upgrading your hinge adjustment method: use a torque driver set to manufacturer-recommended settings to avoid over-tightening, which can strip screw holes. This simple change can preserve your cabinets’ structural integrity and ensure smooth operation for years. Remember, a little maintenance now saves you from major repairs later. Dive into your toolkit today and set the schedule for regular upkeep—your future self will thank you.
Lessons That Transformed My Approach
One of the most eye-opening lessons I learned was the importance of specific plywood grades in supporting weight, which has saved me from countless sagging shelves. I discovered that relying solely on standard 1/2-inch plywood often leads to future issues, and upgrading to 3/4-inch measures provides peace of mind and durability.
Another insight was understanding the grain direction’s role in strength. Running plywood sheets perpendicular to the shelf edges creates a sturdier base, a trick I wish I knew from the start. This small detail drastically extends the life of my pantry storage.
Personally, I underestimated the value of support brackets—simple metal braces can make the difference between a sagging shelf and a stable, long-lasting solution. Incorporating these reinforcements early saved me time and money on future repairs.
Lastly, I’ve realized that precise measurements and planning, combined with quality materials, form the backbone of a support system that truly stands the test of time. Investing time in this process has made my kitchen remodel more satisfying and functional than I ever imagined.