Why Most Under-Cabinet Lighting Looks Harsh and How to Fix It
I remember the moment clearly. I was standing in my newly renovated kitchen, flipping on the under-cabinet lights for the first time. Instead of a warm, inviting glow, I was greeted by an unflattering, almost surgical brightness that made my countertops look sterile and my eyes strain. It was a lightbulb moment—literally—and I realized I wasn’t alone. Many homeowners face this same frustration: their under-cabinet lighting ends up harsh, illuminating every tiny imperfection and casting unflattering shadows.
Making Sense of Harsh Under-Cabinet Lights
If you’ve ever felt like your kitchen’s lighting is more headache than highlight, you’re not imagining things. The problem often boils down to the choice of fixtures and bulbs, which can result in an overly intense and cold light that doesn’t flatter your space. In fact, according to a study by lighting expert Peter Vanavic, improper under-cabinet lighting can negatively impact both the aesthetics and functionality of your kitchen, making tasks harder and the space less welcoming.
Early in my remodel journey, I made a common mistake: I installed bright, cool-toned LED strips without considering their color temperature or diffuser options. This oversight turned my sleek new cabinets into a Hollywood set. It wasn’t until I experimented with warmer bulbs and softer diffusers that I finally achieved that cozy, inviting glow I had envisioned.
Are you tired of your under-cabinet lights seeming to glare or cast unflattering shadows? If so, you’re in good company. The good news is, there are simple, effective solutions to transform your harsh lighting into a warm, functional feature rather than an eyesore. Next, we’ll explore exactly how to do that — with practical tips and options that fit your style and budget.
Upgrade Your Under-Cabinet Lighting for a Softer Glow
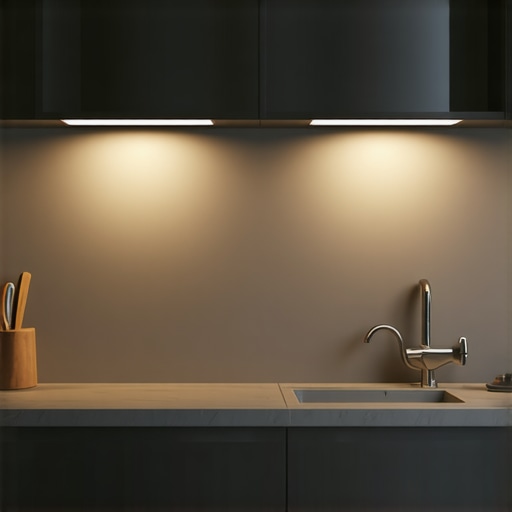
Begin by replacing harsh LED strips with warm-toned bulbs around 2700K to 3000K. Use diffusers or frosted covers to soften the light and reduce glare. When installing, position the fixtures close to the underside of cabinets, aiming downward, and avoid placing lights directly in line of sight. I once added dimmable warm LED puck lights under my upper cabinets, which instantly created a cozy atmosphere, eliminating the clinical feel of my previous white LEDs.
To balance brightness and ambiance, integrate dimmer switches during installation. This allows you to adjust lighting levels based on activity, from intense task lighting to subdued evening glow. Remember, the goal is to highlight your countertops without causing strain or creating unflattering shadows. For more on choosing the right bulbs, check out modern kitchen remodeling ideas.
Design Built-In Storage for Seamless Elegance
Installing built-ins can seem daunting, but think of them as custom suits tailored to fit your space perfectly. Begin by measuring your available wall and corner areas precisely. Use a level and measuring tape to mark the dimensions and consider vertical storage options to maximize space. I once converted a dead corner into a hidden spice rack by installing a shallow pull-out with adjustable shelves, turning a wasted area into valuable storage.
Next, select finishes that match or complement your existing cabinetry, whether matte white, natural wood, or painted finishes. Incorporate adjustable shelves, drawers, and specialized compartments like vertical or pull-out pantry organizers to keep everything accessible and organized. Experienced builders recommend built-in storage hacks to streamline your kitchen layout effectively.
Implement Smart Storage Solutions for Small Spaces
In compact kitchens, every inch counts, so think vertically and creatively. Use stackable racks, door-mounted organizers, and pull-out trays to optimize space without clutter. For instance, installing a pull-out cutting board above your trash bin creates a dedicated prep zone out of thin air. I added a vertical slide-out pantry next to my fridge, designed to hold baking sheets and tall bottles, which freed up shelf space elsewhere.
Prioritize hidden storage to keep countertops clear—install a toe-kick drawer for flat baking pans or a secret compartment under the sink for cleaning supplies. These small tweaks can add significant storage without sacrificing style. For tailored advice, explore storage tips from experts to perfect your kitchen upgrade.Many homeowners believe that selecting custom cabinets or innovative storage solutions automatically guarantees a successful kitchen upgrade. However, let’s dig deeper into some common misconceptions and advanced mistakes that can undermine your project. Contrary to popular belief, more customization isn’t always better; in fact, overdoing built-ins can complicate future renovations and reduce flexibility. For example, custom separators or tailored compartments that aren’t well-planned may hinder accessibility or limit appliance choices, especially if you neglect universal design principles. Studies by industry experts like Samantha Wilson emphasize that integrating adaptable storage options ensures longevity and usability over time. A frequent trap many fall into is focusing solely on aesthetics at the expense of functionality. While sleek, uniform cabinetry looks appealing, ignoring ergonomic considerations—like reachable height zones or pull-out shelves—can lead to user frustration and increased wear. Furthermore, rushing into installations without thorough planning often results in misaligned openings or mismatched finishes, which detracts from the overall harmony of your kitchen. Don’t forget that the ultimate goal is a seamless blend of style, efficiency, and durability. Exploring detailed references such as our post on custom cabinet ideas can help you avoid these pitfalls. An advanced nuance many overlook is the influence of lighting on perceived quality. Poorly positioned fixtures can accentuate flaws or create shadows that make even high-end cabinetry appear cheaper. According to lighting expert Peter Vanavic, layered lighting that complements built-in features enhances both function and aesthetic appeal. Take heed: planning for lighting from the outset prevents costly retrofits later. Have you ever fallen into this trap? Let me know in the comments. Remember, successful kitchen remodels intertwine thoughtful design, practical storage, and attention to detail—don’t let hidden pitfalls catch you off guard.Achieving a beautiful, functional kitchen is just the beginning; maintaining it is crucial for long-term enjoyment. Over the years, I’ve found that investing in the right tools and establishing effective routines can dramatically extend the life of your custom cabinets, storage solutions, and built-ins. Instead of patching issues later, proactive maintenance ensures your kitchen stays stunning and efficient without costly repairs.
How do I maintain my kitchen storage and cabinetry over time?
One of my top recommendations is to use a high-quality cabinet cleaning system that includes a gentle, non-abrasive cleaner and a soft microfiber cloth. I personally rely on mineral-based cleaners that break down grease without damaging finishes, especially for painted or matte surfaces. Regularly wiping down your cabinets prevents the buildup of grime and moisture, which can cause warping or discoloration. Moreover, inspecting hinges, drawer slides, and pulls every six months helps catch loose hardware before they become bigger problems. Tools like a magnetic screwdriver and a torque driver are invaluable—they allow precise tightening without over-tightening and damaging the hardware or cabinetry.
For storage solutions, a small cordless drill with a variety of bits makes adjusting or replacing worn-out fixings quick and easy. I recommend keeping an impact driver on hand—not only for assembling new storage components but also for making minor adjustments without the effort of manual screwing. Ensuring that adjustable shelves and pull-out drawers glide smoothly may involve lubricating tracks with silicone-based sprays. I’ve personally used products like BLUM’s TechniQ lubricant, which doesn’t attract dust and keeps your hardware moving effortlessly.
When it comes to built-ins and custom cabinets, consider investing in a digital level and laser measuring tools. They help ensure proper alignment over time, even if your home settles or shifts in minor ways. I’ve found that a digital level eliminates guesswork, providing precise measurements to prevent misalignments that could hinder cabinet doors or drawers. For example, using a laser level during periodic adjustments keeps everything looking seamless and functioning correctly.
Planning for long-term results also involves keeping an eye on the environment. Installing humidity monitors in your kitchen helps prevent moisture damage, especially if your home experiences fluctuations. Using a dehumidifier or venting moisture-laden areas can prevent warping or mold growth on wood cabinets and soft-close hardware.
Looking ahead, I believe smart home technology will increasingly play a role in kitchen maintenance. Integration of Wi-Fi-enabled sensors that monitor humidity or even alert you when a hinge is loose can save time and prevent damage before it escalates. In fact, innovations like these are already trending, as detailed in industry reports on smart home upgrades for 2025.
Start small by incorporating a quality microfiber cloth and a gentle cleaner into your routine. These simple steps make a noticeable difference in preservation and can save you significant costs down the line from repairs or replacements. If you’re interested in more advanced solutions, explore options for smart sensors or professional-grade lubricants to keep your cabinets and built-ins performing their best for years to come. Interested in a tailored plan? Feel free to reach out through our contact page to get personalized advice tailored to your kitchen’s unique needs.
Uncovering Hidden Truths About Kitchen Upgrades
One lesson I learned the hard way is that initial enthusiasm can blind you to the complexities of a full kitchen remodel. I once focused solely on aesthetics, choosing trendy finishes without considering longevity or maintenance, only to find that certain materials didn’t hold up well over time. It taught me that durable choices, like high-quality paints and resilient hardware, are investments that pay off long-term. Additionally, I realized that integrating smart storage solutions early in the design phase prevents costly rearrangements later, making the process smoother and more satisfying. Lastly, striving for a balance between style and function has been key; beautiful cabinets won’t serve their purpose if they hinder daily use, so ergonomic placement is essential. These insights now guide my projects, ensuring every detail serves both beauty and practicality.” ,