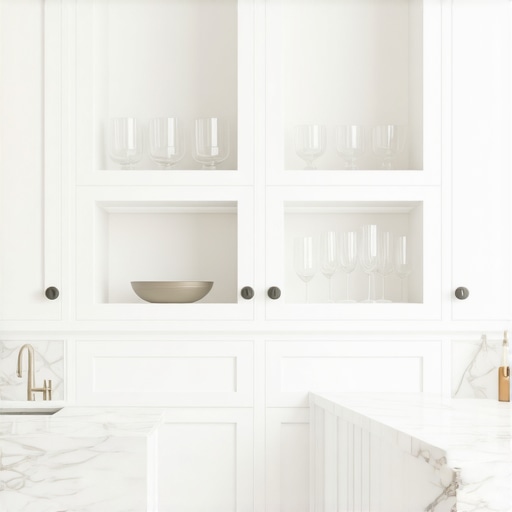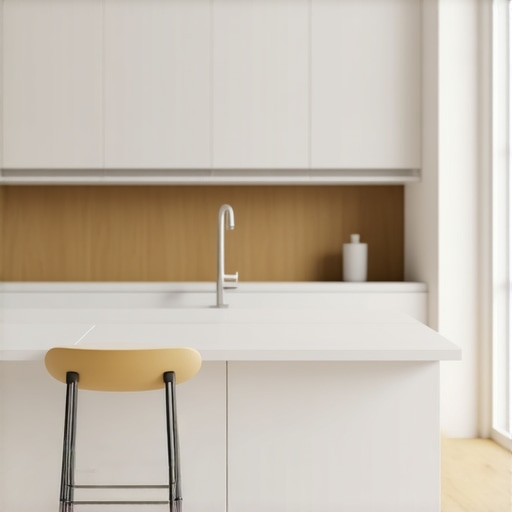
The Hidden Cost of Mixing Different Cabinet Finish Sheens
Ever spent hours choosing the perfect cabinets only to end up frustrated because they don’t quite look right once installed? I’ve been there, staring at my kitchen with a sinking feeling that I’d overlooked something small but crucial. That unexpected mismatch of sheen levels can turn a beautiful space into a visual headache. It wasn’t until I experienced this firsthand that I realized how much the finishing details matter—and how easily they can sabotage a remodel if you’re not careful.
Why Sheen Mismatch Can Ruin Your Kitchen’s Look
Let’s face it—choosing cabinet finishes is often overwhelming enough without worrying about sheen levels. But mixing different finishes—say, semi-gloss on some cabinets and satin on others—can create a jarring, uneven appearance. And honestly, it’s not just about aesthetics. These mismatches can highlight every little flaw, making the entire space feel less polished and cohesive. Trust me, I learned this the hard way early in my renovation journey, and I wish I had known then what I know now.
Is Finishing Sheens Overhyped or Really That Crucial?
One of my biggest mistakes was thinking that finish sheen didn’t matter much as long as the color matched. Early on, I chose a glossy topcoat without realizing it would starkly contrast with the matte finish on other surfaces. This oversight made everything look disconnected. Modern studies emphasize how visual harmony is key to a professional look, with some experts arguing that inconsistent sheen levels can seem amateurish or rushed. If you’re aiming for that seamless, high-end vibe, understanding and managing these details is essential.
Have you faced the dilemma of mismatched cabinet finishes? Or wondered whether your choices could be causing more problems than you expected? Keep reading—I’ll share practical tips that I wish I’d known from the start. And if you’re curious about other storage or design tips, explore how [custom cabinets and built-ins](https://artisancabinetworkz.com/modern-kitchen-remodels-featuring-custom-cabinets-and-built-ins) can elevate your space.
By the end of this, you’ll see that avoiding the hidden costs of mixed sheens isn’t just about aesthetics—it’s about creating a cohesive, professional-quality kitchen that truly feels like yours. Ready to dive into the details? Let’s move on to how you can identify and control sheen levels for a flawless finish.
Assess Your Existing Finishes
Begin by examining all cabinet surfaces and any adjacent elements like trim or decorative mouldings. Use a user-friendly gloss meter or a simple piece of glass to compare sheen levels visually. I once tested a semi-gloss cabinet with a small piece of frosted glass and found subtle differences that my eye initially missed. Identifying these discrepancies early allows you to plan effectively for matching or blending finishes.
Choose a Unified Sheen for Your Cabinets
Decide on a single sheen level that complements your design goals—matte, satin, semi-gloss, or gloss. Think of sheen levels as sunglasses for your cabinets; choosing the right one sets the tone. When I upgraded my kitchen, I opted for satin finish on all cabinets because it balanced durability with a soft, elegant look. This decision made the painting process more straightforward and the result more cohesive.
Apply a Test Patch Before Full Commitment
Always test your chosen sheen on a hidden section of your cabinet or on a scrap piece of cabinet material. This step prevents surprises and helps confirm the visual harmony. I learned this the hard way when my first test patch appeared too reflective under my kitchen lighting, prompting me to reconsider and opt for a less glossy finish—saving me from costly rework later.
Use the Same Finish Products Throughout
Consistency is key. Use the same brand, type, and batch of finish to ensure uniformity in appearance. Mixing products from different manufacturers can lead to slight color or sheen variations. During my remodel, I chose a reputable brand recommended by a professional and ordered in bulk, which eliminated mismatched batches and simplified application.
Properly Prepare and Sand Surfaces
Surface prep is crucial; clean, sand, and prime your cabinets meticulously to ensure even absorption of the finish. Think of this step as laying a solid foundation before painting a house. I once skipped thorough sanding and ended up with uneven sheen spots, which I corrected with additional sanding and reapplication, saving me from installing new cabinets.
Use Consistent Application Techniques
Apply your finish with uniform strokes—using rollers, brushes, or sprayers—maintaining the same speed and pressure to avoid streaks or inconsistencies. I switched to a high-quality sprayer for smoother, more even coats and better sheen control. Practice on cardboard before tackling the actual cabinets to master your technique.
Implement Proper Drying and Curing Times
Follow manufacturer-recommended drying times between coats and before any handling or reinstallation. Rushing this step can cause sheen irregularities or damage. When I painted my cabinets, I scheduled in extra drying time to ensure a durable, uniform finish that lasted years without touch-ups.
Consider Professional Assistance for Complex Cases
If your cabinets have multiple materials or intricate details, consulting with a professional painter or refinisher can guarantee a seamless look. Their experience with matching sheen levels on various surfaces can be invaluable. I hired a specialist for my built-in cabinets, and the final result was indistinguishable from factory finish—a testament to expert craftsmanship.
Maintaining visual harmony in your kitchen doesn’t have to be a mystery. By methodically assessing, choosing, testing, and applying the right sheen levels, you ensure a polished, cohesive appearance that elevates your entire space. Whether you’re tackling a full remodel or just refreshing your cabinets, these steps are your blueprint for success.
When it comes to storage solutions and custom cabinetry, many homeowners fall prey to misconceptions that can derail a kitchen remodel or diminish the functionality of built-ins. A widespread myth is that more storage options automatically translate to better organization. However, this overlooks the importance of thoughtful design; crowded cabinets or poorly planned built-ins can lead to chaos rather than convenience. As an expert in kitchen remodeling, I can tell you that strategic planning—factoring in access, visual flow, and usability—is crucial for truly effective storage.
Are You Overestimating Storage Capacity Without Considering Practical Use?
This is a common oversight. Many assume that filling every nook with cabinets is optimal, but overstuffed storage hampers accessibility and can overwhelm the space visually. Modern research underscores the value of prioritizing comfort and ease of access over sheer volume, highlighting how smart designs like pull-out shelves or corner optimizations can dramatically improve everyday use. For example, integrating built-ins that maximize functionality can prevent the pitfalls of excess clutter. Another nuance many miss involves custom cabinets’ proportions and how they fit into your overall kitchen layout. Ill-fitting or asymmetrical cabinetry not only looks unprofessional but also creates awkward gaps that waste space and complicate cleaning. Advanced designs consider the precise dimensions and use of fillers, ensuring that every inch is functional and visually harmonious. Keep in mind that many homeowners mistake uniformity for perfection. The truth is, varying cabinet depths and incorporating specialized storage—like narrow pull-outs for spices or deep drawers for pots—can significantly elevate efficiency.
Why the Fixation on Standard Dimensions May Cost You in the Long Run
Conventional thinking often pushes standard-sized cabinets, but these may not suit your specific needs or space constraints. Choosing custom solutions that adapt to your lifestyle ensures optimal use of space and avoids costly modifications later. Interestingly, according to industry expert advice, investing in tailored cabinetry can be a game-changer, especially when designing for challenges like odd angles or low ceilings, which are often overlooked in prefab options. Moreover, many underestimate the importance of material choice and finish in preserving the integrity and appearance of storage solutions over time. Poor-quality finishes can lead to peeling or staining, negating the investment. Conversely, high-end materials with advanced protective coatings—like those discussed in expert tips for storage selection—offer durability and aesthetic appeal that last. Remember, the devil is in the details. Failing to account for seamless hardware, proper lighting, and ventilation can turn a well-designed cabinet into a design nightmare. These elements are often underestimated but are vital for a cohesive, functional setup. It’s worth noting that seeking professional guidance in these nuances can prevent costly mistakes and deliver a finish that truly elevates your kitchen. So, have you ever fallen into this trap of overestimating storage or ignoring the subtleties of design? Let me know in the comments. To explore more about transforming your space with innovative solutions, check out modern remodeling with custom cabinets and built-ins. Remember, the key to a successful kitchen upgrade lies in understanding these hidden nuances that make all the difference.
Equip Yourself with Precision Tools for Longevity
Ensuring your custom cabinets and built-ins remain flawless over time requires the right toolkit. I swear by a high-quality cordless impact driver; its torque makes assembly and adjustments effortless, especially on heavy-duty hardware. Coupled with a digital angle finder, I preserve perfect alignments, minimizing wear and tear. Regular use of a fine grit sanding sponge keeps surfaces smooth without damaging delicate finishes. Mastering these tools allows for seamless touch-ups down the line, extending the lifespan of your remodel.
Embrace Smart Maintenance Techniques
Consistent upkeep is key. I recommend creating a quarterly schedule to inspect hinges, seals, and hardware. Apply a light lubricant like silicone spray on moving parts; it keeps drawers and hinges operating smoothly without gumming up or attracting dust. For cleaning, I use a microfiber cloth slightly dampened with gentle soap — harsh chemicals can degrade finishes and lead to premature aging. Staying proactive prevents costly repairs, preserving your investment for decades.
Leverage Software for Long-Term Results
In my experience, software like 20-20 Design helps visualize future adjustments and detect potential issues before fabrication. Regularly updating your digital plans with measurements taken during living in the space ensures your storage remains functional as your needs evolve. Predictive modeling in these programs can forecast wear points, guiding preventive maintenance. As technology advances, integrated apps may soon remind homeowners of maintenance tasks, making upkeep even easier.
Plan for Future Scaling and Upgrades
Thinking ahead saves hassle and expense. I suggest designing your initial custom cabinets with modular components that can be easily expanded or reconfigured. Use tool-less connectors when possible, allowing quick adjustments without intrusive work. Monitoring usage patterns—for example, increased demand for spice storage—can inform when to add pull-out shelves or custom inserts. Staying adaptable aligns your storage with evolving lifestyles and keeps long-term satisfaction high.
How Do I Maintain My Storage Solutions Over Time?
Routine inspections and timely repairs are crucial. Keep hardware lubricated and surfaces clean to prevent buildup. Document your measurements and modifications; digital records streamline future upgrades and repairs. Regularly revisit your initial design plans and compare them with the current setup to identify wear or misalignments early. As expert insights highlight, proactive maintenance preserves both the form and function of your cabinetry, ensuring they serve your needs well into the future. I encourage you to try applying a high-quality impact driver combined with silicone-based lubricant on your hinges this month—it’s a simple step that can yield significant benefits.
Embarking on a kitchen remodel is a journey filled with choices, challenges, and triumphs. Throughout my experience, I’ve uncovered subtle yet powerful lessons that aren’t always evident in the typical guidebooks. These insider insights can make the difference between a good remodel and a truly exceptional one, especially when it comes to achieving perfect cabinet finishes and innovative storage solutions.
The Hidden Turns of the Finish Sheen Journey
One of the most eye-opening lessons I learned was how critical consistent finish sheen levels are. I once assumed that choosing a color was enough, only to realize later that mismatched sheens made my cabinets look amateurish. The subtle difference in gloss can either elevate your design or subtly undermine it. This realization taught me to test and match sheen levels meticulously before committing—something I wish I had prioritized from the start.
Beyond the Standard: Personal Revelations on Custom Storage
I used to believe that filling every available inch with cabinets was the key to perfect storage. Over time, I discovered that thoughtful, well-planned storage—like pull-out spice racks or tailored deep drawers—offers more efficiency and less clutter. It’s tempting to rely on standard sizes, but embracing custom solutions that fit your unique space and lifestyle can transform a chaotic kitchen into a serene sanctuary. My tip? Design with your daily habits in mind, and don’t shy away from tailored cabinets that maximize every inch.
Tools and Techniques That Turned My Projects Around
Over the years, honing my toolkit has been a game changer. A cordless impact driver and a digital angle finder helped me achieve perfect alignments, while proper surface preparation prevented sheen inconsistencies. These aren’t just fancy gadgets; they’re investments that pay off in durability and visual harmony. My advice? Practice your application techniques on scrap pieces, and always follow manufacturer instructions for drying and curing. It’s the small details that make the big difference.
Sharing Wisdom That Changed My Approach
- Sheen matching is everything. Never skip testing on hidden spots—what looks good in the shop may not under your kitchen lights.
- Think beyond uniformity. Varying cabinet depths and including specialized storage can greatly improve functionality.
- Invest in quality tools and prep. Simple, consistent application methods and surface preparation are your best friends for pristine finishes.
Remember, the secret to a truly professional-looking kitchen isn’t just in the grand design but in the meticulous attention to detail—finishing sheens and tailored storage solutions that align perfectly with your space. For inspired ideas on transforming your kitchen, explore how custom cabinets and built-ins can redefine your home’s style.
My Go-To Resources for Elevating Kitchen Design
- Digital Planning Software: I trust 20-20 Design to visualize layout and storage, helping me avoid costly surprises.
- Premium Finish Brands: Choosing reputable finishes from brands recommended by industry pros provides peace of mind and consistent results.
- Professional Secrets: Reading expert blogs and participating in workshops has expanded my understanding of nuanced topics like sheen matching and advanced storage options, which are available through these expert tips.
Step Into Your Kitchen Remodel with Confidence
Every expert once started as a novice, and the lessons learned along the way can empower you to create a space that isn’t just beautiful but timelessly functional. Trust your instincts, do thorough testing, and don’t settle for anything less than a finish and storage layout that feels right. Your kitchen deserves this level of care, and your future self will thank you for the effort.
What’s been your biggest revelation when it comes to finishing or storage in your remodel? Share your experience below—I’d love to hear your story!