The Toe-Kick Heat Vent Trick for Warm Feet and Hidden Storage
Have you ever stood barefoot in your kitchen, longing for warm toes on a chilly morning, only to realize that cold tile floors are metaphorically freezing your enthusiasm for a remodel? That early morning realization hit me hard—there had to be a better way to keep my feet cozy while also maximizing my storage space. It was a classic case of two problems, one solution, and I was determined to crack the code.
The Lightbulb Moment: Combining Comfort with Clever Storage
One day, as I was fumbling around under the sink trying to find that missing spatula, I stumbled upon an idea from a neighbor’s renovation that stuck with me—that’s when I learned about the Toe-Kick Heat Vent Trick for Warm Feet. Not only did this simple modification say goodbye to icy mornings, but it also opened up a hidden storage space that many overlook—underneath your cabinets and appliances.
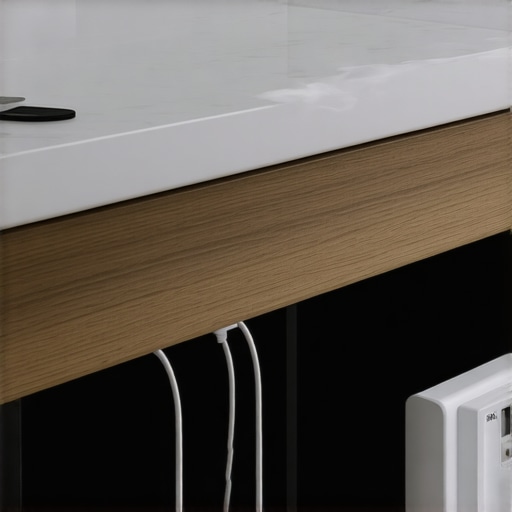
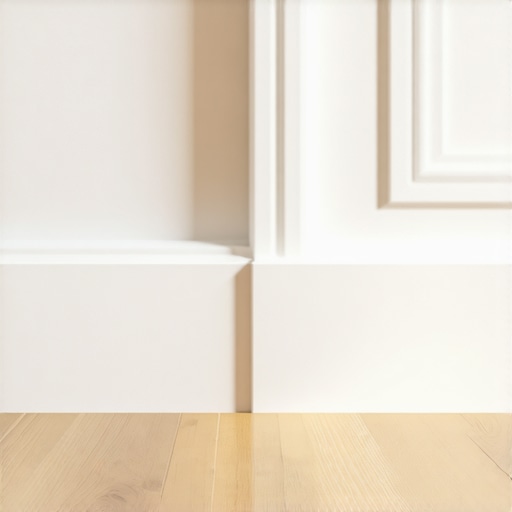
Imagine sneaking a heater behind your toe kick and creating a cozy, tucked-away compartment for bakeware, cleaning supplies, or even pet foods. This dual-purpose hack made me realize how often we ignore the potential beneath our feet, the space that could revolutionize our home’s functionality.
What’s the Point? Why Should You Care About Hidden Kitchen Storage?
Let’s face it—kitchens tend to fill up fast. And if your home is like mine, every square inch counts, especially in smaller layouts or open-concept designs. Maximizing these overlooked spaces offers a strategic way to declutter, improve workflow, and add warmth—literally and figuratively—to your kitchen environment.
Early on, I made the mistake of ignoring these miniature zones, thinking they weren’t worth the effort, only to find clutter spreading across my countertops and corners. Some experts even suggest that smart storage solutions can increase your home’s value and efficiency significantly, making these tweaks well worth the investment (source). Now, I’ll walk you through how to make this hack work for your space and why it’s a game-changer.
Are you tired of cold floors and cluttered counters? Have you faced that persistent challenge of storing bulky kitchen items without sacrificing style? If so, you’re in the right place. Let’s dive into the practical steps to turn your kitchen into a cozy, organized haven—where warmth meets clever design.
.
Plan Your Space Like a Pro
Start by measuring your kitchen’s dimensions precisely, including wall lengths, ceiling height, and existing obstacles. Use painter’s tape to outline potential built-in zones, visualizing how each will integrate into your current layout. I once spent an afternoon sketching these outlines on my floor with masking tape, which revealed underused corners perfect for custom cabinets—saving me from costly mistakes later.
Choose the Right Materials and Styles
Select durable, moisture-resistant materials like plywood or MDF with a water-resistant veneer for areas prone to humidity. Match your cabinetry’s style with existing decor—modern, rustic, or transitional—to create cohesion. When I upgraded my kitchen, I opted for matte finish cabinetry with sleek metal hardware, which seamlessly blended with my appliances and gave the space a cohesive look.
Work with Skilled Craftsmanship
Partner with a cabinetmaker experienced in creating bespoke built-ins. Provide detailed sketches or CAD plans highlighting your desired storage features, such as hidden drawers or pull-out trays. My own project involved working closely with a local craftsman, who suggested adding soft-close mechanisms to avoid slamming doors and integrated LED lighting for better visibility. This collaboration ensured the final product was tailored perfectly to my needs.
Optimize Storage with Smart Features
Incorporate features like pull-out shelves, Lazy Susans, or vertical dividers to maximize every inch. For example, I added a pull-out spice rack inside a narrow cabinet, which freed up counter space and kept everything accessible. Think of these features as your home’s personal organizing assistants—every inch working in your favor.
Install and Finish with Precision
Ensure installation is level, and all doors and drawers align perfectly—use a carpentry level and measuring tape. Seal exposed surfaces with paint or lacquer to protect against moisture and stains. When installing my custom pantry, I double-checked the alignment multiple times, which prevented future misalignments and maintained a sleek, seamless appearance.
Integrate Built-Ins with Existing Structures
Create an airtight integration by scribing moldings and fillers precisely to match uneven walls or ceilings. Use template jigs for repetitive cuts like shelf pinholes, ensuring uniformity. I once had to scribe a filler strip along a crooked wall to finish my cabinet face, and the neatness of the result was worth the extra effort.
Finish with Personal Touches
Add decorative hardware, lighting, or painted accents to match your style and enhance functionality. When I installed brushed nickel handles and under-cabinet lighting, my kitchen felt both modern and inviting. Remember, the small details make a big difference in turning a functional space into a beautiful one.
Many homeowners and designers fall prey to misconceptions that hinder optimal kitchen remodeling. Among the most pervasive is the belief that standard cabinetry or off-the-shelf solutions are sufficient for every space. While convenient, these generic options often overlook the nuanced needs of modern kitchens—especially when it comes to maximizing space and functionality. Contrary to popular belief, custom-built storage solutions can provide tailored benefits that generic options simply can’t match.
One common myth is that more storage always means bulkier, less attractive cabinetry. In reality, sophisticated custom cabinets can be designed to seamlessly blend with your aesthetic while hiding clutter behind sleek, integrated doors. This approach not only preserves style but enhances accessibility and organization. Don’t dismiss this nuance—it could revolutionize your workflow and visual harmony.
Another misconception is that built-ins are only suitable for high-end renovations. Yet, built-in storage solutions are accessible for a wide range of budgets and can be integrated into existing layouts without a total overhaul. The key lies in understanding the advanced techniques used by expert craftsmen to optimize every nook and cranny, transforming overlooked corners into valuable storage hubs.
Why do many get it wrong when planning storage for their kitchens?
A significant pitfall is underestimating how small adjustments can lead to big gains. For instance, incorporating pull-out trays, vertical dividers, and hidden drawers can drastically improve space utilization without sacrificing style. An expert tip is to measure not just the space but the types of items you need to store, then design accordingly.
Many assume that all storage solutions are created equal, but in practice, the *nuance* lies in details such as drawer slide quality, material choices, and the integration of smart features. Cutting corners here can lead to frustrations down the line—like sticky drawers or cabinets that won’t close properly. For savvy homeowners, understanding these nuances can mean the difference between a functional kitchen and a storage nightmare.
There’s also a common myth that once installed, storage solutions require little maintenance. Yet, regular upkeep—like cleaning tracks, checking for hardware wear, and reapplying protective finishes—are vital for longevity. For instance, using materials resistant to humidity and heat, such as specific plywood grades, can withstand kitchen conditions better, reducing future repairs or replacements. A good resource for selecting durable materials is the expert guide on storage materials.
Lastly, advanced remodelers know that the true power of custom storage lies in planning for future needs. Incorporating adjustable shelves or modular units allows your kitchen to evolve with your lifestyle. This proactive approach ensures your investment remains smart and adaptable over time.
So, what’s the bottom line? Don’t let myths and misconceptions limit your kitchen’s potential. Delve deeper into the nuances of innovative storage design and consider advanced techniques that go beyond the basics. Your dream kitchen isn’t just about looks—it’s about smart, personalized function that makes everyday life easier. Have you ever fallen into this trap? Let me know in the comments.
Ensuring your kitchen storage solutions stay functional and attractive over time requires more than just initial craftsmanship. Having the proper tools and maintenance methods in place can significantly extend the lifespan of your custom cabinets and built-ins. One of my go-to tools is a high-quality detailed wood cleaner, such as Howard Wood Clean & Refresh, which helps maintain the finish without stripping away protective layers. Regularly inspecting hardware like hinges and drawer slides using a magnetic screwdriver makes it easier to spot loose screws before they cause misalignment or damage, saving you time and costly repairs down the line.
For more intricate adjustments, I rely on a Fein MultiMaster oscillating tool equipped with fine sanding pads to gently remove any surface grime or minor scratches on the wood. It’s especially useful in tight corners where larger tools can’t reach. When it’s time for a deeper clean, I use a mild vinegar solution diluted in water—avoiding harsh chemicals preserves the integrity of your cabinetry’s finish and keeps everything looking new.
How do I maintain built-in cabinets over time?
Consistent maintenance is key. Develop a routine of visually inspecting for wear and tear, and address issues such as loose hardware or scratches promptly. Using a silicone-based lubricant on hinges and sliders ensures smooth operation and prevents squeaks. Implementing a gentle cleaning schedule, at least biannually, with specialized wood polishes like Miss Mustard Seed’s Milk Paint Furniture Cleanser will help preserve the finish and prevent dust accumulation, which can degrade the wood over years.
Looking ahead, the trend in kitchen remodels is moving toward smart and modular storage systems. Incorporating adjustable shelves and modular units not only adapts to evolving needs but also makes maintenance more straightforward. For example, if a shelf becomes damaged, you can quickly replace it without disturbing the entire unit, thanks to standardized sizing. A smart approach like this aligns with what expert craftsmanship recommends for sustainable design (see here).
Tools I recommend for long-term care
Invest in a quality cordless drill with multiple bits, including countersink attachments, to periodically tighten or replace hardware without damaging the wood. A microfiber cloth with a soft brush attachment is perfect for dusting delicate surfaces. For periodic deep cleans, gentle chemical solutions designed for wood, combined with these tools, ensure your cabinets look pristine for years to come.
Don’t forget a good-quality level, especially when adjusting shelves or door hinges. Calibrating your built-ins periodically maintains a flush, professional appearance. And for future-proofing, consider smart sensors that monitor humidity and temperature, preventing warping or damage due to environmental fluctuations, an innovative step recommended by modern remodeling experts (see more).
I challenge you to implement one of these maintenance routines this month—perhaps scheduling a biannual check or investing in a new tool like a moisture meter. These small steps can save you money and keep your beautiful storage solutions performing flawlessly for years to come. Ready to get started? Your perfect, long-lasting kitchen awaits.
,
The Surprising Lessons That Changed My Approach to Kitchen Storage
- One of my most eye-opening realizations was that even the smallest overlooked spaces—like toe kicks or behind appliances—can be transformed into valuable storage, saving space and adding warmth to your kitchen.
- I learned that embracing custom solutions over generic cabinets not only enhances aesthetics but also ensures every inch serves a purpose, making your kitchen more functional and personalized.
- The importance of collaborating closely with skilled craftsmen became clear—every detail, from soft-close hinges to LED lighting, contributes significantly to the finished look and usability of your built-ins.
- Consistent maintenance and smart upgrades, such as using humidity-resistant materials and periodic hardware checks, extend the lifespan of your investment and keep your kitchen looking pristine over years.
- Planning ahead with adjustable, modular components allows your storage to grow with your needs, making future reconfigurations smoother and cost-effective.
Tools and Resources That Elevated My Kitchen Transformation
- Expert Craftsmanship Guides: I trust resources like creating seamless kitchen remasters to understand how to blend aesthetics with practicality.
- High-Quality Hardware and Materials: Using durable, moisture-resistant materials recommended in innovative storage solutions helps my cabinets stand the test of time.
- Maintenance Tools: A microfiber cloth, a quality drill, and a moisture meter—things I found in< a href="https://artisancabinetworkz.com/maximize-space-with-innovative-storage-solutions-for-every-room" target="_blank" rel="noopener noreferrer">this list—are essential for upkeep and future-proofing.
- Knowledge from Industry Experts: Learning from experts’ tips helps me make informed decisions on where to invest in custom features.
Your Next Chapter in Kitchen Brilliance Starts Now
Transforming your kitchen with clever built-ins and personalized storage isn’t just about aesthetics; it’s about creating a space that adapts to your lifestyle and brings you joy every day. Remember, the journey begins with a single thoughtful step—be it measuring, sketching, or consulting a skilled craftsman. Embrace the process, and your dream kitchen will soon become a vibrant reality. Are you ready to revolutionize your kitchen storage solutions and make every inch count?