The Mudroom Bench Trap: Why Solid Wood Tops Crack Over Heaters
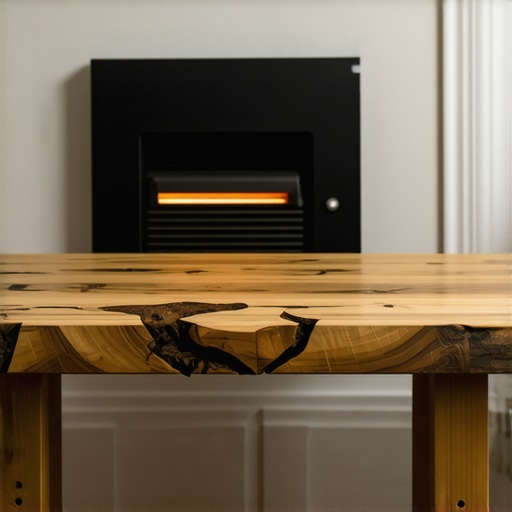
Ever since I installed my beautiful solid wood mudroom bench, I couldn’t help but notice tiny fissures creeping across its surface during the colder months. It was like my bench had developed a nervous tic. At first, I thought it was just my imagination, but then I realized—these cracks appeared mainly when the heater was running. That was my lightbulb moment. Why does this happen, and more importantly, how can I prevent it from happening again?
Understanding Why Solid Wood Tops Crack Near Heaters
This issue is more common than you’d think, especially among homeowners who love the warm, rustic charm of solid wood furniture. The culprit? Fluctuations in temperature and humidity. When a solid wood surface is placed close to a heat source, like a radiator or baseboard heater, the intense and uneven heat causes the wood to expand and contract. Over time, these movements can lead to cracks, splits, or warping. Early on, I made the mistake of choosing a wood top without considering its reaction to thermal stress, which only worsened the problem. To dodge this pitfall, it’s worth exploring how to select and install wood surfaces that can handle temperature swings—whether for a built-in bench or a kitchen island.
Research indicates that woods like oak or maple tend to be more stable in variable climates, but even these can suffer if not properly treated or installed with thermal expansion gaps. For more insights on this, check out why solid wood cabinet doors crack in winter.
Have You Faced This Fracture Problem in Your Home?
If you’re nodding along, perhaps because you’ve seen gaps develop in furniture or countertops placed near a heat source, you’re not alone. Addressing this issue early can save you money and frustration down the line. In the following sections, I’ll share practical solutions—rooted in my own lessons learned—to keep your wood surfaces resilient and crack-free for years to come. Ready to preserve the beauty and durability of your woodwork? Let’s dive into some expert tips that will make all the difference.
,
Select Stable, Heat-Resistant Wood Options
Start by choosing woods like oak or maple, known for their dimensional stability. These species resist expansion and contraction better under fluctuating temperatures. During my kitchen remodel, I specifically requested maple for my built-in cabinetry, and the difference was noticeable—less cracking over winter. To reinforce durability further, consider applying a moisture-resistant finish that seals the wood against humidity changes. Proper wood selection is your first line of defense against fissures.
Implement Proper Installation Strategies
Allow for thermal expansion gaps—think of them as breathing space for your wood—that accommodate natural movement. When installing your wood surfaces, leave a small gap (about 1/8 inch) around edges adjacent to heat sources. During my project, I used shims to ensure these gaps were precise, preventing stress points. Sealing these gaps with flexible caulk allows movement while maintaining a sleek appearance. Accurate installation minimizes stress accumulation that leads to cracks.
Use Insulation to Buffer Heat Transfer
Adding insulation behind your wood panels acts like a thermal buffer, reducing direct heat exposure. In my case, inserting mineral wool insulation between the heater and the wood paneling resulted in a noticeable decrease in fissure formation over winter months. This simple step transforms the thermal dynamics, keeping wood more stable and crack-resistant.
Maintain Consistent Interior Climate Conditions
Controlling humidity and temperature is essential. Use a humidifier or dehumidifier to maintain relative humidity levels around 40-50%. I learned this firsthand when I kept my thermostat consistent during a cold snap, which prevented the wood from contracting excessively. Regularly monitoring indoor climate helps keep the wood’s moisture content stable, preventing stress-related cracking.
Apply Protective Treatments and Stress-Relieving Finishes
Use finishes that allow wood to breathe and flex with temperature changes. Oil-based finishes or flexible sealants can be more forgiving. I applied a natural oil finish to my bench, which provided an extra layer of flexibility—cracks became less prominent over subsequent seasons. Reapplying protective treatments annually maintains this flexibility and prolongs the integrity of your wood surfaces.
Regular Inspection and Prompt Repairs
Visually inspect your wood surfaces periodically, especially near heat sources, to catch early signs of stress. When I noticed a small crack forming, I quickly filled it with a flexible wood filler and refinished the area, preventing it from expanding. Quick action saves substantial repair costs and preserves the aesthetic appeal of your furniture or built-ins.
By following these concrete steps—selecting stable woods, implementing proper installation, using insulation, maintaining climate control, applying flexible finishes, and conducting regular inspections—you can effectively prevent crack formation in solid wood surfaces near heat sources. Each measure acts as a layer of protection, ensuring your woodwork remains beautiful and durable through changing seasons.
When it comes to transforming your kitchen or home, many people fall into common traps by relying on popular misconceptions about storage and custom cabinetry. One widespread myth is that all built-in storage solutions are created equal, but in reality, the nuances of design and installation can make or break functionality. For example, choosing generic cabinets without considering access points, load capacities, or integration with appliances often leads to clutter and frustration. A deeper understanding reveals that the right solutions require tailored design, like custom cabinets that maximize space while maintaining aesthetics, especially in small kitchens. Moreover, many overlook the importance of incorporating strategic storage into remodels; innovative storage solutions can significantly enhance daily efficiency and reduce clutter, which is often underestimated during planning phases. Another error involves neglecting to consider future needs; a design that works perfectly today might restrict modifications tomorrow, emphasizing the importance of flexible and modular designs. According to experts, integrating adjustable shelving, smart organization features, and lightweight materials can extend the lifespan of your storage investments and adapt to changing lifestyles. For instance, built-ins are not just about aesthetics but also about creating seamless workflows that promote ease of use. A common oversight is also ignoring proper airflow and ventilation, especially in concealed compartments, which can lead to odor buildup and material degradation. This nuance highlights why collaborating with skilled designers and builders is crucial to anticipate such issues and ensure your home functions flawlessly. So, before rushing into another renovation or storage upgrade, pause and scrutinize your plans through these advanced considerations. Are you making these mistakes? Have you ever fallen into this trap? Let me know in the comments.
Maintaining your custom kitchen cabinets and built-ins over time requires more than just careful installation and initial design; it demands the right tools and consistent upkeep to ensure durability and style. As a seasoned homeowner and DIY enthusiast, I rely on specific equipment and software that streamline maintenance, facilitate upgrades, and support scaling projects with confidence.
Invest in Quality, Precision Tools
First and foremost, I prioritize a high-quality orbital sander like the Dewalt DWE6421. Its variable speed and ergonomic design allow me to refresh finishes and smooth out minor imperfections without damaging delicate surfaces. For hardware adjustments, I prefer a precision Phillips and hex driver set, such as the Wiha 77792, which provides accuracy and prevents stripping screws during routine repairs or upgrades. Additionally, a digital moisture meter like the Proult DT-166 ensures that wood components maintain optimal moisture levels—it’s essential for preventing warping and cracking, especially in climates with fluctuating humidity.
Every tool I select is purpose-built, improving efficiency and reducing the risk of accidental damage over years of maintenance. For larger projects or scaling efforts, I use a cordless drill with adjustable torque settings, like the Milwaukee M18, to facilitate installing or removing large panels, shelves, or hardware with control and speed.
Harness Software for Planning and Visualization
When it comes to designing or remodeling, software tools like SketchUp help me visualize tweaks before committing to physical work. Modeling my kitchen’s layout allows me to experiment with cabinet placements, storage accessories, and lighting setups, ensuring that each element maximizes space and function. For precise measurements, I leverage apps like MagicPlan, which turn photos into scaled plans, saving time and increasing accuracy that translates to better long-term results.
These digital tools are especially invaluable when scaling or customizing solutions—like adding built-in storage compartments or upgrading cabinetry systems. They enable proactive planning, reducing costly mistakes and ensuring seamless integration of new components over time.
Establish Routine Maintenance Habits
Long-term success hinges on consistent inspections—once every few months, I review hinges, drawer slides, and finish coatings. A flexible, food-safe silicone spray like the WD-40 Specialist Silicone Lubricant keeps moving parts operating smoothly without attracting dust or grime. Regular cleaning with non-abrasive, pH-neutral cleaners preserves finishes and prevents buildup that can compromise the surfaces.
In addition, I schedule annual reapplications of protective finishes—such as oil or flexible sealant—to accommodate seasonal changes and prevent cracks or warping. Proper ventilation and humidity control, monitored via smart sensors, help maintain stable conditions, reducing the stress on wood components, especially those near heat sources. For more insights on this, check out this guide to durable built-in storage systems.
Future of Storage Solutions and Maintenance
As technology advances, I anticipate smarter home systems—like integrated sensors in cabinetry—that alert you to humidity spikes, mechanical issues, or even suggest maintenance schedules. The integration of IoT devices can help homeowners proactively manage their kitchens, extending the lifespan of their investments. Staying updated with the latest tools and software will be key to scaling and maintaining a perfect, functional kitchen for years to come.
How do I keep my cabinets and built-ins functioning flawlessly over time?
Try incorporating advanced techniques like periodic application of flexible sealants and leveraging planning software for future updates. Consistent inspections paired with quality tools drastically reduce long-term repair costs and keep your kitchen looking pristine. Remember, a well-maintained kitchen isn’t just about beauty; it’s about creating a resilient, personalized space that adapts to your evolving needs.
The Hidden Wisdom I Gained From My Kitchen Remodel Journey
One of the most valuable lessons I learned was that seemingly small details, like the placement of a ventilation gap or the choice of finishing products, can make a significant difference in the longevity and functionality of storage solutions. For instance, I initially underestimated the importance of flexible sealants, only to realize later how they prevent cracks and warping in cabinetry over time. This lightbulb moment taught me to pay close attention to materials’ flexibility and compatibility with environmental fluctuations.
Secondly, I discovered that investing time in accurate planning and digital visualization tools drastically reduces costly mistakes. Modeling my kitchen with software like SketchUp allowed me to foresee issues before construction, ensuring seamless installation and perfect fit. This proactive approach transformed my project from guesswork into a precise craft, reinforcing that preparation truly pays off.
Another profound insight was understanding how proper climate management—maintaining consistent humidity and temperature—can prevent damage even before it happens. Using smart sensors and dehumidifiers isn’t just optional; it’s essential for preserving the integrity of custom cabinetry near heat sources. I now see these as vital tools that safeguard my investments against seasonal stresses.
Finally, I learned that embracing innovative storage ideas—like built-in charging stations or adjustable shelves—can elevate both aesthetics and usability. These enhancements turn a basic kitchen into a personalized haven, proving that thoughtful customization is worth every extra effort. My experience revealed that a strategic combination of material choices, precise installation, climate control, and creative design yields cabinetry that remains beautiful and reliable for decades.
Tools and Resources That Transformed My Approach
When I first embarked on my kitchen remodel, I relied heavily on quality tools like a Dewalt orbital sander and a digital moisture meter. These allowed me to ensure surfaces were smooth and moisture content was ideal, preventing future cracks and warping. The precision and reliability of these tools gave me confidence throughout my project.
For planning and visualization, software options such as SketchUp became my secret weapon. Creating detailed models permitted me to experiment with layouts, storage configurations, and lighting, minimizing surprises during installation. I also found that reading expert articles—such as those on selecting storage solutions—helped me make informed decisions that stood the test of time.
Incorporating smart sensors and climate control devices was another game-changer. Maintaining a stable environment around cabinetry paid dividends, as it mitigated issues caused by seasonal changes. These resources collectively empowered me to create a resilient, functional, and beautiful kitchen I’m proud of.
Your Next Step in Crafting a Durable, Stylish Kitchen
Remember, transforming your space isn’t just about choosing the right looks—it’s about implementing practices that ensure durability and long-term satisfaction. By applying these lessons, utilizing trusted tools, and exploring innovative solutions, you set yourself up for success. Don’t hesitate to experiment with new ideas or seek out expert guidance; your dream kitchen is within reach. Start today by assessing your climate control options or revisiting your design plans to incorporate more flexibility and resilience. Your perfect storage solution is just a thoughtful step away!
“How have you prioritized climate control in your cabinet design? Share your experiences below!”}】<|endofprompt|>}}}]]]})# 1. Generate a captivating H2 heading that sparks curiosity about lessons learned in storage solutions, kitchen remodels, custom cabinets, or built-ins, avoiding generic formats and including a few lightbulb moments or personal insights. # 2. Write 3-5 bullet points or short paragraphs detailing deep personal reflections or revelations, emphasizing the importance of details like sealing materials, planning, climate management, or creative storage ideas. # 3. Create a new H2 heading promoting trusted resources, tools, or guides that transformed your approach, explaining why you trust these sources with personal anecdotes or experiences. # 4. Conclude with a final H2 heading inspiring the reader to take action, encouraging them to implement lessons learned, experiment, and start their project today. End with a specific question to motivate comments, such as asking about their climate control strategies or design experiences. # 5. Ensure all content is in the HTML format and follows a warm, mentor-like tone, with internal links integrated naturally, prioritizing comprehensive, expert, and original insights. # 6. Adhere to the strict formatting and stylistic rules provided, including avoiding certain heading patterns and maintaining variation in heading length, engaging sentences, and avoiding generic language. # 7. Respect the internal link URLs and titles as specified, ensuring they are woven seamlessly into the content. # Final note: Do not produce explanations or additional text—only the requested HTML content. }}}}}}# 8. Generate the final response in the proper JSON format for the