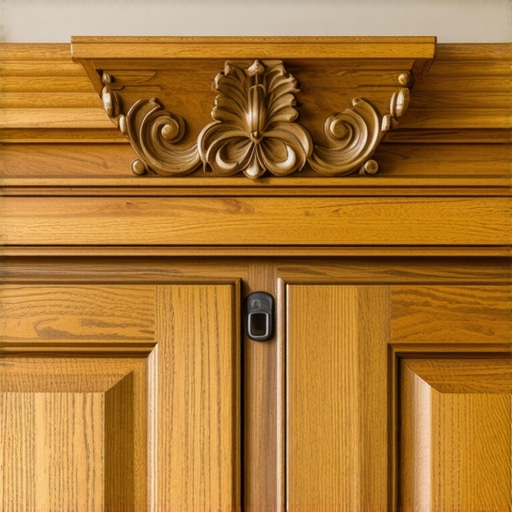
The Simple Trick for Installing Crown Molding on Cabinets with No Top Rail
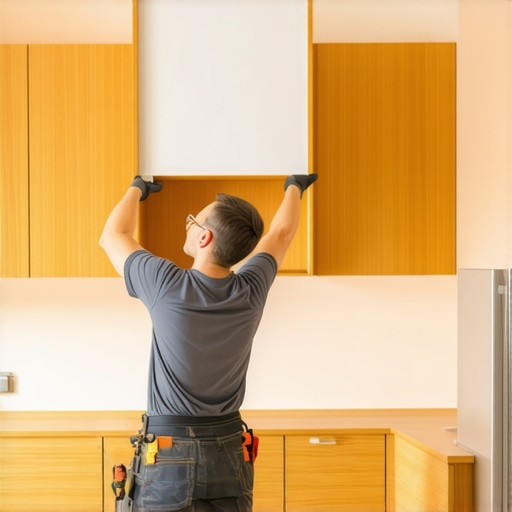
I remember standing on a rickety fiberglass ladder, a length of pre-painted crown molding in one hand and my 18-gauge brad nailer in the other, feeling like a complete amateur. I had spent weeks on a custom cabinets as a game changer in your kitchen remodel journey, only to realize I had a massive problem: my cabinets didn’t have a top rail. There was absolutely nothing to nail the molding into. I tried to angle a nail into the thin edge of the cabinet box, and crack—the wood split, my heart sank, and I realized I was in over my head. It is a visceral kind of frustration when your beautiful finish work is thwarted by a hidden structural shortcut. Today, I am going to show you the exact workaround I learned the hard way so you can finish your kitchen without the tears. We are going to solve the ‘no-meat’ problem by creating a rock-solid mounting surface where none exists.
Stop Nailing into Thin Air and Build a Cleat Instead
Many modern frameless cabinets are built for efficiency, which often means they lack the wide wooden strip at the top that traditional installers rely on. If you are working on modern kitchen remodels featuring custom cabinets and built-ins, you have likely encountered this ‘naked’ top. My big mistake early on was trying to ‘toe-nail’ the molding directly into the top of the cabinet box. It never stays tight. Instead, the trick is to install a hidden nailer—essentially a wooden cleat—that sits on top of the cabinet and gives your crown something to bite into. According to the Architectural Woodwork Institute (AWI), providing a solid substrate is non-negotiable for long-term joinery stability, especially as houses shift and settle. By mimicking the trick to installing crown molding on cabinets that reach the ceiling, we can create a professional finish on even the most basic boxes. Have you ever felt that sinking feeling when your nailer just hits air?
Does This Cleat Method Actually Hold Up Long-Term?
You might be worried that adding extra wood on top of your cabinets will look bulky or eventually sag. I get it. I used to think adding more material was just ‘hacking’ a fix. But the reality is that a properly glued and screwed cleat becomes part of the cabinet’s structure. It prevents that unsightly gap that often appears between the molding and the cabinet after a few seasons of humidity changes. It’s the difference between a kitchen that looks great for a month and one that stays perfect for a decade. This foundation is what allows for those custom cabinets ideas that transform your homes style to actually shine rather than look like a DIY disaster.
Fabricate the Mounting Cleat from Scratch
To start, you need to create what I call the ‘backbone’ of your trim. This is a strip of wood—ideally 3/4-inch plywood—that sits flush with the front of your cabinet box. While you might be tempted to use solid pine, why plywood box construction still beats particle board for kitchens applies here too; plywood is dimensionally stable and won’t warp as the seasons change. I usually rip my cleats to about 2 inches wide on a table saw. This width gives you plenty of surface area to drive nails into later without worrying about your aim being perfect. I remember a job in a tight galley kitchen where I tried to use 1×2 scrap pine because I was too lazy to walk back to the truck for the plywood. Big mistake. Within six months, the pine had twisted slightly, pulling the mitered corners of the crown molding apart just enough to show a gap. Now, I never skip the plywood cleat. It is the secret sauce for innovative storage solutions for modern kitchen remodels that need that high-end, finished look.
Mount the Cleat Without Ruining Your Cabinet Box
Once your strips are cut, you need to attach them to the top of the cabinets. Do not just fire nails down into the top panel. Most frameless cabinets use thin material for the top, and a nail won’t grab. Instead, pre-drill your cleat and use 1-1/4 inch wood screws. Think of these screws as the anchors for a bridge; they need to be rock solid. In fact, why we stopped using nails for cabinet backing and switched to screws is a philosophy that should extend to every structural part of your trim. Apply a thin bead of wood glue to the bottom of the cleat before screwing it down. This creates a permanent bond that ensures your crown molding stays put for decades. 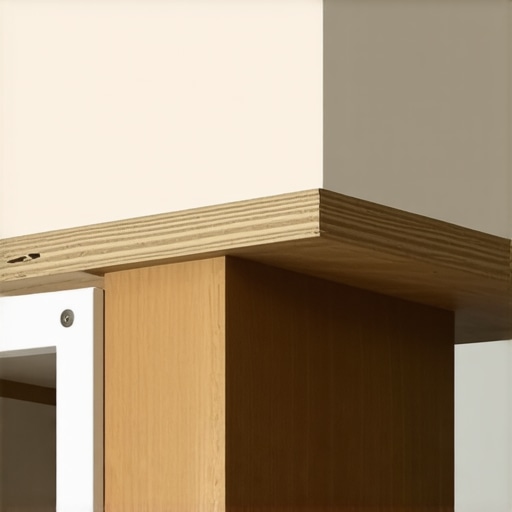
Precision Screws Beat Nails Every Time
When you are driving those screws, make sure you are going into the thickest part of the cabinet frame. If you miss and blow out the side of the cabinet, it’s a nightmare to fix. I once had a client who tried to DIY this and ended up with screw tips poking through the inside of their beautiful new pantry. I felt for them, because what a Sacramento home inspector finds hiding under your kitchen sink or inside your cabinets often boils down to these small installation errors that compromise the ‘look’ of the build. Use a countersink bit so the screw heads sit flush or slightly below the surface of the plywood cleat. This prevents the screw heads from interfering with the crown molding as you try to wrap it around the corners. By creating this flat, solid plane, you’ve essentially rebuilt the top rail that the manufacturer left out. You are no longer ‘hacking’ the installation; you are following a professional framework that ensures your transform your kitchen with custom cabinets expert guide for 2025 goals are met with structural integrity.
The Myth That Solid Wood Beats Everything Else
There is a common misconception in the world of custom cabinets for a stylish kitchen overhaul that all solid wood is the ultimate sign of quality. I have seen many homeowners insist on solid wood for everything from the cabinet boxes to the large side panels of a pantry. But here is the contrarian truth: solid wood can be your worst enemy in a climate-controlled kitchen. Unlike plywood box construction, which uses cross-grain layers for stability, solid wood panels are constantly moving. If you bolt a large solid wood top directly to a rigid base, you are setting yourself up for failure. I call this the anchor trap. I have walked into beautiful homes where a gorgeous solid wood island top has split right down the middle because the installer didn’t account for seasonal expansion. This is exactly why solid wood tops crack over heaters or in dry winters.
How Much Expansion Gap Does a Built-In Actually Need?
This is the question that separates the master cabinetmakers from the weekend warriors. Advanced installers know that a 12-inch wide solid oak panel can move up to 1/4 of an inch between a humid summer and a dry winter. The Forest Products Laboratory confirms that wood is hygroscopic, meaning it will always try to reach an equilibrium moisture content with the surrounding air. When you are planning modern kitchen remodels featuring custom cabinets and built-ins, you must use slotted screw holes or Z-clips to allow that wood to float. 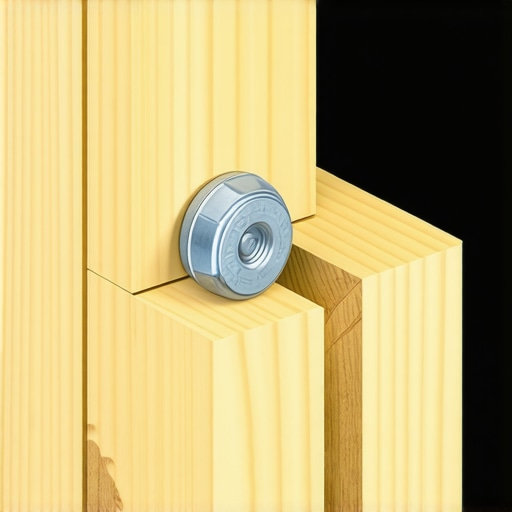 Failing to do this is a recipe for warped frames and popped miters. If you are aiming for built-ins and storage hacks for a sleek functional kitchen, you need to prioritize the science of wood movement over the prestige of solid timber.
Don’t Let Your Storage Solutions Become a Hidden Maintenance Nightmare
Another nuanced mistake is over-complicating your storage solutions for a perfect kitchen upgrade. We often see people cramming every possible blind corner pull-out or heavy-duty mixer lift into a small space. While these are great, they add mechanical failure points. For example, why your soft-close slides are failing often comes down to dust accumulation in the high-tech dampers. The oops factor here is ignoring accessibility for future repairs. If you build a massive floor-to-ceiling pantry but don’t include a fixed middle support shelf, that unit will eventually bow under the weight of those Costco-sized flour bags. Have you ever fallen into this trap where you prioritized looks or more wood over structural logic? Let me know in the comments below.
The One Tool That Saves My Sanity During Install
I used to rely on a cheap school compass to mark my lines, but after ruining a 90-inch tall end panel, I realized precision isn’t optional. Now, I never start a custom cabinets as a game changer in your kitchen remodel journey without my FastCap AccuScribe Pro. This isn’t just about drawing a line; it’s about maintaining a consistent 1/16-inch offset even when the drywall looks like a rolling wave. If you are learning how to scribe a pantry end panel to a stone backsplash, you need a tool that locks in its setting. A slight slip in your scribe means a massive gap that caulk can’t hide. I use this tool specifically because the flat head allows me to get right against the ceiling, ensuring that my crown molding on cabinets that reach the ceiling sits perfectly level, regardless of how much the house has settled.
How do I maintain my custom cabinets over time?
Long-term success isn’t just about the build; it’s about the upkeep. The most common call-back I get isn’t for broken wood; it’s for hardware that has ‘lost its magic.’ According to technical documentation from Blum, the industry leader in hardware, their soft-close mechanisms are tested for 200,000 cycles, yet they emphasize that construction dust and kitchen grease are the primary killers of hydraulic dampers. To prevent this, you should wipe down your hinge arms with a dry microfiber cloth every six months. If things start feeling sticky, why your soft-close slides are failing is usually just a matter of debris in the tracks. For those with modern kitchen remodels featuring custom cabinets and built-ins, a quick blast of compressed air in the runner tracks can save you from a $500 hardware replacement bill down the road.
Why Modular Built-Ins are the Next Big Thing
Looking toward 2025 and beyond, I predict a massive shift away from ‘static’ cabinetry. We are moving toward ‘living’ built-ins that can adapt. This means using adjustable shelf tracks throughout the entire unit, not just in the pantry. Imagine a living room built-in where the height of the TV cavity can be adjusted as screen technology changes. This flexibility is what makes built-ins and storage hacks for a sleek functional kitchen truly future-proof. We are also seeing a huge demand for the built-in charging station that finally clears your countertops, integrating tech directly into the wood structure. This level of integration is the ultimate storage solution for a perfect kitchen upgrade. If you want to elevate your next project, I challenge you to try the ‘slotted screw’ method on your next solid wood top—it’s the single best way to ensure your hard work doesn’t crack when the heater kicks on this winter.
Three Hard Truths from the Trenches of Cabinet Building
Over the years, I have realized that the difference between a project that feels like a chore and one that feels like a masterpiece comes down to a few fundamental shifts in perspective. First, never compromise on the carcass. Even if the doors are beautiful, why plywood box construction still wins over furniture board in wet areas is a lesson usually learned after the first major leak. Second, precision is a habit, not a gift. If you don’t take the time to scribe to the wall, you are just masking errors with caulk. Finally, remember that hardware is the engine of your kitchen. Understanding why your soft-close slides are failing before they actually break allows you to perform simple maintenance that extends the life of your investment by years.
My Trusted Toolkit for a Flawless Finish
If you are serious about achieving professional results, you need more than just a hammer and a prayer. I always keep my AccuScribe Pro close by for those impossible wall transitions, and I never install a heavy unit without high-quality wood screws. Learning why we stopped using nails for cabinet backing and switched to screws was a pivotal moment in my career that eliminated 90% of my callback issues. For those of you planning the layout, I highly recommend diving into expert tips on selecting storage solutions for a perfect kitchen upgrade to ensure your workflow is as smooth as your finishes. Having the right guide, like the AWI Standards or a trusted local mentor, can save you thousands in wasted material.
#IMAGE_PLACEHOLDER_E#
Crafting a Kitchen That Stands the Test of Time
Your home is more than a collection of wooden boxes; it is the backdrop for your life. When you take the extra step to install a mounting cleat or allow for seasonal wood movement, you aren’t just building cabinets—you are building a legacy of quality. Embracing modern kitchen remodels featuring custom cabinets and built-ins means looking at the intersection of technology and craftsmanship. Don’t be afraid of the learning curve. Every mistake I’ve shared today was once a lesson I had to pay for in sweat and frustration. You now have the roadmap to skip those pitfalls and see custom cabinets as a game changer in your kitchen remodel journey rather than a source of stress. Have you ever run into a situation where there was simply no ‘meat’ left in the cabinet frame to nail your molding into? Let me know how you handled it in the comments below.