The Best Way to Install Crown Molding on Sloped Ceilings
I was standing on a rickety ladder at 11 PM, covered in sawdust, staring at a gap in my crown molding large enough to house a small family of squirrels. My vaulted ceiling wasn’t just sloped; it felt like a personal insult to my geometry skills. I had three ‘oops’ cuts in the trash and a growing sense of dread. If you’ve ever tried to make a straight piece of wood look natural against an angled ceiling, you know the despair. Most tutorials assume you live in a perfect 90-degree box, but real homes have character—and character usually means angles that make your miter saw weep.
Sloped Ceilings Don’t Have to Be a Contractor’s Nightmare
The truth is, bridging the gap between a vertical wall and a vaulted ceiling is less about luck and more about embracing the transition. I spent years perfecting this art, and today, I’m going to show you exactly how to make that molding look like it was born there. We are moving past the ‘caulk and pray’ method. Whether you are finishing a bedroom or matching the crown to custom cabinets ideas that transform your homes style, the secret lies in how you handle the transition blocks and the math that actually works. We’re going to solve the ‘floating end’ problem and ensure your joints don’t open up the second the seasons change.
Is Crown Molding Even Possible on a Steep Angle?
I get asked this all the time by neighbors who are eyeing their cathedral ceilings with suspicion. They worry the molding will look ‘tacked on’ or, worse, emphasize how crooked the house is. Early in my career, I made the classic blunder of thinking I could just wing the angles by eye. I even tried why you should avoid using standard nails for cabinet crown, and let me tell you, gravity is a cruel mistress. The molding started sagging before the paint was even dry because I didn’t respect the physics of the slope. According to a report by the National Association of Home Builders (NAHB), architectural trim remains one of the top three interior features that increases a home’s ‘buyability’ and perceived value. But that value only exists if the joints are tight. Have you ever stood in the middle of a room, looked at a corner, and just thought, ‘There is no way a piece of wood fits there’? You aren’t alone. Have you already tried the compound cut and ended up with a pile of scrap wood? Before we grab the saw, we need to talk about why the dead-end transition is usually your best friend.
Stop Fighting the Miter Saw and Start Using Blocks
Stop trying to calculate the compound miter for a 22.5-degree slope. It is a trap. Instead, we use transition blocks—also known as ‘plinth blocks for the ceiling.’ Think of these as a rest stop for your molding. I remember a job in a mid-century ranch where the ceiling looked more like a mountain range than a flat surface. I spent four hours trying to miter a corner where the peak met the wall and failed miserably. I eventually realized that by installing a small, decorative block of wood at the junction, the molding has a flat surface to ‘die’ into. This eliminates the need for impossible angles. It is the same logic we use when we how to align cabinet doors when your walls are out of plumb; you stop fighting the house and start creating your own straight lines.
Build a Transition That Defies Geometry
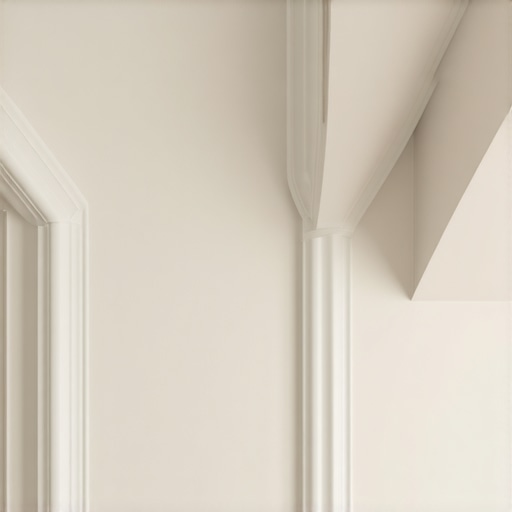
First, cut a block of wood that is slightly wider and thicker than your crown molding profile. You want the molding to look like it is tucking into the block, not floating over it. Fasten this block securely at the highest point of your wall where it meets the slope. This block provides a ‘stationary target’ for your crown. If you are doing a custom cabinets as a game-changer in your kitchen remodel journey, you might even match the wood species of your cabinets to make the whole room feel cohesive. I typically use a simple square block with a slight bevel on the bottom edge to give it an intentional, architectural feel.
Master the Dead End Return for Sloped Ends
The real magic happens with the ‘dead-end return.’ This is how you handle the molding when the ceiling slopes away and you cannot run the wood any further. Instead of leaving an ugly raw edge exposed to the room, you cut a small 45-degree miter on the end of the molding and glue a tiny ‘return’ piece that turns the profile back toward the wall. It is like a tiny U-turn for your trim. This is essentially why why your cabinet crown molding should meet the ceiling; it creates a finished, high-end look that hides the physics of the slope. I once tried to just caulk the end of a piece on a steep vaulted ceiling in a lake house, and the customer (rightfully) thought it looked like I had run out of wood. Never again.
Secure the Molding for a Lifetime
Finally, let us talk about structural integrity. When you are working against gravity on an angle, you cannot rely on a few finish nails and hope for the best. The weight of the wood will eventually pull it down, creating that dreaded ‘shadow line’ at the ceiling. Ensure why your cabinet boxes should be stapled glued and screwed logic applies here too—use a high-quality construction adhesive along the back of the molding where it contacts the wall and ceiling. This bond is what keeps those joints tight through winter’s dry air and summer’s humidity. I learned this the hard way after a client called me six months later because their ‘perfect’ joint had opened up enough to see the attic insulation. Now, I never trust the nails alone.But even with the best adhesive, there is a dangerous myth I need to debunk: the idea that more storage is always better. Most homeowners believe they need to maximize every square millimeter, especially in those awkward spots under a sloped ceiling or in a tight kitchen corner. In reality, “storage maxing” can kill the very architectural beauty you are trying to create. If you do not leave room for the eye to rest, your custom cabinets as a game-changer in your kitchen remodel journey will feel more like a storage locker than a home. The true mark of luxury is not how much you can fit into a room, but how intentionally that space is utilized.
Will Your Custom Cabinets Survive Next Winter’s Humidity?
This is where the real expertise comes in. Wood is essentially a bunch of microscopic straws that expand and contract with the seasons. According to the National Kitchen & Bath Association (NKBA), ignoring these environmental fluctuations is the leading cause of joint failure and finish cracking in high-end millwork. The “oops” factor I see most often? People sealing their crown molding too tightly against the ceiling with rigid wood glue. When the house settles or the humidity drops in January, that wood has nowhere to go but to crack. This is especially problematic in rooms with vaulted ceilings, which often act as a funnel for rising heat and humidity, exacerbating wood movement. Instead of forcing a “perfect” seal that will inevitably fail, I often recommend a small, intentional shadow line. This is a tiny gap—maybe an eighth of an inch—that allows for movement without looking like a mistake. It is a hallmark of truly innovative storage solutions for modern kitchen remodels. This trick is especially vital when you are integrating built-ins and storage hacks for a sleek functional kitchen to ensure the doors do not bind and the trim does not pop during the first freeze of the year. Another common trap is over-engineering the corners. Everyone says you need a complex, rotating cabinet there, but you should actually skip the lazy susan and install lemans pull outs instead or even consider a “dead corner” to allow for much larger, more useful drawers on either side. It feels wrong to “waste” space, but the functionality you gain in the surrounding drawers is almost always worth the trade-off. I have spent decades seeing people regret their crowded layouts, and the most common sentiment is always: “I wish I had prioritized accessibility over sheer volume.” Have you ever fallen into this trap of over-packing a small space? Let me know in the comments.To avoid that cluttered feeling, I have shifted my focus toward precision tools that allow for cleaner, more intentional lines. If you are serious about mastering these vaulted transitions, you have to ditch the plastic protractor from high school. I personally swear by professional digital angle finders with integrated miter functions. It is not just about getting the number; it is about the internal sensors that calculate the exact saw settings for you. This tool is how you ensure your built-ins that elevate your living rooms functionality do not look like a DIY disaster. When you are dealing with a ceiling that is both sloped and out of plumb, guessing is a recipe for expensive firewood. Using a digital reader allows you to translate the house’s quirks into mathematical certainties. Even something as small as knowing how to fix the gap between your cabinet and the refrigerator becomes a ten-minute task instead of a weekend-long headache when you have the right measurements in hand.
How Can I Keep These Joints Tight for Decades?
Maintenance is not just about cleaning; it is about staying ahead of the house’s natural movement. Every six months, I do a walkthrough of my projects to check for settling. I grab a screwdriver and perform the 5 minute hinge adjustment for fixing wonky cabinet reveals. This keeps the doors from clipping the crown molding or the face frames as the wood expands during humid months. According to the Architectural Woodwork Institute (AWI) standards for ‘Premium Grade’ woodwork, joints in a controlled environment should not show a gap exceeding 0.03 inches. To maintain this, I recommend using a high-quality flexible acrylic caulk with silicone additives—not pure silicone, which cannot be painted. This ‘stretchable’ caulk acts like a ligament, allowing the wood to breathe without the paint cracking. If you see a hairline fracture, do not panic; it is often just the finish reacting to the environment. A quick dab of matching touch-up paint is usually all it takes to keep your innovative storage solutions for modern kitchen remodels looking brand new. Looking ahead, I see the world of custom cabinetry moving toward ‘Perfect Fit’ laser scanning. We are already seeing mobile apps that use LiDAR to create 3D models of a room. Soon, you will be able to order smart storage ideas to maximize your kitchen space this year that are pre-scribed by a CNC machine to the exact wave of your specific wall. It is going to make those late-night sessions on a ladder a thing of the past. For now, my best advice is to embrace the manual process but upgrade your precision. Try this: go buy a digital angle finder today and measure just one ‘simple’ corner in your house. You will be shocked to find it is likely 88 or 91 degrees, not 90. That three-degree difference is exactly where most projects fail, and catching it early is the secret to a professional finish.
The Hard Truth About Vaulted Transitions That Most Pros Skip
After years of wrestling with architectural angles, I realized that the biggest mistake isn’t a bad cut—it’s trying to force a house to be something it’s not. Many DIYers get frustrated when their miter saw doesn’t produce a perfect fit, but they forget that walls are rarely plumb. One of my biggest lightbulb moments was learning to prioritize the visual flow over the mathematical correctness. If the joint looks tight from the floor, it is a success. I’ve found that integrating these techniques while creating built-ins that elevate your living rooms functionality requires a mindset shift from rigid carpentry to artistic scribing.
Another lesson learned: always test your angles on scrap wood first. I know, it sounds tedious when you want to see the finished product, but those five minutes of testing save an hour of frustration later. When you are aiming to transform your kitchen with custom cabinets expert guide for 2025, precision in the molding is what separates a weekend project from a professional-grade remodel.
#IMAGE_PLACE_HOLDER_E#
My Go-To Gear for Taming Wild Angles
You don’t need a truck full of equipment, but you do need the right specific tools to handle the transition between a wall and a slope. Here is what I keep in my bag for every vaulted job:
- Digital Angle Finder: This is non-negotiable. It removes the guesswork and allows you to find the exact miter and bevel for every unique corner.
- CA Glue with Activator: This is the secret to those tiny dead-end returns. It bonds in seconds, allowing you to create perfect corners before you even climb the ladder.
- A Quality Pin Nailer: Remember why you should avoid using standard nails for cabinet crown; a 23-gauge pin nailer leaves holes so small they are virtually invisible after painting.
- Flexible Acrylic Caulk: Never use cheap, rigid fillers. You need something that moves with the house to prevent those unsightly winter cracks.
Your Ceiling is a Canvas, Not a Challenge
At the end of the day, crown molding is the jewelry of your home. It frames the room and adds a layer of sophistication that very few other upgrades can match. Don’t let a steep angle or a vaulted ceiling intimidate you. With the right transition blocks and a little patience, you can achieve a look that feels both high-end and intentional. Whether you are adding trim to a new living room or finishing off innovative storage solutions for modern kitchen remodels, the extra effort you put into the details will pay dividends in your home’s value and beauty. Step up that ladder with confidence—you’ve got the math and the methods to make it work. Have you ever stared at a vaulted corner and felt like the math just didn’t add up? Let me know your biggest molding headache in the comments below!