How to Install a Corner Cabinet Without Losing Access to the Back
I still remember the exact moment I realized my kitchen remodel was secretly harboring a black hole. It was a Tuesday evening, three months after I finished installing what I thought was a flawless run of kitchen cabinets. I dropped a heavy cast-iron lid. It rolled backward, slipping silently into the dark abyss of my lower corner cabinet. To retrieve it, I literally had to lie flat on my back on the hardwood floor, squeeze my entire torso through a narrow 12-inch opening, and guide my arm into the dusty, unreachable void like some amateur cave explorer. I came out with dusty elbows, a bruised rib, and a fierce determination to never let a layout defeat me again.
The Real Tragedy of the Kitchen Blind Corner
Let’s be honest with each other: corner cabinets are the absolute bane of any DIYer or homeowner planning a kitchen upgrade. In most standard installations, that deep 90-degree bend is where expensive pots, pans, and rare specialty small appliances go to die. We sacrifice valuable square footage to a dark cave simply because we do not know how to bridge the gap between two intersecting walls. But when you are working hard to maximize space with innovative storage solutions for every room, giving up three cubic feet of prime real estate is simply out of the question.
Today, we are going to change that. I am going to show you exactly how to install a corner cabinet in a way that keeps every single inch of that deep recess fully accessible, functional, and organized. No more bruised ribs, and no more lost soup pots.
Are Corner Cabinet Storage Hacks Actually Worth the Extra Effort?
I get the skepticism. When you are already dealing with plumb lines, leveling shims, and heavy plywood boxes, adding complex internal hardware or custom angles feels like a massive headache. You might ask yourself if it is just easier to block off the dead space entirely. But according to professional space planning standards compiled by the National Kitchen & Bath Association, functional accessibility in corner zones can increase overall kitchen storage efficiency by up to 30%. That is the difference between a cluttered, frustrating countertop and a beautifully streamlined cooking environment.
Early in my cabinet-building days, I made the classic mistake of installing a standard blind corner box without planning for the interior mechanism first. I figured I would just slide in a lazy Susan aftermarket kit later on. It was a complete disaster; the door opening was too narrow, the pre-assembled rack would not fit through the face frame, and I ended up scraping my brand-new paint job trying to force it in. I learned the hard way that you must plan your accessibility strategy before the cabinet ever meets the wall. Whether you choose to implement a clever diagonal cabinet layout, install heavy-duty pull-out trays, or master the best way to organize a blind corner cabinet, success is all in the preparation. Have you ever lost an expensive kitchen gadget to the dark depths of an inaccessible corner cabinet? Let me know in the comments below, because I know I am not the only one who has suffered this layout nightmare!
Step-by-Step Guide to Conquering the Corner Void
Installing a corner cabinet is a lot like playing a high-stakes game of Tetris, except the blocks are heavy plywood and your kitchen walls are rarely as straight as the grid on a screen. If you get the initial placement wrong by even a quarter of an inch, that tiny error will telegraph all the way down your run of cabinets, leaving you with ugly gaps and doors that bind. To keep your custom cabinets as a game changer in your kitchen remodel journey, you must master the mechanics of the corner turn first.
Map Your Critical Clearance Lines Before Lifting
Before you lift a single cabinet box, you must map out your dead space and clearance lines directly on the floor. I learned this the hard way during a kitchen remodel in a tight 1940s bungalow. I slid the blind corner cabinet flush against the back wall, anchored it, and kept moving. It wasn’t until I tried to install the adjacent drawer bank that I realized the drawer handles would strike the corner cabinet door handle every time they opened. I had to rip out three cabinets and start over. To avoid this, always calculate the exact filler strip width needed to allow doors and drawers to clear intersecting hardware. Mark these boundaries on your subfloor with a sharp pencil so you have a physical guide to align your cabinet face frames.
Level the Corner First to Prevent a Domino Effect
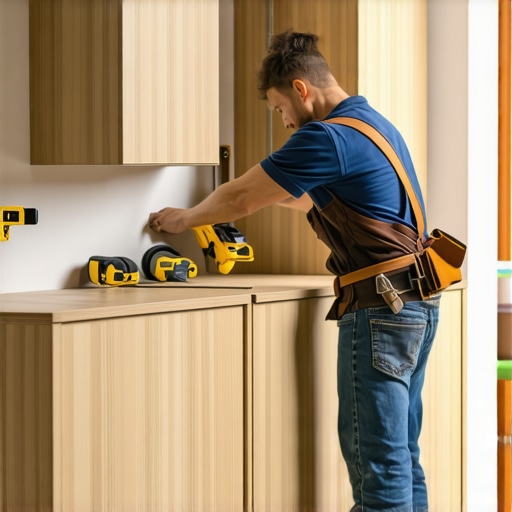
Your corner is the anchor point for the entire kitchen layout. If the corner cabinet is not perfectly plumb and level, every adjacent cabinet will tilt, making countertop installation an absolute nightmare. Start by locating the highest point of your floor along the cabinet run and draw a level reference line on the wall. When you slide the corner cabinet into position, use heavy-duty shims underneath and behind the box to bring it up to your reference line. I prefer using composite shims over cheap cedar ones because they do not compress under the weight of heavy stone countertops later on. Drive your cabinet screws through the back hanging rail and directly into the wall studs, but do not tighten them fully until you check the face frame for plumb in both directions.
Assemble and Test Your Internal Storage Hardware Now
If you plan to utilize specialized racks, lazy Susans, or heavy-duty pull-outs, do not wait until the cabinet is secured to install them. Trying to mount metal glides and pivot hinges while squeezed inside a dark, installed cabinet box is a form of self-inflicted torture. When I was setting up a client’s kitchen to innovative storage solutions for modern kitchen remodels, I pre-mounted the entire swing-out tray system on the shop floor where I had room to move. I then removed the moving trays, secured the empty cabinet box to the wall, and simply clicked the trays back onto their pre-aligned brackets. This sequence ensures your hardware operates smoothly without binding on the door opening. If you are struggling with a tricky layout, learning how to align cabinet doors when your walls are out of plumb is the final touch that makes your hard work look like a professional installation.
When you are deep in the planning stages of a kitchen remodel, it is incredibly easy to get swept up in the aesthetics of door profiles and paint colors. Most homeowners—and even quite a few general contractors—treat corner storage as a minor detail that can be solved with a quick trip to an online organizer store. But let’s challenge a massive industry myth here: everyone tells you that aftermarket pull-outs and swing-out shelves will magically fix any layout mistake. In my experience, relying on those mechanisms to save a poorly designed corner is a recipe for expensive frustration. The hardware itself is only as good as the structural geometry surrounding it, and if your cabinet box is off by even a fraction of an inch, those high-end steel arms will eventually bind, scrape your doors, or jam entirely.
Why Do Expensive Pull-Out Trays Jam After Only Six Months of Use?
The secret lies in the deflection rate of standard cabinet construction. When you load a heavy-duty lazy Susan or swing-out tray with heavy cast-iron pots and ceramic dishes, the weight places a massive cantilevered load on the cabinet sidewalls. If you installed a cheap box made of thin particle board, the cabinet walls will subtly bow over time. According to structural guidelines published by the Woodwork Institute, cabinet side panels must meet strict deflection tolerances to prevent functional hardware failure under load. To avoid this costly trap, you should always insist on premium plywood boxes, especially for your corner units. This structural choice is exactly why particle board sink bases are a disaster and the plywood alternative is the absolute standard for any high-moisture or high-load zone in your home.
Another nuance that most DIYers overlook is the interaction between your cabinet frames and your flooring. If you are updating your floors alongside your layout, you might be tempted to slide your base cabinets on top of your brand-new planks to make the installation look cleaner. This is a critical mistake. You must understand why you should install your base cabinets before your flooring to avoid trapping your materials and causing your cabinet boxes to shift as the seasons change. When your floors expand and contract, they can actually pinch the base of your corner cabinets, throwing your perfectly leveled frames completely out of plumb and ruining the alignment of your internal slide-out storage systems.
Ultimately, achieving a high-end, functional kitchen requires looking past the surface. If you want to elevate the overall flow and value of your home, investing in tailored storage planning is the ultimate move. Taking a thoughtful approach to layout planning is how you transform standard spaces into high-performance zones, similar to how you would approach built-ins that elevate your living rooms functionality. Have you ever fallen into this trap of designing a gorgeous kitchen only to realize a corner drawer won’t open? Let me know in the comments below, and let’s troubleshoot your space together!
Keeping the Magic Alive in Your Kitchen Corners
Now that your customized corner cabinet is perfectly leveled, anchored, and outfitted with high-end internal hardware, your job still isn’t quite finished. A kitchen remodel is a massive investment, and the real test of any custom build isn’t how it looks on day one; it is how flawlessly it operates five, ten, or fifteen years down the road. Corner pull-out trays, heavy-duty lazy Susans, and swing-out blind systems are mechanical marvels, but they are also subject to continuous friction, shifting loads, and everyday wear.
How do I maintain my corner storage hardware over time?
To keep your hardware gliding like butter, you must commit to a quick, biannual maintenance routine. First, avoid using heavy, chemical-laden spray lubricants that attract household dust, pet hair, and airborne cooking grease. Instead, I personally use and highly recommend a dry PTFE Teflon spray lubricant like DuPont Non-Stick Dry Film. It goes on wet to penetrate the roller bearings but dries instantly to a clean, slick barrier that will not collect debris. Spritz this directly onto your glide tracks and pivot points every six months to prevent friction wear.
Second, check the mounting screws on your heavy hinges. Constant movement can slowly back these screws out of the wood. If you notice a hinge beginning to wobble or sag, do not just keep tightening the screw until the hole strips. Keep a small pack of wood glue and flat wooden toothpicks handy. Jamming a glue-soaked toothpick into a loose screw hole and trimming it flush is a time-tested trick to restore the tight grip of your cabinet wood. If you ever run into more complex cabinet issues, knowing how to fix a cabinet door that is rubbing the frame will save your finishes from scraping damage.
The Precision Tools You Need in Your Setup Arsenal
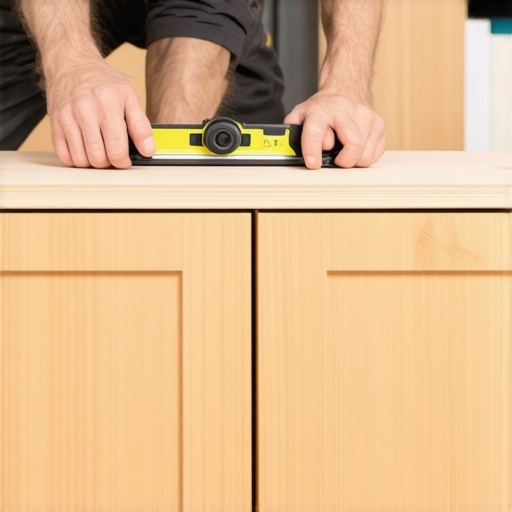
I don’t believe in generic tool kits. When you are adjusting and securing these specialized systems, you need tools that offer high precision. Toss out the basic hand screwdriver and invest in a dedicated long-reach #2 Pozidriv screwdriver. Many European hardware brands use Pozidriv screws for their micro-adjustments rather than standard Phillips heads. Using the wrong driver is the number one cause of stripped adjustment screws. Additionally, always keep a digital torpedo level in your kitchen toolbox. A standard bubble level can easily lie to you in tight spaces, but a digital level will show you the exact decimal degree of tilt, allowing you to fine-tune your roll-out drawers before they begin to drift or bind.
Looking ahead, the future of kitchen planning is moving rapidly toward fully integrated automation. In the coming years, we are going to see smart corner cabinets equipped with gentle-touch motorized assists that glide open at the wave of a hand, eliminating heavy manual pulling altogether. To prepare your home for these high-performance upgrades, it is essential to start with robust foundation planning. If you are ready to elevate your entire cooking space, dive into our expert tips on selecting storage solutions for a perfect kitchen upgrade to ensure your layout is built to last.
My challenge for you this weekend is to grab your level, check your heaviest corner drawer, and apply a high-quality dry lubricant to the tracks. Your wrists and your cabinets will thank you!
The Brutal Truth About Blind Corner Blindspots
After years of fixing crooked installations and rescuing lost bakeware from the dark recesses of kitchen islands, I have realized that the standard approach to corner design is fundamentally broken. Here are the three most critical, real-world lessons that will save your sanity and your budget during a major kitchen remodel:
- The 10% Toleration Rule: No matter how straight your walls look, they are almost certainly out of square. If you do not incorporate at least a 1.5-inch filler strip between your corner cabinet and the adjacent drawer fronts, your high-end pulls will eventually collide and chip your beautiful finishes.
- Weight Matters More Than Volume: It is incredibly easy to get excited about the massive storage capacity of a deep corner drawer, but if your slide mechanisms are not rated for heavy-duty storage, they will fail. Always plan for the heavy weight of cast-iron pans and small appliances before purchasing your internal hardware.
- Hardware Before Finish: Never paint, stain, or seal your cabinet interiors before pre-drilling and test-fitting your complex swing-out brackets. One slipped drill bit can ruin a pristine paint job in a fraction of a second.
The Pro Installer Toolkit for Flawless Corners
You cannot achieve professional-grade results using basic, budget tools. When I am tackling a high-end setup, these are the exact specialized resources I rely on to get the job done right the first time:
- FastCap GluBot: The ultimate wood glue dispenser that allows you to apply precise lines of adhesive vertically and upside down when reinforcing inner corner joints and fixing stripped screw holes.
- DuPont Non-Stick Dry Film Lubricant: My absolute secret weapon for high-friction hardware. Unlike standard WD-40, which attracts dust and cooking grease, this Teflon-based spray dries to a clean, slick finish that keeps heavy-duty pull-outs gliding smoothly for years.
- The Blum Template Guide: A physical marking template that eliminates the guesswork when mounting complex concealed hinges and runner systems. It is worth every single penny to prevent misaligned drawer glides.
Take Back Your Kitchen Space One Corner at a Time
Do not let a challenging 90-degree corner intimidate you into sacrificing precious storage. Designing a highly efficient home is all about anticipating the small friction points and building a foundation that is designed to last. With the right preparation, precision tools, and structural materials, you can easily turn that frustrating blind spot into the most functional, organized hub in your entire layout. By taking a thoughtful approach to space planning, you can easily integrate built-ins and storage hacks for a sleek functional kitchen that elevates your daily cooking routine and adds massive value to your home. If you want to explore more ways to customize your layout, check out our guide on transforming your kitchen with custom cabinets to get your next project started off on the right foot.
Have you ever had to deal with a jammed lazy Susan or a drawer that hits your oven handle? Let me know in the comments below, and let’s troubleshoot your kitchen layout together!