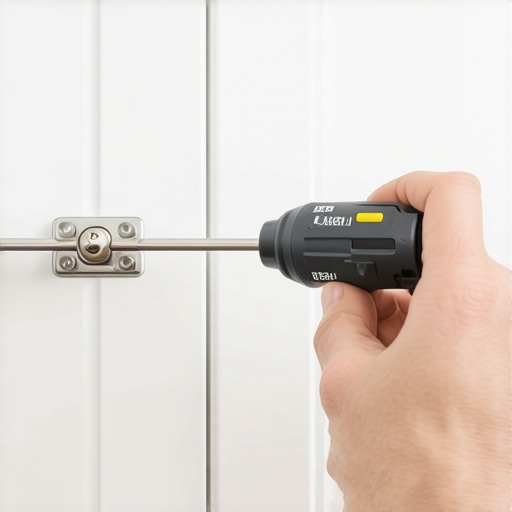
How to Install Cabinet Pulls Without a Jig and Never Miss the Center
It was a typical weekend project—hauling out my trusty screwdriver and a handful of cabinet pulls I had picked up during my last hardware store run. I confidently pressed on, aiming to install each handle perfectly centered on my kitchen cabinets. But as I marked the first hole, I realized I couldn’t find my jigs, and then, disaster—a crooked hole, skewed handles, and a frustration that simmered just below the surface. Sound familiar? That lightbulb moment hit me hard. If you’ve ever faced the nightmare of misaligned pulls or struggled to find your center without expensive tools, you’re not alone.
Why Precision Matters When Installing Cabinet Pulls
Ever wondered why those tiny misalignments can throw off the entire look of your kitchen? It’s because the details—like perfectly centered cabinet pulls—make or break the aesthetic. Missed centers not only look sloppy but can also hinder opening and closing the cabinets smoothly. Plus, consistent placement ensures a professional finish, elevating your space from DIY to designer-quality. Achieving this without a jig might seem daunting, but trust me, with a few tricks, you can do it confidently.
Is It Really Possible to Install Pulls Without a Jig and Still Keep It Perfect?
Initially, I made the mistake of thinking a jig was indispensable. But after some trial and error—and learning from early blunders—I discovered simple methods that work just as well. The key is understanding your measurements, using basic tools, and precise marking techniques. Remember, even experts started somewhere, and you can do this too! For example, I found that measuring from the edge using a ruler and marking with painter’s tape helped me stay consistent. If you’re curious about how to choose the right storage and hardware solutions for your project, check out my guide on expert tips on selecting storage solutions. Early on, I also learned the importance of double-checking measurements and taking my time—skipping these steps led to the most common mistake: uneven pulls.
Ready to master the art of cabinet hardware installation without needing fancy jigs? If so, let’s dive into proven, easy-to-follow steps that will help you perfect your project and enjoy a beautifully updated kitchen.
Marking the Center Lines Precisely
Begin by measuring the width of your cabinet doors or drawer fronts. Use a tape measure to find the midpoint and mark it with a pencil. To ensure accuracy, double-check your measurement from both edges. When I installed my handles in a cluttered workshop, I used painter’s tape along the edge to keep my pencil marks aligned. This simple trick prevented me from slipping, especially on uneven surfaces, and guaranteed symmetrical placement. For an extra layer of precision, draw a thin guideline across the surface at your mark.
Using the Tape as a Visual Alignment Tool
Think of painter’s tape as a temporary measuring and alignment aid—like a mini jig. Stick a length of tape across the surface, aligning the center mark with the tape’s edge. This provides a straight reference line. When I did this on my kitchen cabinets, it made visualizing the handle position much easier, especially since I lacked a dedicated jig. This method is quick and adaptable for different handle sizes and door types.
Creating Your Own Templates for Consistency
If installing multiple pulls, create a paper or cardboard template. Measure the handle’s center-to-ends dimension, then cut a strip that length. Mark the pull’s center on your template, then measure equal distances to each side for the screw holes. Tape this template onto each door, ensuring it’s level and aligned with your marks. During my last project, I used a piece of scrap cardboard, which I marked and trimmed. It saved me from repeated measurements and kept all pulls uniformly spaced, transforming a chaotic install into a professional-looking outcome.
Measuring from the Edges for Perfect Symmetry
Align the handle with the edges of the cabinet, measuring equal distances from each side to ensure symmetrical placement. Use a ruler to mark the screw holes based on your handle’s specifications. When I installed handles on a row of drawers, I measured 2 inches from each edge—a quick method that delivered consistent results without a jig. Double-check the measurements by comparing distances across multiple handles before drilling. This step is vital to avoid misaligned pulls that ruin the visual harmony.
Double-Checking Before Drilling
Always confirm your markings by measuring twice. Use a square or level to verify that your marks are straight and at the correct height. During my last installation, I thought I was precise until I stepped back and saw one handle slightly off; a quick re-measure fixed the issue. Remember, small adjustments before drilling can prevent uneven handles and the frustration of fixing drilled holes. Patience at this stage pays off with a clean, professional finish.
Selecting the Right Drill Bits and Screw Sizes
Choose a drill bit that matches your screw diameter. Using the correct bit ensures clean holes and prevents splitting the material. Typically, pilot holes should be slightly smaller than the screw’s core diameter. In my project, I used a 1/8-inch drill for 1/8-inch diameter screws, allowing easy insertion without damaging the cabinet. If you’re unsure, test on scrap material first. Proper drill selection streamlines installation and minimizes errors.
Drilling with Care and Precision
Secure your cabinet or drawer with clamps or tape to prevent shifting. Drill slowly, applying steady pressure to create clean holes. When I drilled into a stubborn MDF surface, I slowed down my drill, preventing splintering and ensuring neat holes. Take your time; rushing can cause misalignment. If you’re working on delicate veneer or painted surfaces, use painter’s tape over the area to avoid chipping. Precision during drilling results in handles that sit flush and look meticulously installed.
Final Checks and Adjustments
After installing each handle, step back and assess alignment. Use a level or measuring tape to confirm even spacing between pulls. Make minute adjustments by loosening and repositioning if necessary. In my last project, minor shifts after initial tightening made a significant difference. Loose screws can cause handles to shift over time, so tighten them securely but avoid overtightening, which can crack the material. These final tweaks ensure a seamless finish that elevates your DIY effort to a professional standard.
When it comes to upgrading your kitchen with built-ins or custom cabinets, many homeowners believe that simply choosing trendy styles or the latest materials guarantees a perfect fit. However, one of the most overlooked aspects is understanding the *nuance* of space planning and how small details dramatically impact functionality and longevity. Contrary to popular belief, a beautiful cabinet or storage solution isn’t just about aesthetics; it’s about mastering the subtle art of dimensional precision and structural harmony. Wrong assumptions, like relying solely on standard measurements without considering room irregularities or future needs, lead to costly mistakes that can only be corrected with extensive modifications. For example, many assume that custom cabinets are inherently more forgiving than pre-fabricated options, but if measurements aren’t meticulously taken and accounted for, even custom-built pieces can end up misaligned or obstructive. This is why working with an expert who understands *the nuances of space, ergonomics, and materials* is crucial, particularly in complex remodels where every inch matters.
Why does ignoring small details in storage planning backfire in the long run?
Ignoring these nuances often results in solutions that seem perfect initially but become impractical over time. An error as simple as misjudging clearance space for drawers or overlooking the swing of doors may compromise usability. Moreover, many homeowners underestimate the importance of considering the *strain* on cabinetry caused by heavy usage or fluctuating humidity levels—factors that can warp or weaken poorly selected materials. An acclaimed expert, such as cabinet designer Andrew Fanara, emphasizes that understanding *material behavior* and *joint mechanics* keeps installations durable and maintenance-free. By diving deeper into these subtleties, you avoid the “oops” moments of reworking or replacing once-inadequate storage. For further insights, exploring articles like creating seamless kitchen remasters with built-in solutions can reveal how deep customization enhances both beauty and function.
Another trap many fall into involves overlooking the impact of room architecture—like sloped floors or irregular walls—which makes a big difference when designing integrated storage. In my experience, accounting for these irregularities early in the planning phase saves tremendous frustration later. Remember, efficient storage is not just about what fits but how well it adapts to *your specific space and lifestyle*. Think of custom solutions as a tailored suit—it’s precise, but only if measurements and fabric choices align perfectly. Don’t forget, every decision from hinge placement to material choice influences both the performance and aesthetic of your project. To explore how expert designers master these layered details, check out a comprehensive guide on custom cabinetry in 2025. Have you ever fallen into this trap? Let me know in the comments.To ensure your kitchen upgrades stand the test of time, investing in the right tools and maintaining a disciplined approach to upkeep is crucial. I personally rely on a high-quality cordless drill, such as the Milwaukee M18, because its lightweight design and variable speed settings give me the precision needed for delicate tasks like installing built-in storage or custom cabinets. The importance of selecting tools with ergonomic features cannot be overstated; they reduce fatigue during extended projects and help maintain accuracy. For measuring, I prefer a digital laser measure like the Bosch GLM400C, which provides quick, precise readings over longer distances—especially useful when aligning multiple cabinet doors or creating custom templates. Using these tools consistently ensures that each component aligns perfectly, reducing the need for future readjustments.
Proper maintenance involves regular checks of hardware. Simple routines such as tightening screws, inspecting soft-close dampers, and cleaning hinges prevent wear and tear, safeguarding your investment. For instance, applying a light lubricant like silicone spray to hinges every six months keeps everything operating smoothly. When dealing with built-ins, staying current with software can streamline your workflow. I use cabinet design software like 20-20 Design, which allows me to create detailed layouts, simulate storage solutions, and spot potential conflicts before fabrication. As technology advances, incorporating such digital tools into your process offers a clear advantage and helps ensure your project’s long-term success.
Where do I see this trend heading? Expect smarter, more integrated solutions that combine software design with modular hardware, enabling homeowners to customize storage with minimal effort while maximizing space. This integration will likely involve IoT-enabled cabinets and environmentally responsive finishes that adapt to humidity and temperature changes, extending durability even further.
### How do I maintain my storage systems over time?
Routine upkeep is simple but essential. Regularly checking and tightening fasteners, cleaning dust and debris from slides and hinges, and lubricating moving parts prolong their lifespan. Additionally, monitoring space utilization helps prevent overloading, which can strain supports and joints. When installing or adjusting any storage, referencing expert guidelines—such as those found in technical manuals like the one from Blum hardware—ensures that components function properly for years. For example, Blum’s technical documentation emphasizes the importance of proper alignment and load distribution, which can often be overlooked by DIYers.
I highly recommend trying the tip of creating custom templates for repetitive installations. It’s a game-changer for consistency and efficiency, especially in large remodels or when fitting out multiple cabinets. Incorporate digital measurement tools where possible to reduce human error and achieve precision that rivals professional craftsmanship. Small steps like these not only improve the outcome but also reduce future maintenance needs, saving you time and money in the long run. To dive deeper into advanced storage techniques, explore the article on creating seamless kitchen remasters with built-in solutions. Start by applying one of these expert-recommended methods today and watch your kitchen stand the test of time.
What I Would Do Differently After Turning the Screw
One of the biggest lessons I learned was the importance of meticulous planning over rushing into execution. Instead of jumping straight to measuring, I wish I had spent more time creating precise templates and double-checking measurements—these small steps prevented minor misalignments and saved me time during installation. I also realized that investing in quality tools, like a reliable laser measure and properly sharpened drill bits, makes all the difference in achieving professional results. These insights taught me that patience and preparation are the silent heroes behind perfect cabinet and storage solutions.
Tools and Resources That Elevate My Projects
I’ve found that a few dedicated tools truly transform the DIY experience. The Bosch GLM400C laser measure, for example, provides quick and precise readings, reducing errors and ensuring symmetry. A cordless drill such as Milwaukee M18, with adjustable torque and ergonomic design, helps me work comfortably for hours. For learning, I recommend reading expert articles on creating seamless kitchen remasters with built-in storage solutions—they provide practical tips that I wish I had known earlier. Lastly, software like 20-20 Design has been invaluable for visualizing and customizing my storage layouts before cutting materials, preventing costly mistakes and inspiring creative solutions.
Your Turn to Transform Your Space
Remember, mastering storage solutions, built-ins, and custom cabinets doesn’t require perfection from the start—what matters is your willingness to learn, experiment, and refine your approach. Every project teaches you something new, and with patience, you can achieve results that rival professional craftsmanship. Don’t be afraid to take that first step; the satisfaction of transforming your kitchen into a functional masterpiece is worth every effort. Ready to dive into your next renovation and apply these insights? Share your plans or questions in the comments below—I’d love to hear about your journey toward a smarter, more beautiful space.