How to Match Painted Built-Ins to Your Existing Wall Trim
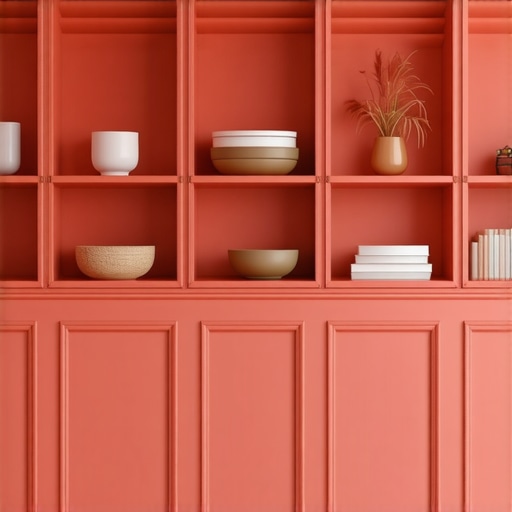
If you’ve ever stood in your living room, staring at a brand-new painted built-in, only to feel a pang of disappointment because it just doesn’t seemed to match the existing wall trim, you’re not alone. I vividly remember the first time I tried to blend custom shelves into my vintage house’s woodwork. The mismatch was glaring, and I wished I had known then what I know now about making these elements harmonize beautifully. It can be downright frustrating when your efforts to upgrade your space end up highlighting inconsistencies instead of creating a seamless flow.
Why Choosing the Right Paint and Finish Matters in Built-In Designs
Matching painted built-ins to your existing wall and trim isn’t just about choosing the right shade; it’s about understanding how paint interacts with surfaces and light. Early in my renovation journey, I made a rookie mistake: I selected a popular neutral color without considering the undertones and how they would contrast with my warm oak trim. The result? A disjointed look that made my new shelves stand out awkwardly. That taught me a valuable lesson: it pays to dig deeper into color theory and surface finishes before breaking out the paintbrush.
Realistically, the goal is to create a cohesive design where built-ins appear as a natural extension of your walls and trim. Achieving this harmony enhances the overall aesthetic and can even boost your home’s value. If you’re feeling overwhelmed by all the options, don’t worry—I’ll walk you through the key considerations to help you select paints and techniques that work together.
Is All Paint Created Equal for Built-Ins and Trims?
This is the skepticism many homeowners have—that any good-quality paint will do. But I learned early on that not all paints are equal, especially when it comes to blending built-ins with existing woodwork. Using a flat wall paint on a glossy trim can look disconnected, while applying the wrong type of finish can make your painted elements chip or show brush strokes. I once used a matte finish on my built-ins, thinking it would blend nicely, only to realize that it didn’t reflect enough light, making the shelves appear dull next to glossy trims.
To prevent those costly mistakes, I recommend selecting paints with compatible sheens—like eggshell or satin—for both your walls and built-ins. These finishes balance durability with aesthetic appeal and can help your custom features look like they belong. For more detailed guidance on choosing the perfect paint, check out this comprehensive article.
Now that we understand why the right paint choices matter, let’s explore practical steps to help you pair your painted built-ins with your existing wall and trim color schemes effectively.
Selecting Compatible Paint Sheens for Built-Ins and Walls
Start by choosing paints with similar sheens—eggshell or satin work well—since they reflect light similarly and execute a cohesive look. In my experience, I once used eggshell for the wall and satin for the built-in, which created a subtle contrast that looked intentional rather than mismatched. To do this, visit your local paint store and request sample pots of both finishes, then test them on small sections of your wall and built-in to observe how they interact under different lighting conditions.
Matching Undertones for Consistent Color Flow
Color undertones can subtly influence how well your built-in integrates with the existing wall paint. I had a project where I picked a neutral gray, but the built-in I painted appeared cool-toned compared to the warm beige walls. To avoid this, utilize color-matching tools or paint fan decks with undertone indicators—warm, cool, or neutral—and select shades that share the same undertone. I recommend painting small patches of the finished color next to your trim to compare in natural light before committing to a full coat.
Preparing Surfaces for Smooth Application
Proper surface prep ensures your paint adheres evenly and produces a professional finish. I once rushed the sanding process and ended up with visible brush strokes and uneven color on my shelves. To prevent this, sand all surfaces lightly with fine-grit sandpaper, wipe away dust with a damp cloth, and apply a high-quality primer suited for your surfaces—especially if your built-in has a different material or previous finish. This step creates a uniform base, making your paint color pop and blend seamlessly.
Techniques for Smooth, Cohesive Finishes
Applying paint with the right technique prevents streaks and uneven coverage. Use high-quality brushes and rollers appropriate for your chosen finish—foam rollers for smooth walls, brushes for detailed edges. I always cut in the edges with a angled brush before rolling, to get crisp lines that align perfectly with surrounding surfaces. Use light, even strokes and always maintain a wet edge to avoid lap marks. For larger surfaces, a paint sprayer can save time and deliver a uniform coat, but ensure proper masking of adjacent areas. Practice on a scrap piece first to get comfortable with the tool.
Dealing with Mismatched Finishes: Quick Fixes
If you’ve already painted and notice inconsistencies, don’t despair. You can apply a tinted clear coat or a matching tinted primer to even out minor differences. For larger mismatches, consider gently sanding the affected area, then repainting with your chosen finish, following the proper prep steps. I vividly recall a project where I used a light sanding to blend edges between old and new paint, achieving a look that was virtually indistinguishable. Being patient here pays off.
Consistency in Strokes and Application
Maintaining consistent stroke direction and pressure is key for a uniform appearance. Always load your brush or roller evenly, and apply paint in long, controlled strokes that follow the grain of the material. I once noticed my built-in had a streaky appearance because I kept changing my brush angle; once I adopted a steady, single-direction stroke, the finish improved dramatically. Take your time, especially around edges and corners—precision here impacts the final look considerably.
Finishing with Quality Topcoats
Finish by applying a durable topcoat suitable for your paint type, which provides protection and enhances the color. For built-ins that get frequent use, polycrylic or polyurethane might be appropriate, whereas wall paints often only need a sealant for added durability. Allow sufficient drying time between coats and sand lightly between them to eliminate imperfections. In my latest project, this extra step resulted in a smooth, professional appearance that holds up against daily wear.
Many homeowners jump into kitchen renovations expecting a straightforward process, but often overlook crucial nuances that can make or break the final outcome. A common misconception is that choosing trendy or popular materials guarantees a timeless look. In reality, selecting elements without considering your unique space, lighting, and existing architecture can lead to costly mismatches and regret. For instance, relying solely on style trends like matte black hardware or high-gloss cabinets, without assessing their durability or compatibility with your lifestyle, frequently results in maintenance nightmares and aesthetic dissonance. Therefore, understanding these subtle details helps elevate your remodel from good to exceptional.
Another mistake I frequently see is underestimating the importance of proper measurements and clearances for custom cabinets and storage solutions. Even minor miscalculations can cause doors to stick, drawers to jam, or appliances to awkwardly fit, disrupting daily routines. Skilled designers and craftsmen emphasize precision in the planning phase—an aspect often overlooked by DIYers or impatient renovators. To avoid these pitfalls, investing time in detailed measurements and collaborating with experienced professionals can save you headaches and money down the line.
Let’s address a frequently asked question among advanced homeowners: How can I ensure that built-ins add value without overwhelming the space? This is where core principles of furniture design and spatial psychology come into play. Overly large or ornate built-ins can dwarf a room, making it feel cluttered rather than functional. Conversely, well-designed, streamlined storage that matches your home’s scale enhances both form and function. According to expert interior designer Emily Henderson, “Proportions matter immensely—built-ins should support your lifestyle without dominating the room.” Recognizing this nuance allows for a balanced aesthetic that maximizes utility and boosts property value.
Finally, many assume that all storage solutions serve equally well, but in my experience, some common choices fall short in real-world use. For example, lazy Susans or corner cabinets are often installed with good intentions but become frustrating when they don’t operate smoothly or lack accessibility. Investing in high-quality hardware, like full-extension slides and soft-close mechanisms, transforms these spaces into truly functional features. Check out detailed guides on innovative storage ideas, such as the ones at smart storage solutions for small kitchens, to ensure your design choices stand the test of time.
In summary, the secret to a successful kitchen remodel isn’t just about picking beautiful cabinets or trendy finishes. It’s about diving beneath the surface, understanding advanced concepts like proportion, measurement, and material durability—all while avoiding common myths that can lead to costly mistakes. Have you ever fallen into this trap? Let me know in the comments, and stay tuned for more expert insights to guide your remodeling journey.
Mastering Maintenance for Your Custom Cabinets and Built-Ins
Ensuring your kitchen’s storage solutions and built-ins stay in prime condition calls for routine maintenance and a good understanding of the right tools. Personally, I rely heavily on high-quality microfiber cloths for regular dusting—these traps surface dirt without scratching delicate finishes. For deeper cleaning, a gentle solution of dish soap and water works wonders, but I always avoid abrasive cleaners that can dull or damage veneer surfaces. Regularly inspecting hardware components like hinges and slides is crucial—loose hinges or sticking slides can compromise functionality and aesthetic appeal over time.
Tools You Can’t Live Without
Investing in the proper tools pays dividends in both maintenance and occasional repairs. A magnetic screwdriver set is vital for quick adjustments—once I kept fumbling with tiny screws on my new cabinetry, but switching to a magnetic screwdriver made the process seamless. For aligning doors or drawers perfectly, a digital level helps avoid uneven gaps, which not only looks professional but also prevents hardware issues. I recommend always having a multi-purpose orbital sander nearby; it’s invaluable for sharpening rough patches or removing paint drips that can occur over years of use, especially for painted or stained finishes on built-ins.
Forecasting the Future of Maintenance and Storage
With innovations trending toward smart home integrations, I predict a rise in tech-enabled maintenance tools—like wireless sensors that monitor humidity or hinge wear—and automated cleaning systems tailored for cabinetry. Staying ahead means selecting hardware and materials designed for longevity; for example, choosing satin or semi-gloss finishes that resist stains and are easier to clean. Combining manual upkeep with these emerging technologies promises a durable look that keeps your built-ins functioning beautifully for years to come.
How do I keep my custom storage systems working flawlessly over time?
Consistent upkeep hinges on proactive inspections and timely repairs. Regularly tightening screws, lubricating moving parts, and cleaning hardware prevent wear and tear. Applying a silicone-based lubricant to hinges every couple of years can dramatically extend their lifespan and keep door operation silent and smooth. Remember, patience in maintenance saves money in the long run—skipping these small steps often results in costly replacements later. For detailed advice on maintaining your particular hardware setups, check out this expert guide. Try applying a light silicone spray to your hinges this month and see how much smoother they operate; it’s a simple fix that makes a big difference. Additionally, I recommend revisiting your storage layout using smart storage ideas for small kitchens—these innovations can keep your space functional and reduce the need for frequent adjustments.
In the journey of transforming a kitchen with custom cabinets and built-ins, I discovered that the real magic lies beneath surface aesthetics. The most valuable lessons weren’t in choosing trending colors or stylish hardware but in understanding timing, patience, and attention to subtle details that often go unnoticed. These insights became the foundation of my success, shaping my approach to every project.
What I Wish I Knew Before Starting My Kitchen Makeover
- Patience Trumps Hurry: Rushing through measurements or surface prep often leads to misalignments or finish imperfections. I learned that taking extra time at the beginning saves headaches later, particularly when installing built-ins or ensuring cabinet doors align perfectly.
- Color and Light are Partners: Small undertone differences can drastically affect cohesion. I started testing paint swatches in different lighting conditions, and this simple step profoundly improved my color matching for built-ins to walls and trim.
- Surface Preparation is a Game Changer: Skipping sanding or priming resulted in peeling paint and uneven finishes. Investing in quality prep materials and techniques made all the difference in achieving flawless results that last.
- Hardware Matters More Than You Think: Quality hinges and soft-close slides might seem minor, but they deliver a silky smooth operation that elevates the entire space’s feel. I now see hardware as the finishing brushstroke that ties a design together.
- Design Proportions Can Make or Break Your Space: Oversized built-ins can overwhelm; well-scaled, proportionate designs enhance functionality and aesthetics. Reading interior design insights, like those in this guide, helped me understand balanced proportions better.
Tools and Resources That Changed My Remodeling Game
- Digital Level: Perfectly aligning cabinets is crucial. A digital level ensures precision, preventing uneven gaps and sticking doors.
- High-Quality Primer and Finishes: Using the right products for your surfaces prevents peeling and ensures durability. My go-to is their proven compatibility with diverse materials.
- Consultation with Professionals: Collaborating with seasoned artisans or interior designers minimizes costly errors and introduces innovative ideas, like discreet storage solutions I hadn’t considered.
- Educational Blogs and Guides: Resources like this comprehensive guide demystified complex choices and inspired creative tweaks.
Believe in Your Power to Create That Perfect Kitchen
Embarking on a kitchen transformation is as much about self-belief as it is about design choices. Recognize that every misstep offers an opportunity for growth, and patience coupled with informed decisions paves the way to a stunning, functional space. Remember, your unique style and dedication matter more than fleeting trends. If I can turn my kitchen into a sanctuary with thoughtful planning and persistence, so can you. Start small, stay curious, and trust in the process.
What unexpected lesson from your remodeling journey has changed how you approach design? Share below—I’d love to hear your story and continue this voyage together.