How to Remove Stubborn Water Rings from Natural Wood Cabinet Surfaces
It happened on a sunny Tuesday morning. I walked into my kitchen, coffee in hand, and the light hit the side of my pantry island just right. There it was: a cloudy, milky-white halo mocked me from the dark walnut surface. I’d left a sweaty glass of iced tea there the night before. My heart didn’t just sink; it plummeted. After all the effort I put into the ultimate guide to custom cabinets for a stylish kitchen overhaul, I felt like I’d just scarred a family heirloom. I’ll be honest, my first instinct was to grab a scouring pad and scrub. Don’t do that. That was my first big mistake years ago, and it turned a minor surface blemish into a full-on refinishing nightmare. Today, I’m going to share the exact method I use to lift those stubborn rings without losing your mind—or your finish.
That Heart-Stopping Moment You Spot a Water Ring
Seeing a blemish on your beautiful built-ins can feel like a personal failure. We invest so much in expert tips on selecting storage solutions for a perfect kitchen upgrade, and then life happens. But here is the good news: those white rings aren’t actually damage to the wood itself. They are just moisture trapped inside the upper layer of the finish. It’s like a tiny cloud stuck under a glass ceiling. If the ring is black, you’ve got a deeper problem because the moisture has hit the grain, but white? White we can fix. I remember when I first started woodworking, I thought I had to strip the whole door. I was wrong. Understanding that why solid wood door panels still need room to breathe in summer also means understanding how they react to humidity and direct moisture.
Can a DIY fix really work without ruining the finish?
It’s natural to be skeptical. You’ve probably heard horror stories of people using mayonnaise or toothpaste and ending up with a greasy, sticky mess. I was a skeptic too, until I realized that the goal isn’t to “clean” the ring, but to release the trapped vapor. According to the Finishing Academy, most modern wood finishes are semi-permeable, meaning they can actually release that trapped moisture if treated with the right amount of gentle heat or a specific solvent. The trick is patience. Have you ever stared at a water mark and wondered if your kitchen was doomed to look “shabby-chic” forever? You aren’t alone, and you don’t have to live with it.
Stop the Panic and Start the Recovery
The very first thing you need to do is put down the chemicals. When I was younger, I thought more power meant a faster fix. I once used a heavy-duty degreaser on a cabinet and watched in horror as the sheen dissolved. Lesson learned. Before we get into the heavy hitters like hairdryers or oil-based treatments, you need to ensure the surface is clean of any actual dirt or dust. If you are dealing with high-quality work, like the ones found in modern kitchen remodels featuring custom cabinets and built-ins, you owe it to the craftsmanship to be gentle. We are going to use the physics of evaporation to our advantage. I’m going to walk you through the “low and slow” heat method that has saved my own kitchen more times than I care to admit.
Evaporate the Fog with Low Heat
The most effective tool for this job is likely sitting in your bathroom drawer right now. A hairdryer set to a medium or low setting acts as a gentle vacuum for moisture. You aren’t trying to bake the wood; you are simply warming the finish enough so the microscopic pores open up and let the trapped water vapor escape. I usually hold the dryer about six inches away and move it in a constant circular motion. If you stay in one spot too long, you risk bubbling the finish—especially if you’re dealing with the difference between pre-catalyzed and post-catalyzed cabinet lacquer, which reacts differently to intense heat. Watch the ring closely; it will often vanish in less than two minutes. It feels like magic, but it is actually just basic physics. The white cloud you see is actually light reflecting off microscopic water droplets trapped in the finish; as they turn to gas and leave, the clarity of the wood returns.
Buff Away the White with Pantry Staples
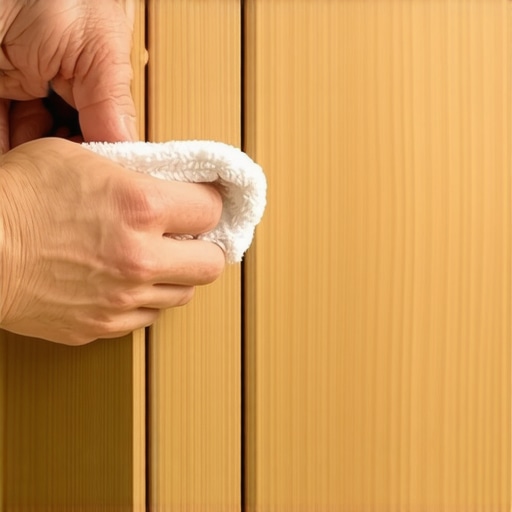
If heat doesn’t do the trick, it’s time for a little chemistry. A 50/50 mix of olive oil and white vinegar can work wonders. The vinegar gently breaks down the surface tension of the blemish, while the oil penetrates to displace the moisture. I once used this on a set of custom cabinets ideas that transform your homes style for a client who was convinced her kitchen was ruined after a holiday party. We applied the mixture with a soft microfiber cloth, rubbing gently with the grain. The result? The wood looked like it had never seen a drop of water. The key is to avoid using too much liquid; you want a damp cloth, not a soaked one. If you leave excess oil on the surface, it can attract dust and eventually gum up the hardware.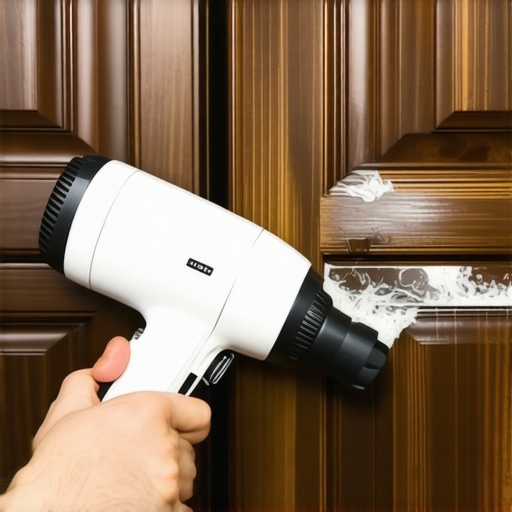
Why You Must Keep the Heat Source Moving
The danger zone is the ‘hot spot.’ I learned this the hard way during a project where we used rift sawn oak for modern kitchen cabinets. I got distracted by a phone call and held the heat on a single corner for just ten seconds too long. The white ring disappeared, but in its place, I created a slight ‘alligatoring’ or cracking of the topcoat. I ended up spending the entire afternoon figuring out how to match new cabinet doors to an existing stain without the guesswork just to fix my own mistake. Always keep that dryer moving. If the wood feels hot to the touch, you’re overdoing it; it should only ever feel warm to the hand. This constant motion ensures the heat is distributed evenly, mimicking the way wood naturally handles temperature shifts.
Restore the Sheen with a Final Polish
Once the moisture is gone, the finish might look a little dull or ‘thirsty.’ This is where expert tips on selecting storage solutions for a perfect kitchen upgrade come into play—it’s not just about the layout, but the longevity of the materials. A high-quality furniture wax or a specialized cabinet cream will seal those pores back up. Think of it as a sacrificial layer of protection. By applying a fresh coat of wax, you are providing a barrier for the next time someone forgets to use a coaster. This maintenance step is what separates a kitchen that looks ‘lived in’ from one that looks ‘worn out.’ If your cabinets are part of a larger project, like those seen in modern kitchen remodels featuring custom cabinets and built-ins, you know that keeping the finish pristine is the only way to protect your investment over the long haul.
While fixing a water ring feels like a major victory, it’s a drop in the bucket compared to the long-term frustrations of a poorly planned layout. Everyone tells you that a successful kitchen remodel is about maximizing every square inch of space. In my experience, that’s a recipe for a kitchen that feels like a Tetris nightmare. I’ve seen homeowners insist on deep corner cabinets that eventually become tupperware graveyards where lids go to die. The contrarian truth? Fewer cabinets with better access beat a wall of deep, dark boxes every single time. This is why kidney-shaped pull-outs are superior to the traditional Lazy Susan; they bring the contents to you rather than forcing you to dive into the abyss.
Why do expensive soft-close slides start grinding after just a year?
It’s a question I get constantly from clients who invested heavily in custom cabinets as a game-changer in your kitchen remodel journey. They assume the hardware is broken, but the nuance is usually in the maintenance—or the weight. According to a study by the Kitchen Cabinet Manufacturers Association (KCMA), the average drawer slide is rated for 75 to 100 pounds, but that includes the weight of the drawer box itself. If you’re loading up a 36-inch drawer with cast iron pans, you’re redlining your hardware. Often, cleaning the slides and adjusting the tension is all you need, but the real fix starts at the design phase by specifying heavy-duty undermounts for pot drawers.
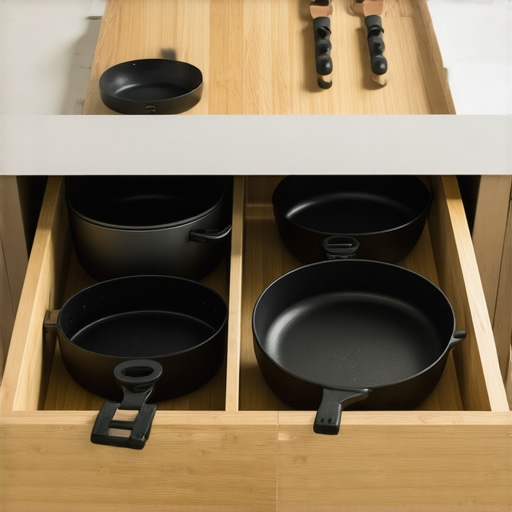
Let’s talk about a trap I see even seasoned DIYers fall into: the butcher block blunder. I’ve walked into stunning kitchens where the wood tops were buckling or, worse, pulling the cabinet frames apart. Bolting a butcher block directly to cabinets ignores the fundamental rule that wood is a living material. It needs to expand and contract with the seasons. If you restrict that movement, something is going to snap. It’s the same reason solid wood door panels still need room to breathe in summer. If your installer doesn’t use oversized holes or expansion clips, they aren’t just doing a sloppy job; they are setting you up for a structural failure.
Another subtle oops factor involves depth. We often think deeper is better for storage, but for specialty items, it’s the opposite. If you’re planning innovative storage solutions for modern kitchen remodels, you have to account for visual inventory. If you can’t see it, you won’t use it. This is why I often steer people away from deep walk-in pantries toward shallower, high-visibility pull-outs. Have you ever fallen into the trap of choosing more space over better space? Let me know in the comments—I’d love to hear your storage horror stories.
Maintaining a custom kitchen isn’t just about wiping down the counters; it’s about the silent workers behind the scenes—the hinges and slides that bear the brunt of your daily routine. If you notice the reason your cabinet doors are slamming despite having soft-close hinges, it is rarely a broken part and almost always a simple matter of tension or dirt. I’ve seen homeowners panic, thinking they need a full replacement, when all they really needed was a five-minute adjustment. High-end hardware is designed to be tuned, not just installed and forgotten. When you invest in transforming your kitchen with custom cabinets, you are buying a machine. And like any machine, a little preventative care prevents a total breakdown.
Stop the Squeak and Grind Before it Starts
I personally keep a small can of silicone-based dry lubricant and a soft nylon brush in my ‘kitchen emergency’ kit. Why? Because construction dust and even regular flour from baking can settle into the grease of your drawer slides. Over time, this creates a grinding paste that eats away at the bearings. This is the real reason your cabinet drawer slides are grinding and eventually failing. I recommend a deep clean of your tracks once a year. Pull the drawers out completely, vacuum the runners, and apply a light spray of dry lubricant. Unlike WD-40, which can attract more gunk, a dry silicone spray leaves a slick film that repels dust. This is the same level of care I suggest when people ask why your soft-close slides are failing and the quick cleaning fix that saves them hundreds in labor costs.
How do I maintain my cabinet finish over time?
The biggest threat to your finish isn’t actually water; it’s the oils from your hands. Look at the area around your most-used cabinet pulls. That slight discoloration or stickiness? That’s skin oil breaking down the topcoat. According to the technical specifications provided by Blum, a world leader in cabinet hardware, their ‘Dynamic Load Capacity’ for MOVENTO runner systems is tested for 100,000 cycles, but they specifically warn that the longevity of the surrounding wood finish depends entirely on regular cleaning with non-abrasive, pH-neutral cleaners to prevent chemical degradation. I always tell my clients to use a simple drop of Dawn dish soap in warm water. Skip the ‘wood cleaners’ with orange oil or waxes; they often build up a sticky residue that makes custom cabinets ideas that transform your homes style look dull and dated within a few years.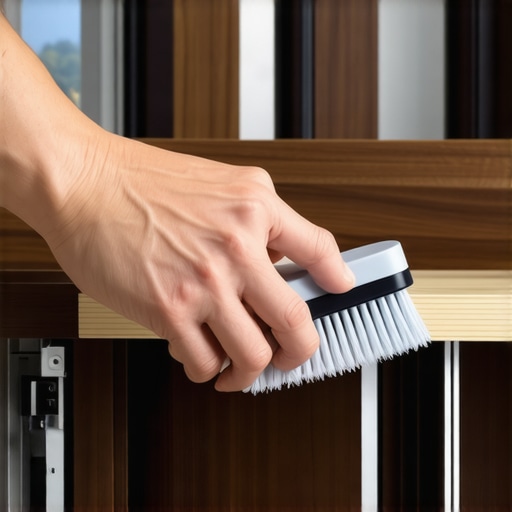
The Next Evolution of Kitchen Automation
Looking ahead, the trend for 2025 and beyond is moving away from physical hardware altogether. We are seeing a massive surge in ‘servo-drive’ technology where a light touch on the drawer face triggers an electric motor to open it. It’s perfect for heavy trash pulls or spice drawers when your hands are covered in dough. If you are planning smart storage ideas to maximize your kitchen space this year, I suggest looking into integrated lighting. We are moving toward a world where the under-cabinet lighting trick isn’t just for the backsplash, but for the inside of every drawer. Imagine opening a deep pot drawer and having it automatically illuminate the dark corners—no more flashlights needed to find that one specific lid. If your floor is even slightly off, don’t forget the proper way to shim a cabinet on a slanted slab floor to ensure these high-tech sensors don’t misfire. Take five minutes this weekend to wipe down your most-used drawer slides with a dry cloth; it’s the single easiest thing you can do to double the life of your kitchen’s moving parts.
Why I Stopped Chasing Perfection in My Cabinet Layout
After decades of working with wood, I’ve realized that a great kitchen isn’t a museum; it’s a living space. One of the hardest lessons I learned was that maximizing space with innovative storage solutions isn’t about cramming every inch with drawers, but about making sure you can reach what you need in two seconds flat. I used to think ‘more is better,’ but I’ve seen too many ‘dream kitchens’ become cluttered nightmares because the owner prioritized volume over flow.
Another lightbulb moment? Realizing that re-aligning doors after seasonal humidity changes isn’t a sign of poor quality—it’s a sign of real wood doing exactly what it’s supposed to do. If your cabinets don’t move at least a hair’s breadth between January and July, they are likely made of materials that won’t stand the test of time. Embracing the natural physics of your home will save you more stress than any ‘fix-all’ product ever could.
The Survival Kit I Keep Under My Own Sink
If you want your investment to last, you need the right supplies on hand. I personally swear by these three things: first, a simple bottle of pH-neutral dish soap. It’s the only thing that safely cuts through grease without eating the finish on your custom cabinets. Second, I always have a can of dry silicone lubricant ready. It is the secret weapon for when soft-close slides start failing, preventing that expensive grinding noise before it ruins the tracks. Finally, I recommend keeping a set of quality microfiber cloths; cheap rags can actually leave microscopic scratches that dull your sheen over years of wiping.
Your Kitchen is a Legacy in the Making
Don’t be afraid to actually use your space. A water ring or a sticky hinge isn’t the end of the world—it’s just a sign that your home is the heart of your family’s activity. When you choose transforming your kitchen with custom cabinets, you are building a stage for memories, not just a place to store plates. Take care of the small things today, like that rogue water mark or a loose screw, and your kitchen will reward you with decades of service. We often worry about the big hardware mistakes that make expensive cabinets look cheap, but the real secret is simply consistent, gentle care. Have you ever found a storage solution that actually changed the way you feel about your morning routine? I’d love to hear about it in the comments below!