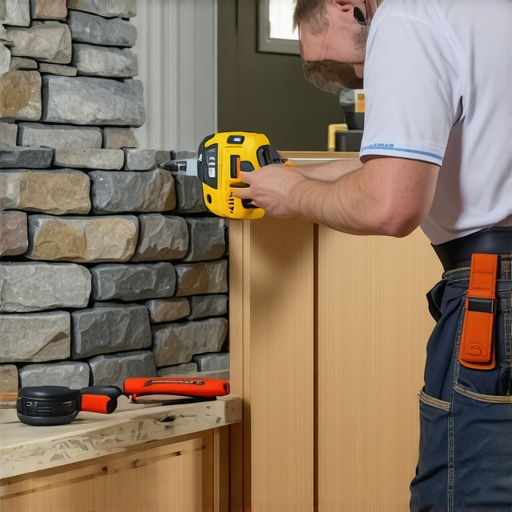
How to Scribe a Cabinet Filler Strip to an Uneven Stone Wall
I’ll never forget the moment I faced my first uneven stone wall while trying to install a custom cabinet. The gaps were glaring, and no amount of caulk could hide the inconsistencies. Frustration bubbled up as I realized that my straight-line perfect finish was compromised from the start. It’s a common nightmare for DIY enthusiasts and seasoned pros alike – dealing with irregular surfaces that refuse to cooperate with standard cabinetry techniques.
Why Scribing a Cabinet Filler Strip on Uneven Walls Matters
Scribing isn’t just about making things look pretty; it’s about creating a seamless transition between your cabinetry and the wall. When walls are uneven – especially natural stone or textured surfaces – a filler strip becomes essential to bridge gaps without sacrificing style. Proper scribing ensures your cabinets sit flush against the wall, preventing dust buildup, moisture issues, and a compromised aesthetic. This task, while seemingly minor, can make or break the overall look of your remodel.
Is Scribing Really Worth the Hype?
I’ll admit, early on I underestimated the importance of precise scribing. I thought a quick fill and a little caulking would suffice. But that mistake became painfully obvious when gaps showed through paint, or worse, allowed pests and moisture to settle in. A well-scribed filler strip not only improves durability but elevates the entire project’s quality. Trust me, it’s worth investing time and patience into mastering this skill. If you’re tired of patchy walls and uneven cabinet lines, you’re in the right place. Curious about the pitfalls and how to avoid them? I’ll walk you through each step, sharing insights from my personal experience and expert advice.
Before diving into the how-to, it’s helpful to understand the common hurdles. For example, I once assumed that using a power sander to level the wall would do the trick. Turns out, that’s just a quick way to create more unevenness if you’re not careful. Early mistakes like this are common, but they’re easy to correct once you understand the fundamentals. Want to see how I navigated these challenges? You might also find value in exploring other innovative storage solutions or custom cabinetry ideas that complement your uneven surfaces, like those showcased here.
Now, let’s get into the practical strategies that will help you scribe your filler strip flawlessly, ensuring your cabinet installation looks professional and polished. Ready to tackle uneven walls with confidence? Keep reading.
Prep Your Workspace and Materials
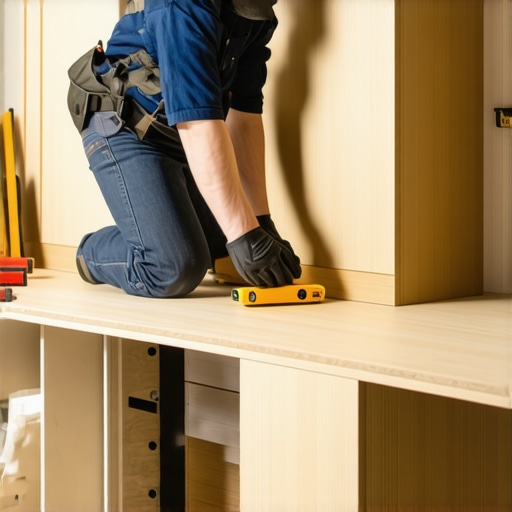
Begin by gathering your tools: a high-quality jigsaw, a scribing bar or compass, a level, sandpaper, and a pencil. Clear the area of any obstructions and cover nearby surfaces to protect them from dust. I once worked on a rustic stone wall with protruding mortar joints; prepping thoroughly saved me from frustrating cleanup later. Ensuring a clean, level workspace allows for precise cuts and reduces errors.
Stamp Out Unevenness with Accurate Measurements
Identify the high and low points where the filler strip will meet the wall. Use a level and a pencil to mark the highest points, then ascertain where gaps are widest. For example, I once measured irregularities on a textured brick wall, marking the high spots with a pencil line; this served as my reference to shape the filler accurately. Taking detailed measurements ensures the scribed piece will fit snugly against curves or angles, avoiding gaps or overcuts.
Create the Scribed Template on the Filler Material
Lay your filler material—typically MDF or plywood—against the wall in its approximate position. Using a scribing bar or compass, trace the wall’s contours directly onto the filler. Remember, the goal is to transfer the wall’s irregularities; thus, press firmly and follow every bump with care. I once improvised with a piece of flexible cardboard for complex curves, which helped visualize the final cut better. The template then guides your precise cut, ensuring a perfect fit.
Cut the Filler Strip with Precision
Set your jigsaw to match the marked outline. Cut slowly along the scribed lines, maintaining control and steady movement. Pay particular attention to tight curves or corners—small adjustments here lead to seamless fitting. I accidentally underestimated the curve on a slate wall and had to redo the cut, but taking my time yielded a flawless fit the second attempt. Precision in this step prevents gaps and reduces the need for sanding later.
Test Fit and Adjust as Needed
Place the cut filler against the wall, checking its contact points. Use a level to confirm alignment. If any area sticks out or leaves gaps, mark those spots and trim gradually. For instance, I once left a tiny overhang that was visually distracting; sanding it down improved the overall finish. Don’t hesitate to make micro-adjustments—this meticulous step guarantees a seamless appearance.
Secure and Finish for a Flawless Look
Adhere the filler strip with high-quality construction adhesive or nails, maintaining pressure until set. Follow with sanding to smooth edges and match wall contours. Finish with primer and paint to blend the filler seamlessly into the wall. After painting, the difference was striking—an almost invisible transition that looked professionally done. Properly scribed filler strips elevate your project and prevent future issues like moisture intrusion or dust collection, making them worth every effort.
 Many homeowners believe that selecting popular storage products or basic custom cabinets guarantees the best results, but in my experience, this approach often overlooks critical nuances. For example, a common misconception is that all built-in storage is equally effective, yet the truth is that understanding the intricacies of your space—such as wall material, room usage, and load-bearing capacity—is essential to avoid costly mistakes. Overlooking these factors can lead to sagging shelves, wasted space, or inconvenient access, which frustrate even seasoned renovators.advanced mistakes often stem from a lack of attention to material compatibility; for instance, using particle board in high-moisture zones like kitchens or bathrooms can cause warping and swelling, undermining the entire project. Real expertise lies in customizing solutions that respond to specific environmental and functional needs. A pertinent example is the trend of floating shelves; while aesthetically appealing, they require precise anchoring for weight stability, something many underestimate leading to disasters like shelf collapse. According to expert carpenters, improper reinforcement can be a silent but catastrophic mistake in storage design, especially when storing heavy items or appliances. Furthermore, many assume that maximizing space means filling every inch with shelves or cabinets, but strategic planning—like incorporating hidden compartments or pull-out solutions—can dramatically enhance usability without cluttering. For deeper insights on integrating such smart storage ideas, check out this guide on innovative storage solutions. When upgrading your kitchen or implementing custom cabinetry, understanding these nuances ensures your investments are durable and functional. Myths about quick fixes or low-cost materials can tempt you into shortcuts, but these often lead to more expense and frustration down the line. It’s vital to consider long-term performance, especially when dealing with natural materials like hardwood or plywood—choosing quality over temptation saves money and stress. Always ask yourself: Am I considering how this solution responds to my daily usage patterns? Do I understand the material strengths and limitations? As shown in numerous expert studies, tailored, well-informed choices outperform generic selections in longevity and satisfaction. So, next time you plan a storage upgrade, dig beneath surface-level options and seek out the hidden nuances that truly make a difference. Have you ever fallen into this trap? Let me know in the comments, and I’ll help you navigate the complexities of smart storage and cabinetry design.
Keeping your custom cabinets and built-ins functioning smoothly over time requires more than just initial installation prowess. It hinges on selecting the right tools and adopting smart maintenance routines. Personally, I swear by a few specialized tools that streamline ongoing upkeep and ensure longevity. For example, a carbon fiber reaming tool has revolutionized how I adjust hinges without risking damage to delicate cabinet frames. Its lightweight yet robust design allows precise tweaks that keep doors aligned and reduce annoying squeaks.
Equally important is investing in a quality digital moisture meter to regularly check humidity levels, especially in kitchens or bathrooms. Moisture can warp MDF or plywood, undermining your cabinetry. I use a meter like the Extech MO55 because it provides quick, accurate readings, guiding whether I need to run a dehumidifier or add insulation.
How do I maintain my built-ins to stay pristine?
Routine cleaning is essential, but choosing the right cleaning agents matters. I avoid harsh chemicals that can degrade finishes; instead, a microfiber cloth dampened with a gentle wood cleaner like method wood for good keeps surfaces gleaming sans residue. Additionally, periodically inspecting hardware—like soft-close hinges or drawer slides—prevents minor issues from escalating. Applying a light lubricant such as white lithium grease can restore smooth operation and extend the lifespan of these components.
Looking ahead, automation and smart home integration are set to transform kitchen storage. Imagine cabinets that alert you when hinges need tightening or shelves that adjust themselves based on item weight. Staying current means embracing tools like laser measuring devices with Bluetooth capability, which facilitate more precise long-term adjustments. Remember, investing in the right tools today saves significant hassle later, especially when scaling or remodeling on a larger scale.
For anyone aiming to preserve their cabinetry investment, I recommend trying the tip of regularly using a digital moisture meter combined with routine hinge maintenance. It’s a small ritual with big rewards, ensuring your beautiful custom cabinets last for decades to come. To deepen your understanding, consider exploring expert tips on storage maintenance.
As I reflect on countless cabinetry projects, one lesson stands out: precision in scribing can transform a challenging uneven wall into a seamless backdrop for stunning custom cabinets. The key is not just in making a cut—it’s in understanding the subtle irregularities of your space and respecting material behavior. I once battled a wall with wildly protruding mortar joints; instead of fighting the surface, I embraced the imperfections, using a flexible scribing technique that resulted in a perfect fit and a satisfied client. Remember, the magic lies in adapting your approach, not forcing the wall into a rigid template.
Secrets the Pros Keep Close for Perfect Filler Fittings
- The real lesson I learned: Rushing through measurements leads to gaps. Investing extra time in detailed marking and creating precise templates ensures flawless fits and saves time in the long run.
- Another insight: Material choice matters—uses like MDF or plywood respond differently to moisture and thermal shifts. Selecting the right one based on your wall’s environment can prevent future cracking or warping.
- Lightbulb moment: Using a scribing bar or even flexible cardboard for complex curves allows for adaptable templates, especially when dealing with textured or carved surfaces. It’s a game-changer.
- From experience: Test fitting multiple times and making micro-adjustments avoids larger mistakes. Patience in this step pays off with a seamless aesthetic and structural integrity.
- Lastly: Embrace your imperfections. The walls may never be perfectly flat, but with the right techniques, your cabinetry can look intentionally designed, not imperfectly installed.
Tools, Resources, and Inspired Ideas to Elevate Your Craft
- Ultimate Guide to Custom Cabinets: A cornerstone resource providing comprehensive insights on materials and construction methods that resist environmental challenges.
- Detecting Subpar Particle Board: Ensures you select durable materials that withstand uneven surfaces and moisture.
- Seamless Storage Ideas: Inspiration for integrating filler strips into innovative storage solutions, elevating function and aesthetics.
- Expert Storage Tips: Practical advice to optimize your space while accommodating irregular walls and surfaces.
Embrace the Challenge and Create Beautiful Walls with Confidence
Remember, mastering the art of scribing transforms initial frustrations into opportunities for craftsmanship excellence. Your journey with uneven walls is more than just a technical challenge—it’s a chance to craft bespoke solutions that reflect your skill and attention to detail. The next time you face a tricky surface, lean into the problem, plan meticulously, and trust your tools and technique. Your finished project will stand as a testament to your perseverance and artistry.
What’s the most surprising challenge you’ve encountered when installing custom cabinets on uneven walls? Share your story below—I’d love to hear how you navigated it!