The Countertop Support Move That Keeps Your Breakfast Bar from Sagging
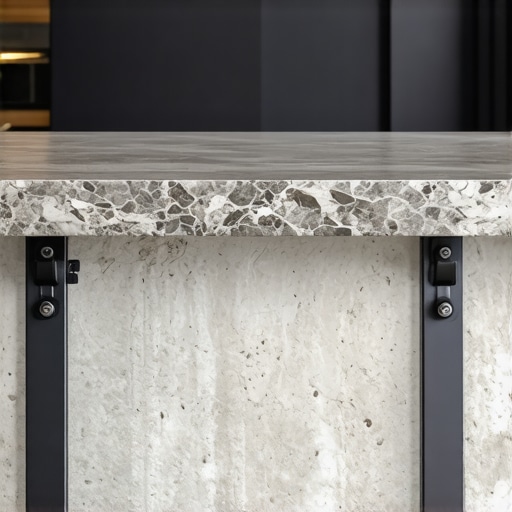
I remember the first morning I leaned on my brand-new granite breakfast bar and felt a sickening thud. Not a break, but a subtle, terrifying shift. I had spent months planning a stylish kitchen overhaul, only to realize my beautiful stone overhang was basically a ticking time bomb. I stood there with my coffee, leaning just a bit too hard on the edge of the island, and I swear I saw the seam at the backsplash move. My heart sank. I had ignored the most basic law of physics: gravity always wins. I had made the classic amateur mistake of thinking a couple of decorative wooden brackets would hold up 300 pounds of quartz. They didn’t. Within three months, that breakfast bar was bowing like a tired shelf, and I was terrified a guest would eventually snap the whole thing off. If you have ever noticed a tiny gap forming between your counter and the wall, you know exactly that cold sweat I am talking about. Today, we are going to fix that anxiety for good by talking about the hidden structural moves that keep your counters dead-level.
Stop Trusting Decorative Wood to Do a Structural Job
In my early days of DIY and remodeling, I fell for the pretty bracket trap. I bought these chunky, hand-carved oak corbels because they matched my custom cabinet ideas perfectly. What I did not realize is that wood expands, contracts, and—more importantly—compresses under the sheer weight of modern stone. It is the primary reason we now use steel brackets instead of wood corbels for almost every project with a significant overhang. The secret isn’t just more support; it is unyielding support. Look, I’ve been there. You are standing in the middle of a kitchen remodel using built-ins and you are trying to keep the aesthetic clean, but skipping the right support is like buying a high-end sports car and putting bicycle tires on it. According to the Natural Stone Institute, any stone overhang exceeding 10 inches requires structural support, and even then, at least two-thirds of the stone must be supported by the cabinetry to prevent a catastrophic failure. I learned this the hard way when I had to pull up a slab to retrofit the proper hardware after the fact. It was expensive, messy, and totally avoidable.
Do These Hidden Brackets Actually Support the Weight?
I get asked this all the time by homeowners who do not want to see ugly metal bars under their beautiful stone. The skepticism is real. People worry that a flat piece of steel cannot possibly be stronger than a thick wooden post. But the physics of cantilevered support tells a different story. These plates are routed directly into the top of the cabinet carcass, making them virtually invisible once the stone is dropped on top. It creates a seamless look while providing the kind of rigid backbone that wood simply cannot match. It is the same principle that allows floating vanities to stay level despite constant pressure. Have you ever looked at your breakfast bar and felt like it was sloping just a hair toward the floor? Tell me I am not the only one who has panicked over a 1/16th-inch gap. If that is you, do not worry—we are about to dive into the exact installation steps to ensure your breakfast bar never budges again.
Flush Mount the Steel for a Gap-Free Finish
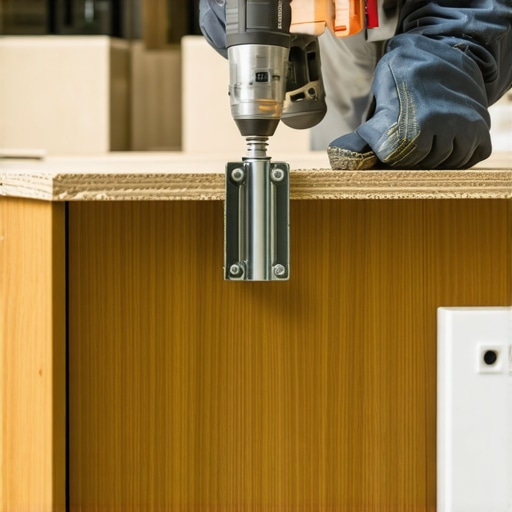
The biggest mistake I see DIYers make is thinking they can just screw a steel plate on top of the cabinet and let the stone sit on it. If you do that, you create a 1/2-inch hump that makes your expensive quartz look like it’s hovering. You have to route a channel directly into the cabinet’s top rail so the bracket sits perfectly flush. It is much like the secret to hanging floating vanities; you want the support to be part of the structure, not an afterthought. I use a plunge router with a straight bit, set to the exact thickness of the steel. I remember one job where I tried to ‘eyeball’ it with a wood chisel because I forgot my router at home. Halfway through, I realized I was turning a $5,000 island into a mess of splintered plywood. I ended up driving back to the shop, and now I never start an installation without the right template. This precision is what separates a stylish kitchen overhaul from a hack job.
Locking Down the Backbone
Once your channels are cut, the choice of fasteners is non-negotiable. You aren’t just holding metal to wood; you are resisting the leverage of a heavy stone slab. Using the wrong hardware is the fastest way to experience the cabinet screw mistake that causes failure. I always use #12 or #14 pan-head screws that are just short enough to not pierce through the finished interior of your custom cabinet ideas. Think of these screws like the lug nuts on your car tires. If one is loose, the whole system vibrates; if the screws aren’t beefy enough, the bracket will eventually flex, and that is when the dreaded hairline cracks appear in your grout or backsplash. This is especially critical when you are integrating built-ins and storage hacks into the island, as you need every inch of structural integrity to remain intact while you are cutting out sections for drawers or appliances.
Combine Strength with Smart Storage Below
One of the perks of using flat steel instead of bulky wood corbels is the reclaimed legroom. This allows you to get creative with your innovative storage solutions. Without a wooden post in the way, you can actually utilize the hidden drawer hack for extra storage right under the overhang. In a recent project, we installed a set of shallow ‘secret’ drawers for placemats and silver polishing kits that would have been impossible if we had used traditional braces. It turned the dead space under the bar into a high-functioning part of the kitchen remodel journey.
Ensure the Base is Dead Level
Your brackets are only as good as the cabinets they are attached to. If your floor has a slope—and let’s be honest, every floor has a slope—you must address it at the base. This is why every base cabinet needs adjustable feet. If the cabinet is leaning even a fraction of a degree toward the room, the leverage on that 12-inch overhang is multiplied. I once walked into a kitchen where the homeowner had perfectly installed the brackets, but the island was shimmed poorly at the floor. Over six months, the weight of the granite literally started to pull the cabinet carcasses apart. We had to strip the stone, re-level the bases, and start from scratch. Don’t let that be you. Level your boxes, route your channels, and use the steel to make that breakfast bar feel like it’s part of the foundation of the house itself.
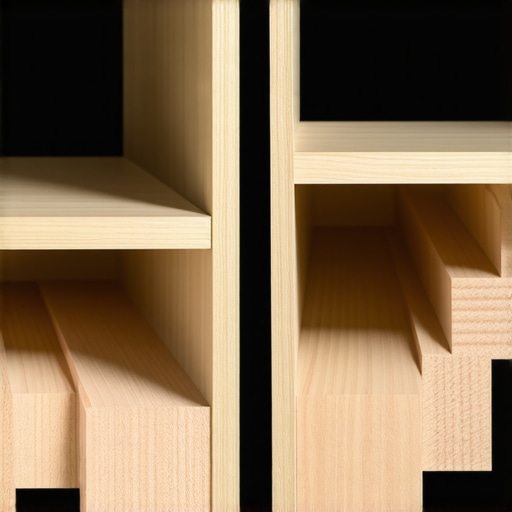
I have spent a lot of time talking about steel brackets, but even the strongest metal cannot save a weak cabinet box. A common myth I see in the ‘luxury’ market is that solid wood is the only choice for a high-end kitchen remodel journey. It sounds prestigious, right? ‘Solid maple boxes.’ In reality, solid wood is often a poor choice for the internal structure of a kitchen cabinet. Wood moves, breathes, and twists with every change in humidity. This is why I always tell my clients that plywood shelves outperform solid wood for long spans every single time. Plywood is engineered for stability; its alternating grain layers resist the warping that turns a solid oak shelf into a U-shape under the weight of your heavy cast-iron pots.
Why does plywood box construction win the durability war in wet zones?
Many builders try to save money by using particle board or furniture board for the cabinet carcasses. While this is fine in a dry bedroom closet, it is a ticking time bomb near a sink or dishwasher. According to the Architectural Woodwork Institute (AWI), moisture resistance is the single most important factor for cabinetry longevity in high-moisture zones. If you have a minor leak, particle board acts like a sponge, swelling until the drawer slides stop working and the hinges pull right out of the softened wall. That is why plywood box construction is mandatory for wet areas in any home I work on. It is the difference between a quick wipe-up and a ten-thousand-dollar replacement bill. The ‘Oops’ factor often comes from the things you cannot see until they fail. For instance, homeowners often obsess over the paint color but ignore the physics of heat. If you do not follow the 30-inch clearance rule for ovens, you will soon wonder why your cabinet paint bubbles near the stove. Heat delamination is real, and it is usually caused by trying to squeeze ‘extra’ storage too close to the range. You want to maximize your kitchen space, but doing it at the expense of safety clearances is an amateur move that will eventually void your cabinet warranty and ruin your aesthetic. Have you ever fallen into this trap where a design choice looked great on paper but failed in the real world? Let me know in the comments.
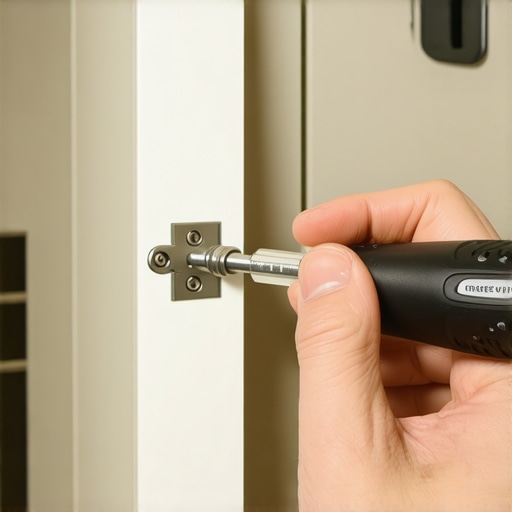
I’ve spent years perfecting the art of the install, but the real test of a kitchen remodel journey happens two years later when the house settles and the humidity swings. If you don’t have a maintenance plan, those silent, heavy drawers will eventually start to protest. My secret weapon isn’t a fancy power tool; it’s a simple #2 Pozi-drive screwdriver. If you look at your European hinges, you’ll see screws that look like a standard Phillips but have extra tick marks. Using a regular Phillips driver is the hardware mistake that makes expensive cabinets look cheap because it strips the heads, making future adjustments impossible. I carry a dedicated Pozi driver in my pocket during every walkthrough to ensure every door sits perfectly flush.
Keep Your Hardware From Turning Gritty
The most common complaint I hear is that drawers don’t slide like they used to. Usually, the real reason your cabinet drawer slides are grinding isn’t a mechanical failure—it’s kitchen grease and dust creating a sticky paste in the ball bearings. I always tell my clients to avoid WD-40 like the plague; it attracts even more gunk. Instead, use a dry PTFE lubricant spray. It’s a game-changer. Understanding why your soft-close slides are failing and the quick cleaning fix can save you from a $200 service call. According to the Kitchen Cabinet Manufacturers Association (KCMA) A161.1 performance standards, quality hardware is rated for tens of thousands of cycles, but that’s only if the tracks remain clear of debris. Take five minutes once a year to wipe those tracks down with a microfiber cloth.
How do I maintain my custom cabinets over time?
Maintenance is mostly about managing movement. Wood is a living material, and in the winter, your cabinet doors might shrink just enough to create an uneven gap. This is especially noticeable with the inset cabinet gap during seasonal changes. To keep everything looking sharp, you need to learn how to adjust European hinges. A quarter-turn on the depth screw can bring a crooked door back into alignment in seconds. Also, keep an eye on your sink base. I’ve started installing removable panels in all my projects because I know that a tiny drip today becomes a floor-replacement nightmare tomorrow. If you notice any musty smells, check for moisture immediately and ensure your built-ins and storage hacks aren’t blocking airflow around your appliances.
The Future Is Hidden Under the Toekick
Looking ahead to 2025 and beyond, we are seeing a massive shift toward active cabinetry. It’s no longer just about holding plates; it’s about power. I’m increasingly asked to install the built-in charging station that finally clears your countertops, integrating USB-C ports directly into drawer boxes. We are also moving toward integrated sensor lighting that triggers when you walk into the room. This is why I always suggest why under-cabinet lighting should always be recessed—it hides the tech while highlighting the craftsmanship. If you want to future-proof your kitchen today, my one piece of advice is this: pick one drawer that feels slow or heavy right now, pull it out, wipe the tracks with a dry cloth, and apply a tiny bit of dry lubricant. You will be amazed at how much newer your whole kitchen feels with that one simple fix.
The Hardest Lessons I Learned Fixing Failing Kitchen Island Supports
Over the years, I have seen more sagging stone and cracked grout than I care to admit, and almost every failure traces back to cutting corners where no one can see. The biggest lightbulb moment for me was realizing that ‘structural’ and ‘decorative’ are two different languages. I once watched a homeowner spend thousands on exotic marble, only to have it tilt because they insisted on using flimsy wooden legs instead of steel. If you are selecting storage solutions for an island, remember that gravity does not care about your Pinterest board. Another hard truth? Silence is golden. If a drawer makes a sound, something is dying. Whether it is friction in the glide or a loose screw, catching it early prevents the entire box from racking. Finally, never assume your floor is flat. If you don’t use adjustable feet, you are essentially building your dream kitchen on a foundation of quicksand. These invisible details are what determine if your kitchen stays beautiful for three years or thirty.
The Three Tools I Never Start a Kitchen Installation Without
If you want your remodel to last, you need more than just a hammer. I have narrowed my personal ‘survival kit’ down to a few essentials that save my sanity on every job site. First, a dedicated #2 Pozi-drive screwdriver is non-negotiable for anyone with European-style hinges. It stops the stripping that ruins expensive hardware. Second, I always keep a bottle of dry PTFE spray nearby; it is the only way to keep tracks gliding without attracting the dust that leads to grinding. Third, I never finish a sink base without adding a custom tray; I have learned that waterproof liners are mandatory to protect your investment from the inevitable slow drip. I also recommend keeping a simple reference guide on innovative storage solutions to help you visualize how to use every square inch of your new footprint effectively.
Your Kitchen Remodel Journey Is Only One Step Away
Taking on a renovation can feel like a mountain of decisions, but the best advice I can give is to prioritize the bones of the room. When you focus on high-quality plywood, unyielding steel support, and precision hardware, the aesthetic beauty of your home naturally follows. You deserve a space that is as tough as it is gorgeous, and by paying attention to these structural secrets, you are ensuring your home remains a source of pride rather than a list of repairs. Your kitchen remodel journey is a chance to fix the frustrations of the past and build a functional future. Don’t be afraid to demand the best materials—your future self will thank you every time you open a drawer or lean on that rock-solid breakfast bar. Have you ever discovered a hidden structural issue or a sagging shelf that completely changed how you view ‘quality’ cabinets? Let me know in the comments below.