The Hidden Drawer Hack for Extra Storage in Your Kitchen Island
Ever stood in your kitchen, frustrated because the counter space is cluttered, and you can’t find that elusive spoon or measuring cup? I’ve been there! One day, during a chaotic morning, I realized my beloved kitchen island—even though designed with style—was also a black hole for utensils, gadgets, and random odds and ends. It felt like I was constantly digging through a cluttered drawer, or worse, a jumbled pile on the countertop. That’s when the lightbulb went off: what if I could hide extra storage right within my kitchen island, without sacrificing its sleek look? And better yet, make everything instantly accessible?
Revolutionize Your Kitchen Storage with a Hidden Drawer in Your Island
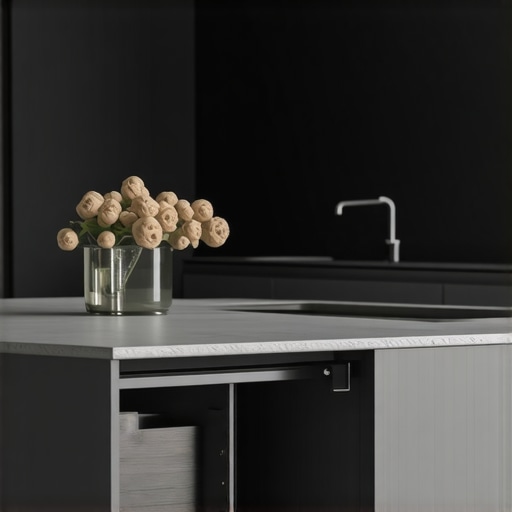
This idea wasn’t just a flash of inspiration—it’s a game-changer I wish I’d discovered sooner. Installing a hidden drawer or extra compartments within the base of the island provided me with a treasure trove of space, cleverly tucked away but easy to access. Imagine the peace of mind that comes with having your baking sheets, cleaning supplies, or even small appliances out of sight but just a slide away. And yes, it’s surprisingly simple to implement, especially when you work with experts who specialize in custom solutions. Want to learn how I did it? Stick around, because I’ll walk you through the process, share my personal mistakes, and help you avoid pitfalls before you start your upgrade journey.
Is a Hidden Drawer Actually Worth the Hype?
Honestly, I was skeptical at first—thought it might be a complicated, costly project that wouldn’t deliver. My early mistake was assuming I could add this feature myself without proper planning. Turns out, rushing the design leads to issues with drawer alignment and usability. That’s why I recommend consulting with specialists who understand the nuances of creating seamless, functional storage solutions. You can learn more from experienced craftsmen who combine aesthetics with practicality, like at artisancabinetworkz.com. This way, your new hidden drawer will be both beautiful and durable, fully integrated into your existing kitchen design.
So, have you faced the frustration of limited kitchen storage? If so, keep reading—because I’m about to show you how to turn your kitchen island into a storage masterpiece that doesn’t compromise style for function.
Measure and Plan Your Hidden Storage Space
Start by identifying where you want the hidden drawer—usually at the base of your kitchen island. Use a tape measure to mark the height and width, keeping in mind the appliances, plumbing, or structural elements that could interfere. I once tried fitting a drawer where a support beam was, leading to a frustrating re-measurement. Plan for at least an inch of clearance on all sides for smooth operation. Sketch your design and note dimensions carefully, as precise measurements prevent mishaps during installation.
Choose the Right Materials and Hardware
Select durable plywood or hardwood for the drawer box, matching your existing cabinetry for a seamless look. For the hardware, opt for soft-close slides to ensure quiet, effortless opening. I recommend specialty concealed slides that can hold heavier loads without sagging, especially if you plan to store appliances or pots. Quality hardware might be more expensive upfront, but it pays off in longevity and ease of use. Visit this guide for detailed material selection and hardware options tailored for built-in solutions.
Construct the Drawer Frame and Box
Using your measurements, cut the plywood for the sides, bottom, and front of the drawer. Create a sturdy frame by attaching the sides to the front and back pieces with countersunk screws and glue. Remember, precision is key; a tight-fitting frame ensures smooth operation. I once rushed this step and ended up with a crooked drawer, so take your time aligning edges. Clamp the pieces during glue-up to prevent shifting and ensure a flush finish. Consider using factory-finished plywood for a clean look without extra finish work.
Prepare the Island Base for Installation
Remove the existing panel or kickplate where the drawer will go. Cut or modify the base to accommodate the new drawer cavity, using a jigsaw for clean, accurate cuts. Double-check your measurements before cutting; a misjudgment here can cause alignment issues. I once cut too deep, which required patching with scrap wood—lesson learned. Reinforce the surrounding framing if needed, to support the weight of stored items. Ensure the opening is smooth with no rough edges that could snag the drawer.
Install the Drawer Slides and Fit the Drawer
Attach the slides to the inside of the cavity and to the sides of the drawer, following the manufacturer’s instructions. Use a level to ensure alignment, as even minor tilts can cause binding. Once installed, gently slide the drawer into place, checking for smooth operation. Adjust the slides if necessary—most have micro-adjusters for perfect alignment. I once forgot to tighten the screws fully, causing the drawer to wobble; double-check before finalizing. For a seamless appearance, choose slides that can be hidden behind the drawer face.
Finish and Integrate for a Seamless Look
Apply matching paint or veneer to the drawer front to blend with your island surface. Attach handles or push-to-open mechanisms depending on your style preference. Seal the edges with wood filler or edge banding for a polished look. I experimented with a matte finish to match existing cabinetry, which turned out stunning. Test opening and closing the drawer multiple times to ensure reliability. For an extra touch, consider installing a soft-close mechanism that’s flush with the cabinet face, maintaining a sleek aesthetic. If you’re unsure about custom fitting or want a flawless finish, consulting with experts can guarantee professional results.Many homeowners assume that installing built-in cabinets and custom storage solutions is just a matter of choosing the right finish or style, but in my experience, the devil is in the details. One widespread misconception is that all built-ins are equally suited for any space. Actually, neglecting the specific nuances of your kitchen’s architecture can lead to costly mistakes or awkward designs that break the seamless aesthetic you’re aiming for. For example, relying solely on standard measurements without considering the function and flow can result in wasted space or inconvenient access. Consulting with experts who understand the subtleties of custom cabinetry—like at this detailed guide—can help avoid these traps and bring your vision to life.
Another common myth is that higher-end materials always guarantee better longevity. While quality materials are crucial, the way they are integrated plays a pivotal role. For instance, using particleboard for heavy-use pantry shelves might save costs initially, but it’s prone to bowing over time, especially in humid environments. Instead, opting for plywood or solid wood, as recommended by industry experts, ensures durability and ease of maintenance. Additionally, many overlook how hardware choices—like soft-close hinges and steel brackets—affect the long-term performance of their built-ins. These nuances can make or break the functionality and satisfaction with your remodel.
It’s also worth mentioning the trap of focusing solely on aesthetics—think glossy finishes or trendy colors—without considering accessibility. Proper ergonomics, such as drawer heights and door swing clearances, are often underestimated, leading to frustration down the line. Advanced homeowners and designers consider these factors at the planning stage, ensuring that every inch serves its purpose efficiently.
A question I often get from more experienced DIY enthusiasts is: “How do I ensure my custom cabinets will stay perfectly aligned, especially on uneven floors?” The answer lies in precise measurement and adjustable hardware, like concealed micro-adjusters, which allow fine-tuning post-installation. It’s a detail that many overlook but can save hours of rework. For deeper insights into this, visit this expert resource.
In conclusion, understanding these nuanced aspects—beyond just selecting styles or finishes—can elevate your kitchen remodel from amateur to professional quality. Trust me, avoiding these pitfalls requires an eye for detail and industry insights, which I’ve gathered through years of hands-on experience and studying best practices. Have you ever fallen into this trap? Let me know in the comments, and I’ll be happy to share more about how to steer clear of these common mistakes on your remodeling journey.
Keeping It Working: Essential Tools and Maintenance Tips
Ensuring your custom kitchen cabinets and built-ins remain functional and beautiful over time requires the right tools and routine care. I’ve found that having a precise set of equipment makes all the difference in both installation and ongoing maintenance. For tasks like adjusting European hinges or realigning drawer slides, I swear by a high-quality Allen wrench set and a fine-tipped screwdriver. These allow for fine adjustments that keep doors and drawers closing perfectly without needing to call in a pro every time. When it comes to cleaning, I recommend a soft microfiber cloth combined with a gentle, pH-balanced cleaner. Avoid harsh chemicals that can damage finishes—especially on matte or natural wood surfaces—preserving your investment for years to come.
Additionally, investing in a laser level is a game-changer during initial installation or re-alignment. It helps ensure everything stays perfectly plumb, especially in kitchens with uneven floors or soffits. For those who enjoy DIY upkeep, a small pipe cleaner or toothpick can clear out debris from tight hinge or drawer channels, preventing sticking or squeaking. These minor tools can prolong the lifespan of hardware and keep functionality smooth.
Predicting the Future of Kitchen Maintenance
I believe that as smart home integration advances, we’ll see more built-ins equipped with sensors that alert you to loose hinges, worn slides, or even moisture issues before they become major problems. This proactive approach will save homeowners time and money, enabling them to maintain their kitchens effortlessly. Imagine receiving a notification on your phone that a cabinet latch needs tightening or that a drawer slide is showing signs of wear—instant alerts that keep everything in tip-top shape.
How do I keep my storage and cabinets in top shape for years?
Regular check-ins and quick adjustments are key. For instance, incorporating a scheduled monthly inspection of hinges, slides, and seals can prevent unexpected failures. Keep in mind that hardware like soft-close hinges or concealed slides benefits from lubrication every few months with a silicone-based spray—this reduces friction and noise, ensuring longevity. As I recommended at this expert guide, using the right maintenance products is crucial. I encourage you to try out a silicone spray on your hinges this month. It’s a simple step that makes a tangible difference in how smoothly everything functions.
Finally, keeping your cabinets clean and free from excessive moisture or heat will protect veneers and finishes. Installing interior dehumidifiers or avoiding storing excessive liquids inside your built-ins helps preserve their integrity. With a little routine and the right tools, your kitchen will remain as stunning and functional as the day it was installed—well into the future.
Over the years, I’ve realized that the true art of kitchen renovations lies not just in selecting beautiful cabinetry but in mastering the intricate details that elevate functionality and style. One of my most eye-opening lessons was how a thoughtfully designed hidden storage drawer transformed my entire approach to built-in solutions. It’s not just about space—it’s about reimagining what your kitchen can do for you, seamlessly blending innovation with aesthetics.
The Unexpected Pitfalls That Changed My Strategy
One of the biggest lessons I learned was the importance of precise measurements and not rushing the design process. A seemingly small miscalculation can lead to misaligned drawers or compromised structural integrity. I once overlooked a support beam, which caused hours of frustration trying to adapt my plan. Now, I always double-check every measurement and consult with specialists to ensure perfection, avoiding costly reworks and ensuring my built-ins stand the test of time.
Transform Your Kitchen with Curated Resources
When it comes to creating custom cabinets and hidden storage solutions, trust in well-vetted tools and guides is invaluable. I rely heavily on this comprehensive resource, which offers expert advice on integrating built-ins beautifully. Additionally, I recommend exploring advanced hardware options from trusted suppliers—these make a world of difference in durability and smooth operation.
Design Beyond the Surface: Embrace the Journey
Most importantly, I want to emphasize that a successful kitchen remodel is an ongoing journey, one that involves patience, attention to detail, and a willingness to learn from every challenge. Don’t be afraid to iterate and adapt your plans; innovation often arises from the lessons we learn along the way. The satisfaction of opening a perfectly aligned, hidden drawer, crafted precisely for my needs, makes every setback worth it.
Are you ready to take your kitchen remodeling game to the next level with smart built-in solutions? Share your thoughts or questions below—I love hearing about your projects and ideas!
,