The One Tool You Need for Perfectly Aligned Cabinet Knobs Every Time
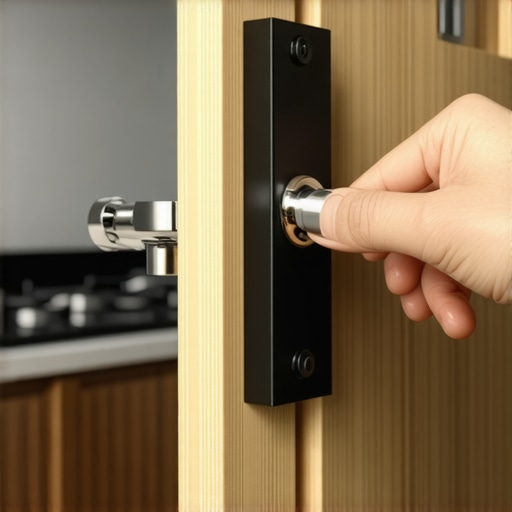
I remember standing in my kitchen, heart hammering against my ribs, holding a cordless drill and a $150 slab-front walnut door. I had spent months planning this modern kitchen remodel, and now I was at the finish line: the hardware. I measured. I marked a tiny pencil dot. I measured again. Then, I held my breath and drilled. The result? A knob that sat exactly 1/8th of an inch higher than its neighbor. Every time I walked into the room, that tiny misalignment screamed at me like a neon sign. It was a classic hardware mistake that makes expensive cabinets look cheap, and I had fallen right into the trap. We have all been there, haven’t we? That moment where a ‘quick task’ turns into a permanent scar on our beautiful cabinetry. Today, I am going to save you from that nightmare by introducing the one tool you absolutely cannot skip if you want professional results: the cabinet hardware jig.
Why Your Measuring Tape is Lying to You
Relying on a tape measure for twenty different cabinet doors is a recipe for disaster. Human error is inevitable when you are tired or working under poor lighting. Even if you are careful, the slight variation in how you hold the tape can lead to ‘stair-stepping’ handles. During my early days, I tried to avoid tools I thought were ‘extra,’ but I soon learned that custom cabinets deserve better than a ‘close enough’ attitude. Have you ever stepped back from a project only to realize one handle was just crooked enough to drive you crazy?
Is This Just Another Plastic Gimmick?
You might be thinking that a specialized jig is just another way for big-box stores to take your money. I felt the same way until I ruined a drawer front on a set of built-ins that I had spent weeks building. The reality is that these jigs provide a physical stop—a hard boundary that prevents the drill bit from wandering. According to the National Kitchen & Bath Association (NKBA), cabinetry accounts for nearly 30% of a kitchen remodel budget, so protecting that investment with a $30 tool is just common sense.
The Moment I Finally Stopped Guessing
The first time I used a real aluminum cabinet jig, I finished an entire bank of drawers in fifteen minutes. No marking, no re-measuring, and most importantly, no stress. It’s a game-changer when you are navigating a kitchen remodel journey where a thousand other things are already demanding your attention. In the next section, I will walk you through how to set up the jig and the specific trick I use to ensure even the longest pulls stay perfectly level.
Stop Guessing and Lock in Your Layout
The biggest mistake people make is treating every cabinet door as a new math problem. Instead, think of your jig as a master template. First, you must determine your ‘setback’—the distance from the edge of the door to the center of the hole. For most modern kitchen remodels, handles are centered on the stile. I once worked on a set of rift-sawn oak cabinets where I thought I could skip the jig for the last two doors because I was in a rush to finish the built-ins. I ended up drilling a hole right into the decorative chamfer. It was a $300 mistake that took two weeks to replace. Now, I clamp the jig to a scrap piece of wood first, drill a test hole, and hold it up to the cabinet to verify the look before touching the actual door.
The Correct Way to Center Oversized Hardware
When dealing with wide drawers, the math gets trickier. If you are following the 5-inch rule for choosing the right size cabinet pulls, you might be dealing with hardware that spans twelve inches or more. On these large spans, a single mounting point isn’t enough; you need the jig to bridge the entire distance. For drawers wider than 24 inches, I always recommend using two handles or one very long pull to prevent the drawer from racking. If you feel the drawer face flexing, you might need to fix a sagging pot and pan drawer with a center support to ensure the weight of the heavy cookware doesn’t pull the hardware right through the face.
Prevent the Dreaded Wood Splinter
Nothing ruins a kitchen remodel journey faster than ‘blowout’—when the drill bit exits the back of the wood and tears a massive chunk of veneer with it. This is especially common if you aren’t using high-quality materials. It is one reason why plywood box construction still wins over furniture board; the layers of real wood resist splintering better than compressed particles. To avoid this, apply a piece of blue painter’s tape over your mark on both the front and back of the door. The tape holds the wood fibers in place as the bit passes through.
Keep Your Drill Level Every Time
Even with a jig, if you hold your drill at a slight upward or downward angle, the handle will sit crooked. I use a small ‘drill guide’ block or a self-centering Vix bit if the jig allows for it. Think of it like a train on a track; the drill should only move forward and backward, never side-to-side. This precision is vital when you are integrating smart storage ideas that require perfectly aligned finger pulls or specialized latches. When the holes are straight, the screws glide in without resistance, which prevents the hardware from loosening over time due to stripped threads.
While a jig ensures your holes are straight, the most sophisticated mistake I see homeowners make during a modern kitchen remodel isn’t about the drill bit—it is about the physics of the drawer itself. Most people assume that if they invest in high-end, heavy-duty slides, they can pack their drawers with cast iron pans without a second thought. But here is the contrarian truth: even the strongest hardware cannot compensate for a weak cabinet box. I have seen $200 slides literally pull the screws out of particle board because the material couldn’t handle the torque. This is exactly why plywood box construction still wins over furniture board in any high-traffic area. The structural integrity of the wood layers provides a ‘bite’ for the hardware that composite materials simply lack.
The Expensive Hardware Myth That Costs Homeowners Thousands
We often think that ‘more is more’ when it comes to storage, but over-engineering your custom cabinets can actually lead to the ‘Oops Factor’ that ruins your daily workflow. Take the trendy T-bar pulls, for example. They look sleek and modern, but if you don’t know how to use t-bar pulls without them catching your pockets, you will find yourself literally tethered to your cabinetry every time you try to cook. It sounds like a minor annoyance until you realize you’ve ripped a belt loop or, worse, tripped while carrying a pot of boiling water. Precision in a kitchen remodel journey means thinking about how you move through the space, not just how the space looks in a photograph.
Does Your Kitchen Layout Violate the 4-Foot Rule?
An advanced nuance often missed by DIYers is the ‘traffic tolerance’ of an island. Many people try to squeeze a massive island into a medium-sized kitchen, sacrificing floor space for extra storage solutions. However, why your open-concept kitchen island needs a 4-foot clearance rule becomes obvious the moment two people try to work in the kitchen at once. The Architectural Woodwork Institute (AWI) emphasizes that ergonomic standards are just as vital as material quality; if you can’t fully extend a drawer without hitting the dishwasher behind you, the most expensive cabinetry in the world will still feel ‘cheap’ and poorly planned. Have you ever fallen into this trap of prioritizing storage volume over actual movement? Let me know in the comments.
The Hidden Danger of Outdated Storage Trends
Another common mistake is clinging to traditional storage ‘solutions’ that actually degrade your investments. For years, the ‘standard’ was to place wine racks in the small gap above the fridge. In reality, why we stopped putting wine racks over the refrigerator is simple: heat. The compressor from the fridge vents upward, cooking your wine and drying out the cabinet wood, leading to premature cracking. Instead, look toward smart storage ideas that utilize cool, dark zones or pull-out systems. When you shift from ‘where can I fit this?’ to ‘where does this item belong for longevity?’, your custom cabinets move from being simple furniture to a high-performance tool.
You might think your kitchen is a static object, but a modern kitchen remodel is actually a living, breathing mechanical system. After the dust settles, the real work of homeownership begins: maintenance. If you start hearing a ‘clunk’ when you close a drawer, do not panic. Usually, it is not a mechanical failure but a debris issue. I have seen homeowners spend hundreds replacing perfectly good hardware because they did not know why your soft-close hinges are suddenly sluggish and how to clean them. A quick wipe-down of the piston with a microfiber cloth often restores that buttery-smooth motion immediately.
Fix the Sluggishness Before Replacing Parts
According to Blum’s technical documentation, high-quality hinges are tested for up to 200,000 opening and closing cycles. This means that if you treat them right, your custom cabinets should function perfectly for over 20 years. However, this longevity depends entirely on your ability to make micro-adjustments as the house settles and the humidity fluctuates. If you notice your doors are starting to touch or look uneven, do not wait. Prompt action prevents the finish from chipping when the wood expands and rubs together, which is a common issue when solid wood door panels still need room to breathe in summer.
The Hidden Tool That Saves Your Screws From Stripping
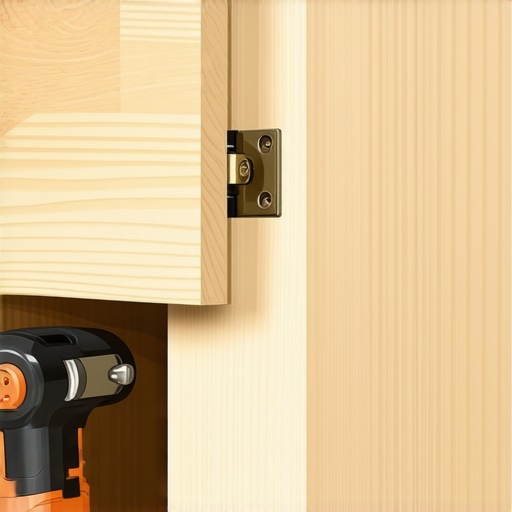
The most important tool in my kit is not a power drill—it is a PoziDriv #2 screwdriver. Most people use a standard Phillips, but the screws on high-end European-style hinges have a secondary ‘cross’ that requires a PoziDriv bit. If you use the wrong one, you will strip the head, and suddenly re-aligning doors after seasonal humidity changes becomes an impossible task. If you see your doors sagging, use the adjustment screws to shift the door’s ‘throw’—the side-to-side and depth positioning—until the gaps are perfectly uniform. This precision ensures your storage solutions remain effortless to use.
How can I keep my custom doors aligned through the seasons?
The secret is not just in the hinges; it is in the base. If your floor is not perfectly level—and let’s be honest, no floor is—your cabinet boxes will eventually ‘rack’ or twist. This is why every base cabinet needs adjustable feet on uneven concrete or old subfloors. By using a laser level and adjusting the legs individually, you ensure the box stays square, which keeps the hardware from binding. This foundation prevents the real reason your cabinet drawer slides are grinding over time. When your base is solid, your expertly selected storage solutions will feel just as premium ten years from now as they did on install day.
The Future of Smart Cabinet Maintenance
Looking forward, I predict we are going to see a massive shift toward ‘smart hardware’—hinges with built-in sensors that notify your phone when a door is out of alignment or when a hinge is under too much stress from a heavy load. It sounds futuristic, but the technology already exists in commercial spaces. For now, my best advice is to grab a dedicated PoziDriv driver and spend ten minutes this weekend checking your gaps. Trust me, your future self will thank you for catching a loose screw before it ruins a $500 door panel. Take a moment to inspect your most-used drawer today and see if it needs a quick cleaning or adjustment to keep it running smoothly!
Hard Truths I Learned the Expensive Way
Reflecting on my early mistakes, I have realized that the most beautiful custom cabinets can be ruined by a single moment of impatience. Here are the lightbulb moments that changed how I approach every install:
- The ‘Half-Turn’ Rule: When tightening pulls, stop exactly a half-turn after you feel resistance. Overtightening can snap the screw head or crack the wood finish, especially on delicate veneers.
- Verify Your Center Line: I once drilled twenty doors based on a ‘factory’ center line that was actually off by 1/16th of an inch. Always verify the manufacturer’s specs against the physical handle before you touch the drill.
- Trust the Blue Tape: Even if you are using a high-end jig, that extra layer of painter’s tape is your insurance policy against the smallest wood splinters on the exit side of the hole.
- The Power of the Headlamp: Shadows are your worst enemy when marking drill points. A high-lumen headlamp ensures you see exactly where the bit meets the wood, regardless of overhead lighting.
Tools That Keep My Workshop Running
I do not believe in buying every gadget, but these four items are non-negotiable for anyone attempting modern kitchen remodels at home:
1. Professional-Grade Aluminum Jig: Unlike plastic versions, a solid aluminum jig will not flex or warp over time. It provides a rock-solid guide that ensures every hole is perfectly vertical. 2. PoziDriv #2 Screwdriver: Most high-end European hinges use PoziDriv screws. Using a standard Phillips will strip the head, making future maintenance a nightmare. 3. Self-Centering Vix Bits: These bits ensure your hole is dead-center within the jig’s guide hole every single time. 4. High-Tension Laser Level: Indispensable for ensuring your built-ins and storage hacks align across the entire length of the room.
Your Kitchen Deserves This Level of Care
At the end of the day, your kitchen remodel journey is about more than just aesthetics; it is about creating a space that feels intentional and high-quality in every interaction. When a drawer glides open silently and every handle is perfectly level, it sends a subconscious signal that the room was built with love and precision. Don’t rush the finish line. Take the extra five minutes to set up your jig and calibrate your tools. Your future self will thank you every time you reach for a coffee mug or a dinner plate. For more inspiration on the planning phase, check out our ultimate guide to custom cabinets for a stylish kitchen overhaul. Have you ever had a hardware ‘oops’ moment that you had to get creative to fix? Let me know in the comments below!