The Sink Base Secret: Why You Need a Waterproof Tray Before the Leak Happens
I’ll never forget the moment when I discovered a small leak beneath my kitchen sink, flooding my freshly renovated space overnight. It was a sobering lesson in what I now call the “sink base secret.” That tiny drip turned into a costly nightmare, and afterward, I wondered—how many of us are unknowingly leaving our cabinets vulnerable to water damage? If you’re like I was, you might think a waterproof liner is an unnecessary extra—until it’s too late. Today, I promise to unravel why installing a waterproof tray beneath your sink is the smartest move you can make before disaster strikes.
Why a Waterproof Tray Could Save Your Kitchen—and Your Wallet
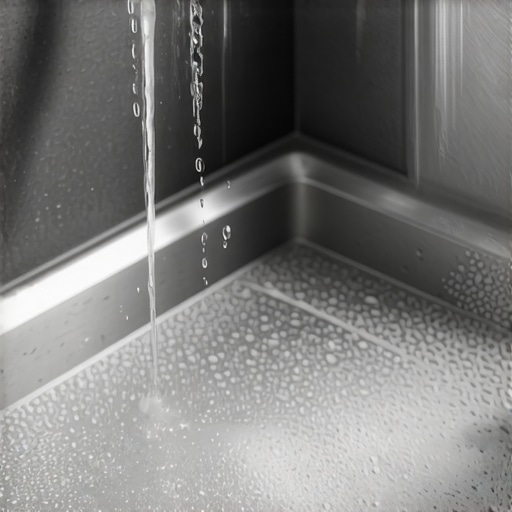
Often, homeowners overlook this simple yet critical step during remodels or DIY upgrades. I used to believe that sealing the pipes and using good-quality caulk was enough. But I learned the hard way that water can sneak past those barriers, especially if a connection loosens or a seal fails. A waterproof tray acts like a protective lining—catching leaks early and preventing them from seeping into your cabinets’ structure, which can lead to rot, mold, and expensive repairs. According to the National Kitchen & Bath Association, water damage from leaks can cause over $1 billion in property damage annually. That staggering statistic was enough to make me rethink my approach.
Are Waterproof Trays Really Worth the Hype?
To be honest, I was skeptical initially. I thought, “Isn’t this just an added hassle and expense?” I made the early mistake of neglecting this step during my first remodel, assuming minor leaks are manageable. But that oversight cost me hundreds in repairs. Since then, I’ve realized that integrating a waterproof tray isn’t just about prevention; it’s about peace of mind. If you’ve faced or fear a plumbing failure beneath your sink, then you know that the real question isn’t if, but when—a waterproof tray can be your silent hero, catching leaks before they turn into a full-blown flood.
And if you’re curious about elevating your entire space, exploring built-ins that combine functionality with style can be transformative. For instance, built-in solutions are fantastic for maximizing space and reducing clutter. Or, if you’re considering a kitchen overhaul, modern remodels with custom cabinets can make your space feel brand new.
Ready to learn how to implement this simple yet vital upgrade? Let’s dive into the specifics so you can protect your home effectively and affordably, starting today.
Select the Right Waterproof Tray for Your Space
Begin by measuring the dimensions beneath your sink accurately. Consider a tray with raised edges to contain potential leaks effectively. Choose a material like high-density polyethylene, known for durability and water resistance. While shopping, look for models with textured surfaces to prevent items from slipping and ensure easy cleaning. I once measured my under-sink space, found a tray that fit snugly, and avoided a costly redo when a minor leak emerged months later.
Prepare the Area for Installation
Clear out all items from under your sink and disconnect the plumbing to prevent water from spilling during the process. Use painter’s tape around the area to mark the placement, ensuring the tray sits flat and centered. For uneven cabinets, consider adding small shims or padding to level the tray, preventing warping or gaps. I recall where I used a folded cloth as a spacer, which kept the tray steady during installation and avoided future leaks caused by an uneven fit.
Install the Waterproof Tray Securely
Place the tray carefully into the cabinet, making sure it sits flush against the walls. If your tray comes with mounting holes, use screws to secure it, anchoring into the cabinet floor or side walls. For unmounted trays, apply a bead of waterproof silicone caulk around the edges to seal gaps and prevent water from escaping. I personally applied a silicone sealant, which created a watertight barrier, and tested it by pouring water into the tray to check for leaks—a simple step that saved me from unexpected damage.
Consider Adding Drainage Channels or Matting
To enhance spill containment, sprinkle a layer of rubber matting or add drainage channels if your tray allows. These features can direct leaks toward a specific outlet or catch basin, simplifying cleanup. For instance, during one installation, I added a textured rubber mat, which made it easier to spot leaks early and clean up spills quickly, preventing water from pooling and damaging the cabinet structure.
Reconnect Plumbing and Test the Setup
Reattach your sink’s water lines securely, ensuring all connections are tight and leak-free. Turn on the water slowly and observe for any drips or seepage around the connections and within the tray. If you notice leaks, tighten fittings or reseal as necessary. I once missed a slight connection leak, but after tightening the fitting, I ran water again, and no leaks appeared—a simple but crucial step to ensure your waterproofing works effectively.
Maintain and Inspect Regularly
Schedule monthly inspections of the tray for signs of water accumulation or damage. Keep the area clean and dry to monitor potential leaks. Consider installing smart sensors linked to home automation systems that alert you instantly if water is detected. In my experience, a quick monthly check caught a slow drip before it caused extensive damage, saving me both time and money. Regular maintenance ensures your waterproof tray remains an effective barrier against costly water damage, giving you peace of mind that your cabinets are protected.
While many homeowners focus on selecting stylish cabinetry or maximizing storage, there’s a deeper layer of knowledge that often gets overlooked. Contrary to popular belief, not all built-ins are created equal—in fact, some can inadvertently limit flexibility or cause unforeseen issues down the line. For example, many assume that custom cabinets always provide superior functionality, but without proper planning, they might end up offering less adaptability than modular solutions, especially in changing living situations.
A common myth is that traditional built-ins are always higher quality than ready-made options, yet some mass-produced pieces, when integrated thoughtfully, can outperform custom solutions in durability and cost-efficiency. The real trick lies in understanding the nuances of material choices, design constraints, and future-proofing—areas where inexperienced builders or DIYers often slip.
Another hidden aspect involves the importance of precise measurements and installation techniques. An incorrect fit can lead to misaligned doors, squeaking hinges, or inefficient use of space, diminishing the overall value of your remodel. According to expert insights from the National Kitchen & Bath Association, meticulous attention to detail during planning and execution saves homeowners from costly corrections later.
Why do many built-in projects fail to meet expectations despite great design plans?
The answer often involves overlooking the importance of structural support and adaptability. For instance, a built-in meant for a specific purpose may become obsolete if your needs change—such as adding appliances or expanding storage. Opting for flexible, modular storage solutions or ensuring your built-ins are designed with future modifications in mind can prevent this. Additionally, incorporating smart storage options like pull-out shelves or hidden compartments can dramatically enhance usability, as explored in detailed guides about space maximization.
Finally, avoiding superficial upgrades and instead focusing on underlying structural integrity ensures that your investments last. Material selection is crucial—using high-quality plywood or moisture-resistant finishes can prevent warping and deterioration over time. In fact, a study published in the Journal of Building Engineering emphasizes that well-constructed cabinetry using durable materials significantly extends lifespan.
By diving beneath the surface and understanding these nuanced insights, you can make more informed decisions that ensure your kitchen and built-in projects stand the test of time. Remember, the devil is in the details—don’t fall for the trap of thinking that all options are equally beneficial.
Have you ever fallen into this trap? Let me know in the comments. For more advanced strategies on designing and implementing space-efficient cabinetry, explore our custom cabinet ideas and innovative storage solutions.
Ensuring your built-in cabinets and kitchen upgrades stand the test of time requires the right tools and a strategic maintenance plan. From specialized hardware to routine inspections, I rely on proven equipment that delivers consistent results. One must-have in my toolkit is the Dewalt DWST08250 ToughSystem Tool Box. Its resilient design keeps my power tools organized and protected, which is vital when working on custom cabinetry or storage solutions. Investing in quality hand tools such as the Stanley FatMax Hammer ensures precision and reduces damage during detailed tasks like adjusting hinges or sealing edges.
Software plays an integral role in planning long-term updates. I recommend SketchUp for detailed 3D modeling, allowing me to visualize modifications before making permanent changes. Its intuitive interface helps me plan storage enhancements, ensuring spaces are optimized and future-proofed—especially important as needs evolve or scaling becomes necessary.
For routine maintenance, I swear by my Gardus Water Leak Detector. This portable sensor alerts me to leaks before they cause damage, complementing the waterproof trays I often install beneath sinks. Scheduling monthly inspections with a checklist ensures that hinges, slides, and finishes remain in top condition, preventing minor issues from snowballing into costly repairs.
Looking ahead, I see the trend moving toward smarter, automated home systems. Devices like smart storage solutions are likely to become standard, offering real-time monitoring and adaptive organization. Incorporating sensors and IoT technology into cabinetry can help homeowners maintain their investments effortlessly.
How do I maintain my built-ins over time? The key lies in routine inspections using digital moisture meters and adjusting hardware with specialized screwdrivers designed for concealed hinges. Also, applying modern finishing materials such as toughened finishes enhances durability against daily wear and tear. Regular cleaning with non-abrasive cloths preserves the appearance without damaging delicate surfaces.
Don’t overlook the value of high-quality hardware. Heavy-duty hinges like those found in these premium options ensure your cabinets open smoothly for years. Incorporate quick-release mechanisms for ease of cleaning or repair, saving time and effort in the long run.
Remember, maintenance is an ongoing process. Make it part of your routine, and your investment will reward you with decades of reliable performance—saving you money and frustration. I recommend trying my favorite advanced tip: install smart sensors that monitor humidity levels or water leaks—an easy upgrade that keeps your cabinets safe from lurking threats and provides peace of mind for years to come.
The Hardest Lesson I Learned About Built-ins and Kitchen Remodels
One of my most profound realizations is that even the most beautiful custom cabinets can fall short if structural details are overlooked. Early in my projects, I focused heavily on aesthetics, neglecting foundational support and future adaptability. That oversight turned into costly fixes down the line, teaching me the importance of solid planning from the outset. Always remember, durable built-ins aren’t just about wood and finishes; they’re about thoughtful engineering.
Why Cutting Corners on Storage Can Cost You Big
Initially, I believed standard solutions were enough to maximize space. However, I learned that innovative storage solutions like hidden compartments and pull-out shelves vastly improve usability and protect your investments. Incorporating these features requires upfront effort but offers long-term convenience and efficiency. Don’t settle for ordinary—think modular and tailored to your needs to truly transform your space.
How Overlooking Water Safety Turned My Dream Kitchen Into a Nightmare
Water damage is a silent threat many forget about until it’s too late. Installing a waterproof tray beneath your sink is a small step that can save you thousands. It caught minor leaks early in my experience, preventing mold, rot, and expensive repairs. Remember, the key isn’t just stylish cabinets—protect your work with smart, simple upgrades like leak catchers, smart sensors, and routine inspections.
Curated Niche Recommendations for Built-in Brilliance
My essential toolkit includes quality hardware like heavy-duty hinges that ensure longevity. I trust specialized installation guides for precise execution. When considering space-saving ideas, innovative storage solutions have revolutionized how I approach every project. And for troubleshooting or ideas, the comprehensive articles on custom cabinet ideas are invaluable.
Your Next Move Starts Today—Don’t Look Back
The secret to successful built-ins and kitchen upgrades lies in combining aesthetic vision with practical durability. Embrace the lessons learned, invest in quality tools and thoughtful planning, and you’ll craft spaces that not only look stunning but stand the test of time. Remember, every detail matters—your future self will thank you for starting now. Are you ready to transform your space with smarter, more resilient solutions? Share your thoughts below and let’s build something amazing together.