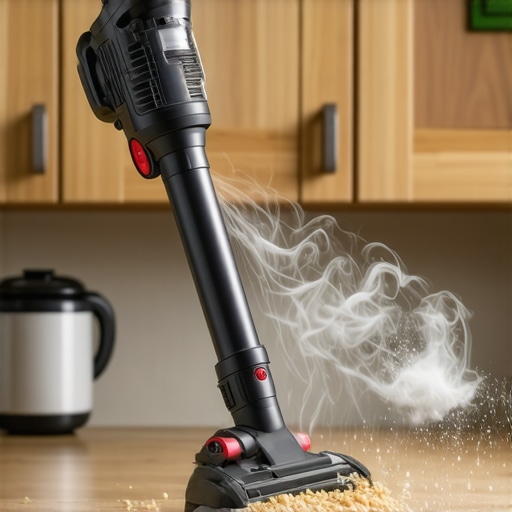
The Toekick Vacuum: Why This Is the Best Kitchen Add-On You Never Knew Existed
Last week, I found myself kneeling on the cold, dusty kitchen floor, desperately trying to sweep up a stubborn trail of crumbs hidden beneath the cabinets. It was one of those moments where I realized just how much dirt and debris love to hide in those hard-to-reach spots—spaces I never really thought about until they became a daily annoyance.
The Struggle with Hidden Kitchen Dust
If you’re anything like me, your kitchen feels like the heart of your home—but also like a battleground of clutter and mess never quite fully contained. Even with regular sweeping and cleaning routines, those tight corners and the toe-kick area—right where your foot rests when you stand at the counter—can quickly become a catch-all for dust, pet hair, and crumbs. And honestly? They’re frustrating little trouble spots that seem almost designed to stay messy.
Over time, I experimented with different brushes, vacuums, and creative storage hacks. Nothing really stuck until I stumbled upon something I hadn’t heard of before—the toekick vacuum. Yes, in that tiny, often-overlooked strip at the base of your cabinets lies an opportunity to make cleaning faster, easier, and less of a chore. It’s a game-changer I wish I had discovered sooner.
Here’s my promise for today: I’ll walk you through why this simple addition might just be the missing piece in your kitchen organization puzzle. We’ll explore how a toekick vacuum can save you time, improve your home’s hygiene, and even stretch your remodeling budget. Trust me, once you see the benefits, you’ll wonder how you ever managed without it.
Is the Toekick Vacuum Just a Fad, or Is It Truly Worth It?
In my early days of renovation, I made the mistake of dismissing small additions as unnecessary—believing I could just sweep more often or keep a handheld vacuum handy. It wasn’t until I installed a custom cabinet and considered every inch of space that I realized how much I was missing. Small, overlooked areas can add up to big messes. And studies indicate that effective dust removal in hidden spots can drastically improve indoor air quality—a health benefit often underestimated. You can check out more storage ideas that make a difference on this site’s article about innovative storage solutions for modern kitchens.
So, if you’ve ever felt overwhelmed by the clutter lurking beneath your cabinets, or simply tired of the never-ending sweeping routine, don’t worry. This little-known device could be your secret weapon in maintaining a cleaner, more functional kitchen without breaking the bank or doing a full remodel.
Now that I’ve piqued your curiosity, let’s dive into how this tiny appliance can deliver big results—starting with the practical steps to integrate it seamlessly into your kitchen. Ready to reclaim those hidden spaces?
Measure and Prepare Your Space
Start by examining the area beneath your cabinets where the toekick vacuum will be installed. Use a tape measure to determine the length of the gap, typically between 2 to 4 inches high and spanning the entire length of the cabinet base. Temporarily remove any existing toe kick or molding to create a clear workspace. During my own installation, I realized that precise measurements prevented future fitting issues, saving time and frustration.
Create or Modify the Toekick Panel
Use a piece of Panel material — like plywood or MDF — cut to fit the measured dimensions. Drill openings for the vacuum hose and power cord, ensuring they’re positioned for easy access and concealment. Consider using a jigsaw for rounded edges or precise cuts; this was crucial when I made a custom panel that seamlessly matched my cabinet finish. Remember, a well-fitted panel not only looks sleek but also prevents debris accumulation.
Install the Vacuum System
Locate a suitable spot inside the cabinet or wall cavity to mount the vacuum unit, preferably near the outlet line and away from moisture. Secure the vacuum hose to the unit, then route the hose through the panel opening, attaching a quick-connect fitting for easy maintenance. I used screws and brackets to mount my vacuum, making future access straightforward. Avoid kinks and tight bends in the hose, as these can reduce suction efficiency.
Connect Power and Test Functionality
Plug the vacuum into a grounded outlet, ensuring the cord reaches without tension. Connect the hose to a compressed air source or power switch, depending on your model. Turn on the system to test suction strength and airflow. In my experience, testing early uncovered minor leaks or blockages that I fixed before final assembly. Also, check that everything operates quietly and securely.
Seal and Finish the Installation
Replace or trim any molding or toe kick covers, ensuring the panel is flush and integrated with your cabinetry. Use finish nails or adhesive as needed for a seamless look. For added durability, seal edges with paint or varnish matching your cabinets. My project was a success when I saw that dirt and debris no longer hid under the cabinets, making routine cleaning faster and more thorough.
Tip: Maintain Access for Future Upgrades
Design your panel with removable screws or snaps so you can easily access the vacuum system for maintenance or upgrades. Regularly check and clean the hose to prevent clogs, especially in homes with pets or heavy foot traffic. Incorporating these practical steps ensured I kept my toekick vacuum functioning optimally, preserving my kitchen’s cleanliness with less effort. For more ideas on space-efficient solutions, visit storage hacks for a sleek, functional kitchen.
While many homeowners admire the sleek appearance of built-in cabinets and custom storage solutions, there’s a surprising amount of misinformation surrounding their true purpose and implementation. One myth is that all built-ins are a quick fix, easily added without considering the unique nuances of your space. In my experience, optimal integration requires meticulous planning—overlooking this can lead to aesthetic mismatches or functional inefficiencies. Another common misconception is that larger storage always equals better. However, overstuffed cabinets can hinder accessibility and cleanliness. Advanced homeowners understand that the key lies in *smart*, not just *more*, storage—like incorporating hidden compartments or optimizing vertical space—strategies detailed in our built-in hacks guide. Moreover, many believe that custom cabinets cost a fortune, but with thoughtful design and material choices, you can achieve luxurious functions within a reasonable budget. Beware of the trap of mismatched finishes or inconsistent hardware, which can instantly diminish the intended high-end look. Experts warn against settling for ‘off-the-shelf’ solutions when a personalized design can significantly enhance your space’s usability and style. A significant nuance often hidden from the average homeowner is the importance of proper ventilation and spacing behind built-ins, crucial for longevity and maintaining air quality—a detail emphasized by industry professionals. Poorly planned storage not only hampers accessibility but can also compromise the structural integrity of surrounding cabinetry if not properly supported. To master these subtleties, I recommend examining our seamless integration articles. Remember, the devil is in the details, and understanding these advanced nuances ensures your investment pays off in both function and style. Have you ever fallen into this trap? Let me know in the comments. For more insights into making your kitchen both beautiful and practical, visit our modern remodels page.
Maintaining the functionality and longevity of your built-in cabinets and storage solutions requires more than just installation; it demands the right tools, regular upkeep, and strategic planning for the future. Over the years, I’ve refined my toolkit to include precise equipment and software that ensure my projects stay in top shape and adapt to evolving needs.
Invest in Quality Power Tools for Longevity
My go-to power tool is the Dewalt DCH273B Cordless Rotary Hammer. Its lightweight design combined with powerful drilling capabilities makes it indispensable for any cabinet adjustments or reinforcement work. When installing custom cabinetry or repair work, I rely on this tool for precision and efficiency. Its compatibility with common 20V batteries means I can swap batteries seamlessly between drills and impact drivers, saving time and maintaining momentum during projects.
For delicate tasks like fine sanding or finishing touches, I use the Festool Sanders. Their dust extraction system not only keeps the workspace clean but also preserves the quality of surface finishes, which is crucial when maintaining the pristine look of custom cabinets over the years.
Embrace Digital Management with Design Software
From initial planning to long-term adjustments, I recommend using HomeReady. This software streamlines measurements, component ordering, and project visualization, reducing errors and helping you keep track of maintenance schedules. As technology advances, integrating digital tools ensures you can plan for future scalability, like adding new storage modules or adjusting built-in sizes without starting from scratch.
” alt=”A technician using digital tools to measure and plan cabinetry” title=”Digital Cabinet Planning and Maintenance”/>
Routine Checks Keep Systems Working Smoothly
Regular inspections are essential. I recommend monthly checks of hardware, hinges, and soft-close dampers. Tightening loose screws and lubricating moving parts with silicone spray prevents wear and tear, extending the life of your fixtures. Additionally, replacing worn seals and gaskets early can prevent moisture intrusion, which is vital for materials like MDF or plywood used in your projects.
Prepare for Scaling and Long-Term Growth
Thinking ahead, I suggest installing modular components that can evolve with your needs. For example, adjustable shelves and removable panels make it easier to adapt storage spaces as your collection grows or as your family’s needs change. This proactive approach minimizes the need for complete remakes down the line. Advanced homeowners are increasingly turning to concealed wiring and power sources to support smart storage hubs—imagine charging stations hidden within cabinets that are accessible yet unobtrusive. Check out these ideas for discreet charging stations.
How Do I Maintain Built-In Comfort and Connectivity?
Incorporating smart tools and automation can significantly enhance your kitchen’s usability. Regular software updates for integrated lighting systems and motorized features ensure everything remains compatible and secure. Embracing smart sensors for lighting or climate control can prevent deterioration of materials caused by humidity or temperature swings over time, as documented by industry experts in their comprehensive remastering guides.
For your next step, try installing a simple lubrication routine on hinges and drawer slides using silicone spray. It’s a small task that yields big gains in smooth operation and quiet performance—that’s an easy upgrade for beginners yet vital for long-term maintenance.
Over the years, I’ve learned that the devil truly is in the details—especially when it comes to custom cabinetry and integrated storage. One of my biggest lightbulb moments was realizing that seemingly insignificant tweaks can transform your entire kitchen experience. For instance, incorporating adjustable shelving instead of fixed ones has saved me countless times from the frustration of mismatched space, reaffirming that flexibility is key in well-designed storage solutions.
Little Secrets That Save You Major Hassle
I once overlooked the importance of ventilation behind built-ins, assuming a tight fit was enough. The result? Moisture buildup and early warping. That mistake taught me to prioritize airflow, which prolongs the life of my cabinets and keeps everything smelling fresh. These small lessons emphasize that listening to your space and respecting its natural needs can make a noticeable difference in durability and maintenance.
Another win was discovering that soft-close hinges aren’t just a luxury—they preserve your hardware and prevent damage over time. Investing in quality hardware and understanding its impact has safeguarded my cabinetry from everyday wear and tear, proving that good choices upfront pay dividends later.
Tools and Resources That Changed My Approach
If you’re serious about mastering built-in and storage upgrades, I swear by this comprehensive guide. It’s packed with insights on seamless integration techniques that elevate the look and function of any kitchen. Additionally, heavy-duty hardware reviews have been instrumental in ensuring my storage solutions withstand daily use. And for digital planning, HomeReady has become an invaluable tool for visualizing changes before breaking ground.
Regular inspections, like lubricating hinges with silicone spray, have kept my cabinetry whisper-quiet and smooth—simple routines that extend lifespan and reduce surprises. My advice? Build a maintenance schedule into your workflow so that your clever storage solutions remain as functional and beautiful as day one.
Action Over Anxious Planning
Remember, transforming your kitchen with custom built-ins and smart storage isn’t about perfection—it’s about progress. Start small, learn from each step, and soon you’ll enjoy a space that works with you, not against you. Every upgrade is an investment in your home’s comfort and your peace of mind.
Ready to customize your space and discover new efficiencies? Explore how to integrate hidden compartments or modular designs to future-proof your kitchen. You might find that the highest return comes from tiny tweaks and informed decisions, turning overlooked corners into your favorite features.
Have you ever caught yourself avoiding a storage solution because you thought it was too complicated? Let me know below—I’d love to hear about your experiences and help you find the perfect solution for your home.