Why You Should Avoid Glue-Down Cabinet End Panels
I vividly remember the moment I first saw a kitchen remnant with end panels glued tight, only to realize months later that this seemingly small detail was causing more hassle than it was worth. That lightbulb moment hit hard—what I thought would make my cabinetry seamless and tidy turned out to be a hidden mess. If you’ve ever tackled a remodel and wondered why your cabinets aren’t as functional or durable as promised, you’re not alone. Today, I want to share my experience and how avoiding certain installation tricks can save you frustration in the long run.
Breaking Free from the Glued End Panel Trap
Many DIYers and even pros fall into the trap of using glue-down end panels because it seems like a quick way to achieve a sleek look. The logic is straightforward: glue them in, forget about it. But let me tell you from personal experience—this approach often backfires. Over time, glued panels can warp, crack, or even pull away from the cabinet frame, especially if your home experiences humidity swings. Plus, repairing or adjusting once installed becomes a nightmare. I learned this the hard way early in my remodeling journey, and I wish I had known then what I do now.
In fact, according to industry experts in [innovative storage solutions for modern kitchen remasters](https://artisancabinetworkz.com/innovative-storage-solutions-for-modern-kitchen-remodels), choosing flexible, reversible installation methods for cabinetry components can vastly improve both the aesthetics and longevity of your kitchen. Unfortunately, the convenience of glued end panels often masks the reality of their potential for long-term problems.
Will a glued panel really hold up over time?
This is the biggest skepticism I hear when talking about cabinet installation methods. It’s natural to wonder if avoiding glue will compromise the stability or appearance of your cabinetry. Trust me, I shared that doubt myself. But I also learned that well-designed mounting techniques, like using clips or hidden fasteners, can secure panels just as firmly without the drawbacks of glue. Plus, they’re much easier to adjust if your measurements shift or if you want to change your decor later.
Early on, I made the mistake of relying solely on glue, only to find myself unable to tweak or replace components without destroying parts of my cabinets. That was an expensive lesson. Instead, I now advocate for a combination of cleats, screws, and floating methods that allow flexibility and ease of maintenance.
If you’re questioning whether the extra effort is worth it, consider how unresolved issues with glued panels can lead to costly repairs down the line. The good news? There are many smart, reliable alternatives. Want to learn more about practical storage and cabinetry ideas that truly transform your space? Check out [custom cabinets ideas that transform your home’s style](https://artisancabinetworkz.com/custom-cabinets-ideas-that-transform-your-homes-style) for inspiration.
Use Mechanical Fasteners for Flexibility and Durability
Instead of relying on glue, opt for screws, clips, or cleats to attach end panels. During my recent kitchen update, I used a system of concealed clips paired with screws to hold the panels tightly against the frame. This approach allowed me to make adjustments later without damaging the cabinetry, saving time and money. Think of it like assembling furniture with dowels and screws instead of glue—strong, adjustable, and reversible.
Pick the Right Screws and Fasteners
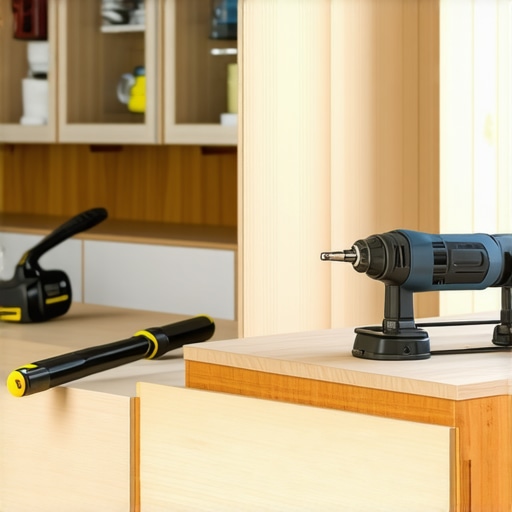
Choose screws that are appropriate for your cabinet material—usually 1.25 to 2-inch hardened wood screws for framing. Pre-drill holes to prevent splitting, especially with hardwoods. During my project, I used a drill with depth stops to ensure consistent screw depth, which kept the panels flush and avoided warping.
Install with Precision for a Seamless Look
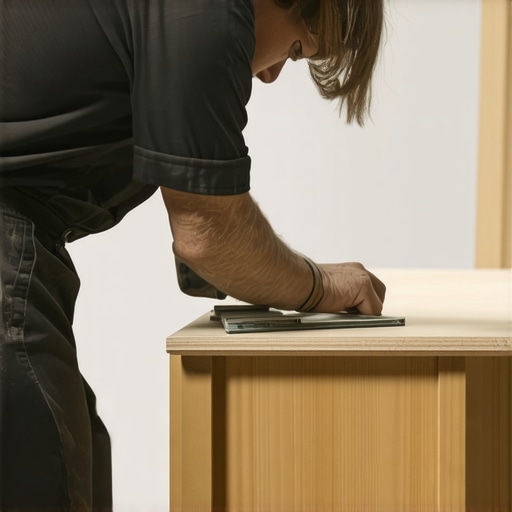
Accurate measurement is your best friend. Use a combination square or a framing square to mark where the fasteners will go—spacing them every 8 to 12 inches for sturdy support. In my experience, measuring twice and drilling once ensured perfectly aligned panels, giving a professional finish.
Utilize Leveling Techniques
Ensure the cabinet frame is perfectly level before attaching panels. Use a spirit level or a laser level during installation, akin to tuning a musical instrument for harmony. During my installation, I shimmed uneven floors with plywood scraps, then rechecked everything, resulting in a perfectly flush surface that wouldn’t wobble over time.
Leverage Hidden Supports for Extra Stability
Adding supports such as cleats or brackets behind the panels offers additional reinforcement. I attached a 3/4-inch thick cleat along the interior of the cabinet frame, which provided a solid backing for the panel. This method is like putting a backbone behind your design—hidden but vital for strength and longevity.
Consider Reversible Mounting Options
Design your installation so panels can be removed or replaced easily. Using clips or mounting brackets allows you to retrofit or adjust as needed, especially if your design plans evolve. During my project, this flexibility proved invaluable when I decided to swap out a damaged panel without dismantling the entire cabinet.
Dabble with Proper Finish and Sealants
After securing panels, seal edges with low-VOC sealants to prevent moisture intrusion, which can cause warping. I applied a bead of silicone along the panel edges before final assembly, mimicking how you might weatherproof a boat—protecting your investment from future damage.
By combining these approaches—mechanical fasteners, precise measurement, level installation, hidden supports, and proper sealing—you’ll achieve cabinetry that’s both beautiful and built to last. These steps are your toolkit for elevating a simple remodeling task into a craftsmanship masterpiece, ensuring your kitchen remaster stands the test of time. For more ideas on innovative storage and cabinet designs, explore [custom cabinetry solutions](https://artisancabinetworkz.com/custom-cabinets-ideas-that-transform-your-homes-style), and feel confident that your project is on the right track.Many homeowners and even some designers believe that outfitting a kitchen or living space with built-ins and custom cabinets is a straightforward way to achieve seamless elegance and maximum storage. However, this common perception often overlooks nuanced pitfalls that can compromise both functionality and longevity. Let’s dig deeper into what most people get wrong about these solutions and how to avoid costly mistakes.
Myth: All Custom Cabinets Are Created Equal
A pervasive misconception is that custom cabinetry guarantees superior quality and perfect fit. In reality, the quality depends heavily on materials, craftsmanship, and installation techniques. For example, many assume that semi-gloss finishes are universally suitable; yet, for high-moisture areas like kitchens, a curated finish like low-VOC sealants offers better durability and stain resistance. According to industry expert insights, choosing the right material and finish can significantly impact the lifespan and maintenance of your cabinets. Don’t assume ‘custom’ inherently means ‘better’; vet your choice carefully by consulting reputable sources such as [expert tips on selecting storage solutions](https://artisancabinetworkz.com/expert-tips-on-selecting-storage-solutions-for-a-perfect-kitchen-upgrade).
Why Do Some Built-Ins Fail Over Time?
Interestingly, a common oversight is neglecting environmental factors that influence material stability. For instance, wooden elements exposed to fluctuating humidity tend to warp or crack—especially if the cabinetry wasn’t properly sealed or if substandard plywood was used. A study published in the Journal of Wood Science highlights how moisture management is critical; materials like birch plywood, when properly treated, outperform particleboard in high-humidity zones. This underlines that understanding material nuances can be the difference between durability and failure. Have you ever fallen into this trap? Let me know in the comments.
Capturing Space without Decorating Your Life
Another overlooked nuance is the critical importance of storage solutions tailored to actual usage patterns. Many homeowners install built-in niches or corner cabinets without considering workflow or accessibility, resulting in cluttered spaces. Smart design involves deploying features like hidden toe-kick drawers or vertical dividers—warts for organizing baking sheets or spices. Explore [transformative storage ideas](https://artisancabinetworkz.com/custom-cabinets-ideas-that-transform-your-homes-style) that maximize every inch, ensuring your space serves your lifestyle, not just aesthetics.
Advanced: How to Integrate Built-Ins Seamlessly into Existing Structures
For sophisticated remodels, integrating bespoke built-ins requires meticulous planning—such as scribing cabinetry to uneven walls or incorporating electrical outlets subtly. A common mistake is to ignore these details, resulting in visible gaps or inadequate power access. Experienced installers often use advanced techniques like laser leveling and custom cleats for perfection. This not only enhances appearance but also simplifies future maintenance. Want a deeper dive? Check [how professional installers revolutionize kitchen remodels](https://artisancabinetworkz.com/revolutionize-your-kitchen-remodel-using-built-ins-and-creative-storage).
Maintaining your built-ins and custom cabinets requires more than just regular cleaning; it hinges on using the right tools and adopting effective methods. I personally swear by a cordless oscillating multi-tool for minor adjustments and delicate tasks. Its variable-speed feature allows precise control, making repair work seamless without risking damage to your cabinetry. For measuring, a digital laser level has become indispensable, ensuring everything stays perfectly aligned, especially in rooms with uneven floors, which I tackled during my recent remodel. Its accuracy accelerates the process, reducing guesswork and ensuring a professional look. When it comes to sealants and finishes, I opt for low-VOC, water-based polyurethane for its durability and eco-friendliness—perfect for long-term protection, especially in humid environments. Applying with quality brushes and foam rollers speeds up the process, prevents streaks, and yields a smooth finish that resists chipping over time. To stay organized, I rely on clear, labeled storage bins to keep fasteners, hinges, and other hardware sorted, which minimizes waste and delays during maintenance. As technology advances, software like SketchUp or CabinetVision can assist in planning future modifications or scaling your storage solutions efficiently, saving time and costs. Predicting the future, I believe AI-driven design tools will become more accessible, enabling homeowners to experiment with configurations virtually before making any cuts or purchases. This proactive approach minimizes mistakes and ensures your updates stand the test of time.
How do I keep my cabinetry functioning smoothly over time?
Regular inspection of hinges and slides ensures they operate quietly and without resistance. Lubricate these moving parts with a silicone-based spray to prevent squeaking and wear. Cleaning surfaces with a soft cloth and mild soap prevents grime buildup that can compromise finishes. For more advanced upkeep, applying a fresh coat of finish periodically restores the appearance and protection of wood surfaces. Remember, investing in quality hardware and sealing techniques now pays dividends by reducing future repairs—check out expert tips on selecting long-lasting storage solutions to keep your kitchen functional and beautiful. Many of my improvements owe their longevity to choosing tools tailored for specific tasks: a pneumatic nailer for fast, flush fastening; a cordless drill with reversible bits for effortless adjustment; and an orbital sander for smooth, dust-free sanding between coats. These tools streamline maintenance and upgrades, making it easier to adapt your cabinets as your needs evolve. A noteworthy trend heading into the future is incorporating smart hardware, such as touch-activated hinges or motorized lifts, which enhance usability and preserve aesthetics. Embracing these innovations now can prepare your space for future upgrades, ensuring your cabinetry remains both stylish and functional. Always remember, proper maintenance combined with the right tools is key to preserving the beauty and utility of your built-ins. Start by inspecting your hinges and hardware today, and consider investing in a quality multi-tool to handle minor fixes with precision and ease. Your cabinets will thank you for the extra care, and you’ll enjoy a seamless kitchen experience for years to come. For tailored advice on selecting tools suited for your specific projects, contact us or explore our comprehensive guides on custom cabinetry and storage optimization.
What I Wish I Knew Before Starting My Built-ins Journey
One of the最难忘的教训是忽视细节会带来长远的麻烦。在我最初的厨房改造中,过度依赖胶粘端板,结果导致将来调整和修复变得既昂贵又繁琐。这让我明白,灵活可靠的机械固定比单纯的粘合更为重要。
我还发现,材料的选择直接关系到成品的耐久性。尤其是在湿润环境中,选用优质的胶合板远胜于频繁维护的颗粒板。这一理念让我在后续项目中减少了很多后续维修的烦恼。
家居存储的秘密:细节决定成败
我逐渐意识到,合理的空间利用不仅是美观问题,更关系到日常使用的便利性。例如,利用隐藏空间创造专属存储,使我整齐有序的厨房空间变得更加智能和实用。这种策略在[提升空间利用率](https://artisancabinetworkz.com/maximize-space-with-innovative-storage-solutions-for-every-room)中尤为重要。
此外,将设计与实际需求紧密结合,才能实现真正的空间奇迹。如巧妙运用角落空间和可调节的吊柜,改善了原本令人头疼的死角区域。
新时代工具助你轻松应对装修难题
我逐渐学会,合适的工具能大大简化维护和调整过程。从使用激光水平仪到多功能电动工具,每一次提升都让我更接近完美。推荐的[测量工具](https://artisancabinetworkz.com/expert-tips-on-selecting-storage-solutions-for-a-perfect-kitchen-upgrade)和[专业配件](https://artisancabinetworkz.com/8-heavy-duty-drawer-dividers-for-ultimate-kitchen-organization),都为我的项目带来了极大的便利。
未来,智能配件如自动调节合叶或隐藏式充电站,将使装修变得更加智能和便捷。我期待着每一次创新都能让我的空间更上一层楼。
学习的真谛:细节决定一切
- 我第一次尝试自己安装时,忽略了预留空间,结果门板总是擦碰墙面。这让我明白,精确测量和预留空间像是打造完美机芯的关键零件。
- 选用高品质的紧密合页和滑轨,即使在常年使用后依然保持顺畅,这让我明白,硬件的选择影响着日常体验的持久性。
- 正确的封边和防潮措施,避免了木材变形或发霉的风险。这让我认识到,每一步的细节都是未来顺利生活的基础。
我的专业建议:逐步掌握,享受成果
在我看来,成功的装修源自不断学习和实践。不用急于求成,从每次项目中吸取经验,调整方案,逐步优化,就能实现理想的空间。记得阅读[专业指南](https://artisancabinetworkz.com/transform-your-kitchen-with-custom-cabinets-expert-guide-for-2025),让自己每一步都迈得坚实且有信心。
从心出发,做属于你的空间革新
装修不只是改善家居,更是与生活方式的对话。相信我,用心设计、细心施工,你的空间会焕发出无法复制的魅力。不要怕犯错,因为每个小失误都是成长的契机。现在就行动起来,让你的家成为最真实的表达!
你是否曾为某个细节的遗漏而烦恼?分享你的故事,让我们一起成长!