Why Your Kitchen Island Needs a Prep Sink More Than You Think
There was a moment during my recent kitchen remodel when I slammed my hand on the island countertop in frustration. I was trying to prep ingredients, unload groceries, and coordinate with my family all at once. The chaos was real, and I suddenly realized something crucial: my kitchen island, as beautiful as it was, wasn’t quite serving the role I needed it to. That lightbulb moment made me question everything about my layout—and led me down a rabbit hole of solutions that transformed my space entirely.
The Hidden Power of a Prep Sink in Your Kitchen Island
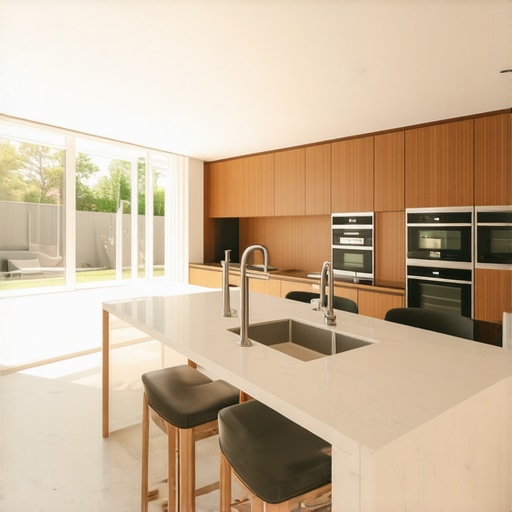
If you’re like me, you’ve probably focused on sleek cabinets, eye-catching countertops, and maybe even a fancy cooktop. But one feature that often gets overlooked—and yet, can dramatically improve your kitchen workflow—is a prep sink built into your kitchen island. It’s more than just an extra faucet; it can change how you work in your space, making prep work smoother, cleanup easier, and your overall experience more enjoyable.
Is a Prep Sink Really Worth the Investment?
When I first considered adding a prep sink, I hesitated. Would it be practical or just another expensive add-on? I made the mistake early on of believing that a single, main sink was enough. Trust me, I’ve learned that having a dedicated prep area with its own faucet cuts down on mess and congestion. According to this guide, well-planned kitchens with multiple sinks offer efficient workflows, especially during large gatherings or daily busy routines. Since then, I’ve wondered how many headaches I could have avoided if I’d included it from the start—so I want to share that insight with you.
Of course, I understand some skeptics worry about cost and space. My biggest mistake? Not considering the functionality before the aesthetic. I focused too much on looks and not enough on how I’d actually work. That’s why I’ll walk you through the real benefits and how to avoid common pitfalls—so you can decide if a prep sink is right for your space.
As we dive in, I’ll show you how this small addition can unlock big advantages and how to visualize a layout that works for your unique needs. Ready to rethink your kitchen’s potential? Let’s go!
Design Your Layout for Functionality First
Start by sketching your kitchen’s blueprint, marking existing plumbing lines, electrical outlets, and available space. During my recent remodel, I used painter’s tape on the floor to visualize different island sizes and placement options. This practical step revealed that a standard 36-inch-wide island could accommodate a dual-basin prep sink comfortably without clashing with walkways. Identifying such spatial constraints early helps prevent costly adjustments later.
Choose the Right Sink and Fixtures
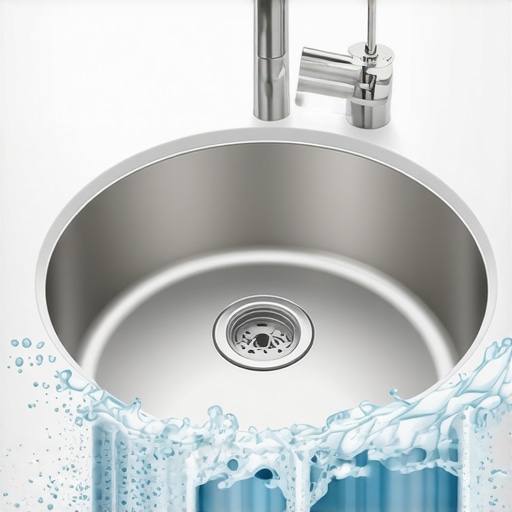
Opt for a durable, easy-to-clean material like stainless steel or composite granite. Determine the size—typically 15-20 inches in length—and whether a single or dual-basin suits your prep needs. I installed a 16-inch single-basin sink with a high-arc faucet on my island, which made rinsing large pots a breeze. Also, consider a soap dispenser or a pull-out faucet for added convenience. Planning these details upfront ensures seamless integration during installation.
Coordinate Plumbing with a Professional
Working with a licensed plumber is crucial to reconfigure water supply and drainage lines. Expect to extend supply lines from your main valves, which might involve cutting into existing cabinetry or flooring. I hired a professional who carefully rerouted the drain and water lines beneath the floor, minimizing disruption. This step prevents leaks and ensures the new sink functions flawlessly. Always double-check local building codes and permits to stay compliant.
Customize Storage Beneath the Sink
Maximize the space under your prep sink for organized storage. Instead of generic cabinets, opt for custom-built drawers or pull-out shelves that fit tightly around plumbing. I installed a shallow drawer for cleaning supplies and a vertical pull-out for trash and recycling bins, inspired by innovative storage solutions I learned about here. This approach keeps essentials accessible and maintains a sleek look.
Finish with Practical Details
Seal all surfaces with suitable waterproof finishes, especially around the sink edges, to prevent water damage and mold. Consider installing a backsplash that extends behind the sink for added protection and style. During my project, I sealed the seams with high-quality silicone, which has held up well against daily use. These finishing touches enhance durability and maintain the aesthetics of your space.
Test and Refine Your Setup
Once installed, test the water flow, drainage, and accessibility. Use the sink as intended, filling and rinsing large pots, to identify any adjustments needed. I found that adjusting the faucet’s angle improved reach and comfort. Small tweaks like these ensure your prep station operates efficiently and comfortably, transforming your kitchen into a true culinary hub.
Many homeowners dive into custom cabinet design believing that a beautiful outer finish will solve all their storage woes. But in my experience, there’s a nuanced trap that often goes unnoticed: focusing solely on aesthetics without considering the intricate functionality behind the design. This oversight can lead to storage inefficiencies, frustration, and costly rework down the line. For example, many assume that standard-sized drawers are sufficient, but neglecting custom inserts or modular components can drastically reduce usable space and accessibility, especially in tight kitchens here effectively discusses how tailored storage maximizes every inch.
Why Do People Still Overlook Built-Ins’ Flexibility?
It’s a common myth that built-ins are rigid and limit future upgrades, but the reality is quite the opposite. Built-ins can be designed with flexibility in mind—such as adjustable shelves, hidden compartments, or integrated charging stations—helping your kitchen adapt over time. This is particularly crucial considering how our technology and storage needs evolve. Yet, many underestimate this adaptability, leading to investments that quickly become obsolete or underused. A detailed study by experts emphasizes how future-proofing storage enhances long-term satisfaction and value.
Furthermore, a common mistake I’ve seen is underestimating the importance of door and drawer hardware, which impacts ease of use and longevity. High-quality soft-close hinges and sliders might seem like a minor upgrade, but they significantly improve everyday functionality and reduce wear, saving money over time. Skimping on these details can result in squeaky or misaligned doors, turning what should be a seamless experience into daily annoyance.
For those venturing into complex remodels or custom projects, understanding the detailed nuances—like optimal corner solutions or special-access panels—is vital. For instance, corner cabinets equipped with Lemans pull-outs make a world of difference compared to lazy Susans, which often restrict usability and cleaning. Incorporating such thoughtful touches can elevate your project from ordinary to exceptional. Remember, the devil is in the details, and overlooking them can diminish the overall impact of a well-designed space.
So, have you ever fallen into this trap? Let me know in the comments! For more insights into maximizing your space with custom solutions, check out this comprehensive guide.
Once you’ve carefully designed and installed your custom cabinets and built-ins, the next crucial step is ensuring they stay functional and beautiful over time. Regular maintenance is vital, but it doesn’t have to be daunting. With the right tools and techniques, you can effortlessly preserve your investments and even scale your storage solutions as your needs evolve.
How do I maintain my kitchen’s built-in systems over time?
Start with a high-quality microfiber cloth and a gentle cleaning solution—preferably one formulated for cabinetry to avoid damaging finishes. I personally swear by a soft microfiber mop combined with a mild, pH-balanced cleaner; it effectively removes dust and grease without scratching surfaces. For more stubborn grime, a mixture of warm water and a few drops of dish soap, applied with a non-abrasive sponge, works wonders. Regularly inspecting hinges, slides, and hardware helps catch issues early—using a flashlight and a basic screwdriver, I check for loose screws or misalignments and tighten them promptly, preventing more serious problems.
To keep hinges and slides operating smoothly, I use a small amount of silicone-based lubricant. This prevents squeaking and ensures effortless opening and closing. Be sure to avoid petroleum-based products, which can degrade plastic components over time. For extra protection, sealing edges and joints once a year with a specialized wood or cabinetry sealant prevents water ingress and prolongs the life of your countertops and cabinetry.
What tools make long-term cabinet care easier?
Investing in a precision screwdriver set, such as the Wiha 32990 Compact Bits Set, allows for quick adjustments without damaging delicate screws. A digital moisture meter is also helpful to monitor humidity levels inside your cabinets—excess moisture can lead to warping or mold. I recommend keeping a small vacuum with brush attachments nearby; it’s invaluable for quick cleanups of dust, debris, or small spills that can accumulate behind or under drawers. For larger projects, a cordless drill with a set of specialty bits speeds up refastening or removing panels for deep cleaning or upgrades.
As the trend toward smart kitchens grows, integrating moisture sensors connected via Wi-Fi can alert you before issues become visible. This foresight minimizes repairs and maintains the pristine appearance of your custom work. In the future, expect advancements in smart storage technology that continuously monitors environmental conditions, making maintenance even more intuitive and proactive.
Tools to tackle ongoing repairs and adjustments
If you notice misaligned doors or drawers, a cabinet alignment tool like the Blum free-waist alignment gauge simplifies correcting these issues without professional help. For fixing loose or stripped screw holes, a quality wood filler such as Minwax Wood Filler, paired with a drill guide, allows you to reinforce weak points and restore functionality. Additionally, a set of multi-functional clamps is invaluable for holding panels or fixtures in place during repairs. To safeguard your investment, always keep a set of replacement hardware and lubricants on hand—anticipating and addressing small issues early is the key to lasting durability.
Embracing proper maintenance tools and methods not only extends the life of your cabinetry and built-ins but also keeps your space looking fresh and inviting. Regular upkeep, combined with proactive attention to detail, transforms your kitchen into a functional marvel for years to come. Remember, as expert artisan craftsmanship suggests, consistent care is the backbone of a timeless kitchen. Try implementing a quarterly maintenance routine using these tools—you’ll be amazed at the long-term results.
My journey through kitchen renovation taught me invaluable lessons about the power of thoughtful design and meticulous planning. One lightbulb moment revealed that even minor details—like choosing the right hardware or considering future storage needs—can dramatically influence functionality and satisfaction. Embracing this mindset shifted my entire approach, turning a challenging project into a rewarding experience full of learning and discovery.
Beyond the Surface: Lessons I Didn’t Expect to Learn
- Don’t Chase Perfect Aesthetics Only: Focusing solely on visual appeal often leads to overlooking core functionality. For instance, selecting stylish hardware without considering ease of use can result in daily frustration. Real beauty lies in the seamless blend of form and function, and every choice should serve your unique lifestyle.
- Plan for Flexibility from the Start: Future needs evolve—think about adaptable storage solutions like adjustable shelves or hidden compartments. I once underestimated the importance of universal designs, which made future upgrades more costly. Designing with adaptability ensures your kitchen remains relevant and efficient for years to come.
- Invest in Quality Hardware and Materials: Small components like soft-close hinges or high-quality drawer slides significantly impact durability and daily comfort. Skimping on these details might save money upfront but can cost more in repairs and replacements over time. Trust me, sticking to reputable brands pays off many times over.
Tools and Resources That Changed My Game
- Blum Hardware Collection: Their soft-close hinges and full-extension slides are game changers, enhancing both usability and longevity. I personally rely on their products for peace of mind and smooth operation.
- Creating Seamless Kitchen Remasters with Storage Solutions: This resource offers innovative ideas for maximizing space and organizing efficiently, helping me learn how to utilize every inch effectively. It’s invaluable for planning both aesthetic and functional aspects of cabinetry.
- Expert Consultations: Working with experienced cabinet makers and designers provided personalized insights that no generic guide could offer. Their expertise helped me avoid common pitfalls and inspired me to think creatively about storage and layout.
Your Turn to Build Confidence in Your Kitchen Vision
Once you understand the subtle yet impactful details like these, your kitchen remodel transforms from a daunting task into an exciting opportunity. Remember, the key is to balance beauty with practicality, ensuring your space truly works for your needs. Every decision, big or small, shapes the home you love. Ready to create that perfect harmony in your kitchen? Dive into your project with confidence and curiosity, knowing that thoughtful choices will reward you for years to come.
What’s one small change you’re considering that could make a big difference in your kitchen? Share below and let’s inspire each other!