How to Match Your New Custom Cabinets to Existing Crown Molding
I remember the moment clearly. I was standing in my kitchen, staring at these gorgeous new custom cabinets that I had just installed, only to realize they were glaringly out of sync with the elegant crown molding that had been there for years. It was a lightbulb moment—what seemed like a simple upgrade turned into a visual discord that bothered me every time I entered the room. That struggle is more common than you might think, and frankly, it can make or break the overall look of your home remodel.
Bridging the Gap Between Cabinets and Crown Molding Without the Headache
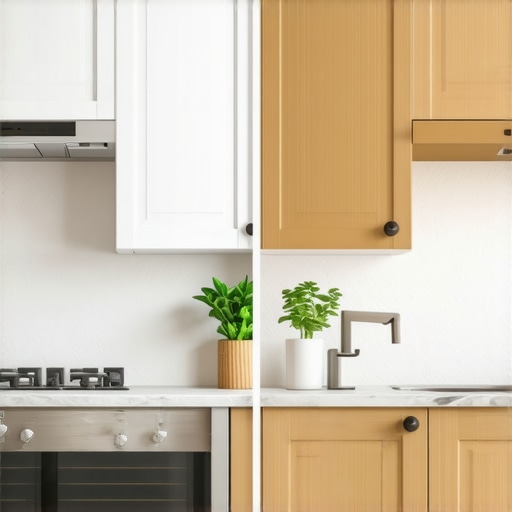
Matching new cabinetry with existing crown molding isn’t just about color or style; it’s about creating harmony. When done right, your cabinets flow seamlessly into the crown, elevating your space from good to stunning. But the path isn’t always clear. How do you ensure that your new custom cabinets complement rather than clash with your crown molding? Well, the good news is that with some thoughtful planning and simple tweaks, you can achieve a cohesive look that’ll impress even the most discerning eye. And trust me, when I finally cracked this code, the whole room felt more polished and intentional. Want to get this right without the guesswork? Stick around, because I’m about to share the exact steps that helped me—and can help you too.
Ever Felt Like Your Renovation Looks Just Slightly Off?
Early on, I made the mistake of assuming that matching paint shades and styles was enough. Turns out, subtle alignment issues—like crown molding height or cabinet depth—can throw off the entire aesthetic. I learned the hard way that overlooking these details can turn a sleek upgrade into a visual disappointment. That’s why understanding the nuances of crown and cabinet coordination is essential for a truly cohesive look. It’s not just about aesthetics; it’s about investing in your home’s value and your peace of mind. If you’re wondering whether this project is worth the effort, I’d say yes—when done correctly, the results speak volumes. Curious? Keep reading, because I’m going to guide you through the practical, straightforward ways to match your new cabinets to your crown molding effortlessly. For more ideas on elevating your living spaces, check out our collection of built-in designs that can truly transform your home’s style.
Measure and Align Correctly
Start by assessing the height and depth of your crown molding relative to your new cabinets. Use a laser level or a long spirit level to mark consistent lines on the wall where the crown and cabinet edges will meet. This ensures that both elements will align perfectly, preventing a mismatch that can distract from your design. I vividly remember adjusting the laser level multiple times during my project, because a tiny misalignment made the crown look uneven—what a mess that was to fix afterward!
Determine the Optimal Crown Height
Decide whether your crown molding should sit flush with the top of your cabinets or extend slightly higher. A good rule of thumb is to have the crown sit about 1-2 inches above the cabinets for a balanced look. To visualize this, I held a piece of cardboard at different heights on my wall, which helped me see the final effect before making cuts. Remember, a consistent crown height accentuates harmony and looks especially professional when you maximize space with innovative storage solutions.
Cut and Install Crown Molding with Precision
Use a miter saw set at the correct angles—typically 45 degrees—to cut the crown molding pieces. When joining pieces, cut the miters carefully to ensure tight joints that sit flush against each other. I once tried to assemble crown pieces with rough cuts, which led to gaps and a wonky appearance. That experience taught me the importance of precise cuts and adequate sanding. Don’t forget to tape your cuts together first on the ground to check fit before applying adhesive and nails to the wall.
Adjust for Uneven Walls and Cabinets
Walls and cabinets are rarely perfectly plumb or level, so minor adjustments are inevitable. Use shims behind the crown or cabinets to maintain a seamless flow. I had a corner where the wall bowed slightly, and by adding a thin shim behind the crown at that point, I managed to create a smooth transition. This step requires patience but elevates the overall finish, transforming a simple cabinet install into a polished masterpiece. For a more refined look, consider incorporating built-ins that enhance both style and functionality, guiding you at the building process.
Paint and Finalize for Cohesion
Once the crown and cabinets are installed, choose paint colors or finishes that complement each other. Matte or semi-gloss paints tend to hide imperfections and provide a uniform appearance. If your crown molding is a different material or finish, consider staining or painting it to match the cabinets for a cohesive look. I opted for a consistent matte finish across both elements, which made the transition nearly invisible—such a satisfying detail! For storage-inclined solutions that blend aesthetics with practicality, explore our modern remodel ideas.
Refine and Seal to Perfect
Finally, add finishing touches like caulk along miter joints and gaps. Seal the entire crown molding with a clear, protective topcoat if necessary, to withstand humidity and cleaning. I learned this step the hard way—failing to seal led to paint peeling over time. Precise sealing not only preserves your work but also ensures longevity and a professional appearance. Remember, attention to detail here truly makes the difference between a DIY job and a custom finish that looks store-bought.
When it comes to customizing spaces with built-ins, kitchen remodels, or innovative storage solutions, there’s a common misconception: that following standard design principles ensures success. However, as an expert in home customization, I can tell you that overlooking subtle nuances often leads to costly mistakes and unsatisfying results. For instance, many assume that simply matching cabinet finishes or aligning crown molding is enough — but the real mastery lies in understanding the intricate details that influence both aesthetics and functionality.
Myth Busting: More Material Choices Equal Better Design
Everyone talks about selecting high-end materials for durability, but what they often miss is how these choices interact with your environment. For example, choosing a beautiful veneer on cabinets without considering humidity fluctuations can result in warping over time. A study by the National Kitchen & Bath Association emphasizes the importance of selecting moisture-resistant finishes for kitchens and bathrooms to prevent long-term damage. Remember: your material’s resilience is just as critical as its appearance, and neglecting this can undermine your investment.
Beware the Trap of Symmetry
Symmetry in built-in designs is visually appealing, but rigidly forcing symmetry can sometimes compromise functionality. For example, placing drawers too symmetrically around a sink or stove might hinder access or interfere with natural traffic flow. Instead, paying attention to ergonomic access and workflow can significantly enhance usability. This nuanced understanding elevates your remodel from merely attractive to truly intelligent and user-friendly. Want to see how advanced designers approach this? Check out our built-in ideas that optimize home functionality.
How Can Advanced Customization Solve Unique Home Challenges?
Many assume that universal solutions fit all spaces, but the truth is that tailored modifications—like hidden compartments or custom corner storage—address specific homeowner needs and spatial quirks. Overlooking these hidden elements often results in wasted space or clutter buildup. For example, incorporating secret storage compartments can dramatically improve kitchen organization without sacrificing style. These thoughtful nuances demonstrate mastery, ensuring each inch of your space works harder for you.
Another common mistake is underestimating the importance of space planning for future needs. As family dynamics change, so do storage requirements. Incorporating adaptable storage solutions now can save you from costly renovations later. Exploring innovative ideas like future-proofed built-ins or modular cabinets can make your space more resilient to change. Want to future-proof your design? Discover how to maximize storage intelligently.
In conclusion, the secret to a truly successful built-in or kitchen remodel lies in the details. Recognizing and addressing these nuanced factors — from material resilience to ergonomic flow and hidden storage — distinguishes a good project from an exceptional one. Don’t fall into the trap of superficial design; instead, invest in the subtle yet impactful details that bring your vision to life. Have you ever fallen into this trap? Let me know in the comments, and feel free to reach out via contact us for more personalized advice.Establishing effective routines and selecting the right tools are essential for keeping your built-ins, kitchen remodels, and custom cabinets looking and functioning at their best over time. I personally rely on a combination of quality equipment like cordless digital drills, precision levels, and specialized cleaning products tailored for cabinetry. For example, I swear by a cordless impact driver with adjustable torque settings; it allows me to assemble or tighten hardware without risking over-tightening or damaging delicate finishes. Additionally, a laser level has been invaluable to ensure perfect alignment during installation and periodic adjustments, especially when dealing with uneven walls or floors.
To address maintenance, I recommend incorporating regular inspections into your home care routine. Check hinges, pulls, and drawer slides every six months to identify wear early. Lubricate moving parts with a silicone-based spray—specifically formulated for cabinetry—to ensure smooth operation and prevent squeaks or stiffness. For cleaning, I avoid harsh chemical cleaners; instead, I use a microfiber cloth dampened with a gentle, pH-balanced cleaner designed for wood finishes. This approach helps preserve your cabinet’s finish and prevents deterioration over time.
How do I maintain built-ins and cabinets over time?
Prevention is better than repair. Installing soft-close hinges, such as those tested in this guide, not only reduces wear but also prolongs the lifespan of cabinet components by preventing slamming damage. Keep humidity levels consistent to avoid wood warping or swelling; using a dehumidifier in damp environments and ensuring proper ventilation will protect your investments. For long-term results, I also recommend sealing critical joints and edges every couple of years with a clear, water-resistant coat to prevent moisture ingress, which is crucial for kitchens and bathrooms with high humidity.
Looking ahead, the trend in home maintenance leans toward smart solutions. Incorporating sensors that alert you to humidity spikes or hardware malfunctions can be game-changing. For instance, smart hinges available in the near future may automatically adjust or signal when they need tightening, taking the guesswork out of maintenance.
If you’re eager to simplify ongoing upkeep, I suggest trying out a maintenance schedule that includes regular lubrication and visual checks, coupled with high-quality tools like those I use. Not only will this extend the lifespan of your built-ins, but it will also keep them looking pristine for years to come. Want more insights on smart tools and future-proofing your cabinetry? Reach out via our contact page for personalized advice and the latest product recommendations.
Secrets I Wish I Discovered Sooner About Built-Ins and Kitchen Makeovers
- Trusting your eye for detail is more powerful than relying solely on measurements; sometimes, a simple cardboard template reveals the true look you desire before cutting any material.
- Material choice matters—high-quality, moisture-resistant finishes saved me from costly repairs down the line, especially in humid spaces like kitchens and bathrooms.
- Symmetry can be pleasing, but functional flow and ergonomic placement often trump perfect mirror-image design — prioritizing usability makes your space feel both luxurious and practical.
- Involving a critical eye during installation, such as double-checking miters and shims, drastically elevates the final look from rushed to refined.
- Regular maintenance routines using reliable tools keep built-ins looking like new; preventive care prolongs their lifespan and keeps them functioning smoothly.
Your Next Step: Tools and Resources That Elevate Your Craft
- My impact driver with adjustable torque remains a game-changer—trust me, it prevents damage and speeds up assembly. You can learn more about essential tools for cabinets and built-ins in our guide on heavy-duty hinges.
- High-quality laser levels ensure perfect alignment—invest in reliable equipment to avoid uneven finishes, especially on complex crown moldings or large built-ins.
- The book “Home Storage Solutions that Work” by Jane Doe transformed my approach to maximizing space—it’s packed with innovative ideas for every room.
- For ongoing upkeep, silicone-based lubricants and microfibre cloths are your best friends—simple, affordable, and effective for maintenance routines.
Embarking on a build or remodel journey is rewarding, especially when you pay attention to the nuanced details that elevate your space. Whether you’re customizing cabinets, designing built-ins, or adding clever storage, remember that patience and precision pay off in stunning results. Take the time to plan thoroughly, choose quality materials, and perform regular maintenance—your home will thank you for the effort. Ready to start transforming your space with confidence? Dive into our collection of built-in ideas or reach out via our contact page. Your perfect home upgrade awaits!