Why Your Pantry Needs Motion-Sensor LED Strips Before the Shelves Go In
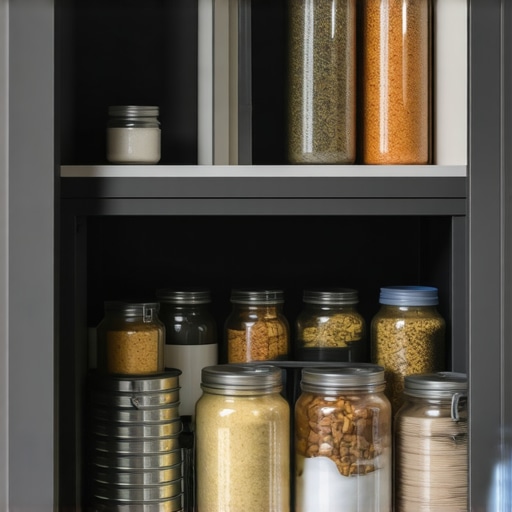
Imagine this: you’re finally deep into your kitchen remodel, the rough shelves are up, and the moment of wiring your custom pantry arrives. But somehow, the space feels dim and uninspired, making it a pain to find that elusive jar of pasta or those overnight oats. I had this lightbulb moment during my last renovation—realizing that I missed a crucial step just before installing the shelves: adding motion-sensor LED strips. The warmth and convenience these little upgrades provide are game-changers, and I wish I had thought of it sooner.
The Hidden Power of Lighting in Storage Spaces
Proper lighting isn’t just about aesthetics; it’s about functionality and safety. An under-lit pantry makes it difficult to see everything clearly, leading to wasted time and spoiled food lurking in the shadows. This is why integrating smart lighting like motion-sensor LED strips beforehand can revolutionize your kitchen experience. Not only do they turn on automatically when you open the doors, but they also enhance the overall ambiance and ease of access. Trust me, once I installed mine, my mornings became hassle-free, and I didn’t worry about red lights or broken bulbs anymore. For more ideas on optimizing your kitchen, check out smart storage solutions for small kitchens.
Is the Hype Overrated? My Early Mistake that Taught Me Better
Before diving into the world of LED upgrades, I assumed that standard lighting would suffice. A mistake many DIYers make is thinking that built-in fixtures alone are enough, neglecting the importance of under-shelf lighting or motion activation. I quickly learned that wiring these strips after shelves are installed is a nightmare—leaving me with messy cables and subpar illumination. The key is to plan ahead, ensuring wiring and power sources are in place before the shelves go in. This small mistake cost me time and effort, but now I know: pre-wiring is essential for a seamless, professional look. If you’re curious about more expert tips, the expert tips on selecting storage solutions can help you avoid common pitfalls.
So, if you’re at the stage of your remodel where wiring and lighting are still on your mind, ask yourself: Have I overlooked the power source placement for my pantry lighting? Taking this simple step now can save much frustration later. Up next, let’s explore exactly how to plan and install these smart lighting systems effectively—so your pantry becomes not just functional, but beautifully lit.
Map Your Electrical Needs Early
Before any shelves or built-in cabinets go up, create a detailed electrical plan. This means marking exact locations for outlets, switches, and lighting fixtures. Use painter’s tape to outline these spots on the wall, simulating where your components will be installed. This step prevents future wiring chaos and saves you from having to retrofit after the fact. I learned this lesson the hard way when I installed my pantry shelves first, only to realize I forgot to plan for lighting switches. The fix involved rerouting cables and drilling new holes, which was messy and time-consuming. To avoid this, think of your wiring plan as the blueprint of a house — essential for smooth execution. For more advanced wiring ideas, visit this guide on smart storage and built-in solutions.
Pre-Plan Power Sources for Light Strips
Decide where your power sources will connect to the main electrical system before installing the shelves. If your plan includes motion-sensor LED strips, these need to be powered and connected to a switch or sensor. Position outlets strategically so cables can run discreetly along the back of shelves, under cabinets, or inside cavities. For instance, when I recently wired my custom pantry, I installed a dedicated outlet behind the back panel, hidden from view but accessible for maintenance. This foresight meant I didn’t have to crawl behind shelves later or deal with unsightly cords. Think of this process as installing the foundation for a building — if it’s solid and well-planned, everything else falls into place easily. For design-inspired lighting ideas, check out expert tips on storage and lighting.
Wiring During the Construction Phase
Once your power sources and outlets are mapped, run the wiring directly through planned channels. Use flexible conduit tubing or wiring ducts to keep cables organized and protected. When installing shelves, route cables along the edges, secured with clips or staples, to prevent sagging or damage. I once fastened cables haphazardly, which led to accidental unplugging and cluttered appearance. Instead, I now use zip ties and raceways to keep everything sleek. Consider pre-drilling access holes from the outside or inside cabinetry to facilitate future upgrades or troubleshooting. Think of wiring like the arteries of your cabinets — they should be hidden, organized, and accessible only when necessary. For hardware solutions that keep your wiring tidy, browse hardware tips here.
Test Before Installing Shelving
Before mounting shelves permanently, connect all wiring and perform functionality tests. Turn on lighting, check switches, and validate motion sensors. This confirms every connection works correctly and prevents costly adjustments later. During my recent project, I temporarily set up the LED strips, tested them for response time, brightness, and placement, then finalized the wiring plan. It turned out that my sensor was too sensitive and needed adjustment, which was easier to do while accessible. This step ensures your system is fully operational and avoids surprises after the shelves are fixed in place. Consider labeling wires for easier maintenance, much like labeling circuits in a home’s electrical panel. For more wiring and electrical setup tips, visit this resource hub.
When it comes to designing the perfect kitchen or living space, many assume that selecting custom cabinets or built-ins is a straightforward upgrade. However, even seasoned homeowners often overlook nuanced pitfalls that can undermine their entire remodeling effort. Let’s dig deeper into some common misconceptions and advanced mistakes that can trip up your project, so you can avoid costly setbacks and achieve truly functional, beautiful spaces.
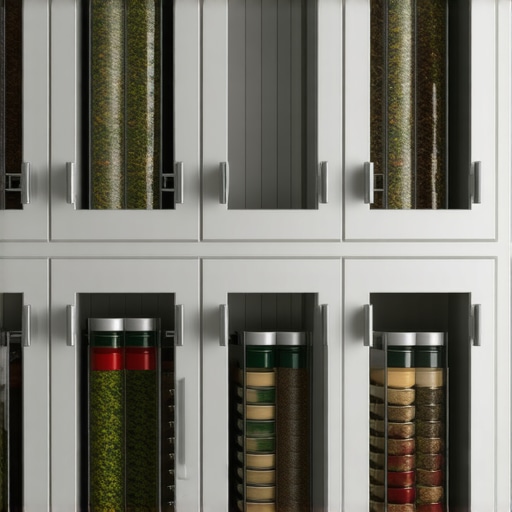
One significant myth is that more storage is always better. Many believe installing every conceivable cabinet or niche maximizes utility, but in reality, overcrowding can make spaces feel cramped and impede accessibility. A well-designed storage plan balances capacity with ease of use, emphasizing strategic placement over sheer volume. For inspiration and strategies, explore smart storage ideas for modern kitchens.
Another common trap involves underestimating the importance of proper door and hinge hardware. Homes exposed to high humidity or temperature fluctuations can cause cabinet doors to warp or hinges to fail prematurely. High-quality, climate-resistant hardware is a must—standard hinges might save you money upfront but will cost more in repairs later. For durability and function, check out heavy-duty hinges that last.
Why does countertop overhang sometimes look great but cause problems in the long run?
Many designers and DIY enthusiasts lean towards larger overhangs to create dramatic, luxurious islands and breakfast bars. While visually appealing, inadequate support can lead to sagging or even structural failure, especially with heavy stone or solid wood surfaces. The key is to incorporate steel support plates or brackets seamlessly into the design from the start—waiting until after installation to reinforce can be costly and aesthetically disruptive. For advanced tips, review support strategies for overhangs.
A worthy nuance often misunderstood is the difference between inset and full-overlay cabinet doors. Beginners focus solely on style, but expert remodelers consider accessibility, maintenance, and future hardware upgrades. For example, inset doors require precise measurement and construction, but they can provide a sleek, high-end look when executed correctly. Conversely, full overlays offer easier access and simpler installation, making them suitable for busy family kitchens. To determine the best choice, read this comparison of cabinet styles.
Lastly, an advanced mistake that can derail your project involves ignoring humidity’s impact on wood. Many assume controlled indoor climates negate moisture concerns, but high humidity zones like coastal areas or sunrooms require specialized materials and finishes. Failing to specify these can result in warping, cracking, or discoloration over time. Expert-grade finishes and moisture-resistant core materials are essential—learn more at this article on moisture management.
In conclusion, achieving a truly custom, functional space goes beyond selecting pretty cabinets or trendy storage solutions. It demands understanding nuanced material behaviors, hardware longevity, structural support, and the subtle balance between aesthetics and practicality. Have you ever fallen into this trap? Let me know in the comments, and share your experiences or questions about advanced design pitfalls. By spotting these hidden flaws early, you’ll ensure your remodeling efforts stand the test of time.
Once you’ve invested time and effort into designing and installing your custom cabinets and built-ins, the next critical step is ensuring they stay functional and beautiful over the years. Proper maintenance not only prolongs their lifespan but also keeps your workspace or living area looking polished. I recommend incorporating specific tools and routines that make this process seamless and effective.
Tools That Keep Your Cabinets in Prime Condition
First up, a high-quality cordless drill with a set of precision screwdrivers is essential. I personally rely on my DeWalt DCD791D2 because its compact size and reliable torque allow me to tighten or adjust hardware without risking over-tightening or damaging the wood. For cleaning, a soft microfiber cloth paired with a gentle cleaner like Simple Green All-Purpose Cleaner works wonders. This combo efficiently removes dust and fingerprints without scratching surfaces. Additionally, investing in a cabinet liner applicator helps keep shelves clean and prevents items from slipping—something I find invaluable for maintaining organized storage spaces.
The Software and Methods That Make Maintenance Routine
Beyond physical tools, digital solutions streamline maintenance tracking. I use the free app Evernote to set reminders for checking hinges, lubricating slide-outs, or reapplying finishes. For hardware adjustments, a precision torque screwdriver like the Wiha 26194 ensures screws are tightened to manufacturer specifications, avoiding hardware failure over time. As I continue to upgrade my spaces, I predict that smart sensors integrated with home automation will eventually notify us when a hinge or gadget needs attention, making maintenance even more effortless.
How Do I Maintain My Custom Kitchen Over Time?
Regular inspections are your best defense against deterioration. This means periodically checking for loose hinges, chipped paint, or sticky sliding drawers. Lubricating moving parts with a silicone-based spray, such as Blaster Dry Lube, prevents squeaking and rust. Another tip is to examine moisture-prone areas—especially in kitchens and bathrooms—and ensure finishes are intact to prevent warping. For surfaces exposed to spills or splashes, reapplying a durable finish like polyurethane or oil-based varnishes will maintain their luster and protect against damage.
Finally, consider consulting professionals for annual checkups, especially if your cabinets are outfitted with motorized or sensor-based features. These components often need calibration or firmware updates. Incorporating these routines into your maintenance schedule can save money and time, ensuring your investment stays clean, functional, and beautiful for decades.
Try adopting a quarterly check-in routine using these tools and methods—you’ll be surprised at how much longer your custom solutions will remain pristine and reliable. Start today, and enjoy the peace of mind that comes with knowing your craftsmanship continues to shine over time.
Lessons That Changed My Approach to Custom Cabinets and Built-Ins
One of the toughest lessons I learned was the importance of foresight in wiring and hardware planning. Rushing into installation without detailed electrical maps cost me time and money, reminding me that patience and comprehensive planning are key. Additionally, I underestimated the impact of high-quality hinges—skimping early on led to frequent repairs later, proving that investing in durable hardware pays off in the long run. Finally, I realized that integrating moisture-resistant materials in humidity-prone areas can prevent costly warping and maintain the beauty of my cabinets over years, not months.
Tools and Resources That Elevate My Customization Game
My go-to toolkit includes a reliable cordless drill, a precision torque screwdriver, and a microfiber cloth with gentle cleaning solutions—these keep hinges tight, surfaces pristine, and details sharp. The ‘Ultimate Guide to Custom Cabinets for a Stylish Kitchen Overhaul’ offers me insights into material choices and design tricks. For ongoing learning, I regularly browse this resource on built-in innovations which keeps me ahead of design trends. I also trust the detailed advice in this expert tips collection for selecting storage solutions that truly last.
Your Next Move to Perfect Your Space
Taking action today can solidify your remodeling success. Whether you’re planning new cabinets, reevaluating storage options, or upgrading your lighting, remember that proactive planning and informed choices make all the difference. Your dream kitchen or living space isn’t just a future goal—it’s within reach now. Start by mapping your electrical needs, selecting durable hardware, and investing in moisture-resistant materials. What feature are you most excited to improve in your space? Share your plans below and let’s inspire each other to create homes that truly shine.