Why Your Kitchen Island Needs a Dedicated Charging Drawer for Devices
It happened during one of those busy mornings—my phone was ringing, the kids were arguing over who got to use the blender, and I was frantically searching for a free outlet to charge my device. No matter how organized I thought my kitchen was, the cluttered cords and overloaded outlets made me feel like I was living in a tangle of chaos. That was my lightbulb moment. I realized that if I truly wanted a sleek, functional kitchen, I needed a dedicated space—to charge, to organize, and to streamline my daily routine. Today, I want to share how a simple addition—a charging drawer—transformed my kitchen, and how it can do the same for you.
The Hidden Clutter Killer: Why a Charging Drawer Makes a Difference
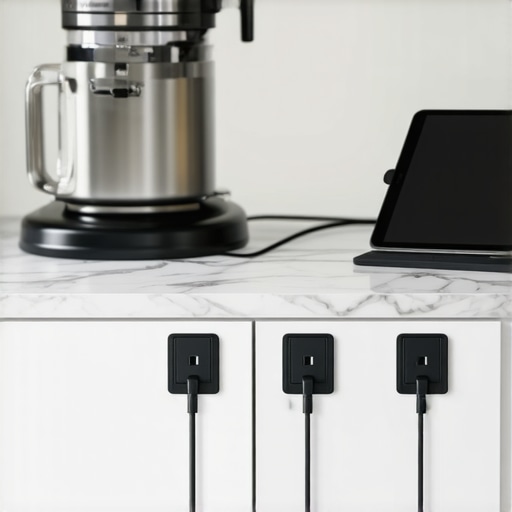
In my early kitchen remodels, I overlooked one of the most common but underrated nuisances: charging devices and their cords cluttering up countertops and drawers. It’s an invisible problem that quietly drains your time and patience every day. Imagine walking into your kitchen, only to trip over a tangle of phone chargers, or worse, find tangled cables behind appliances. I spent ages untangling cords before realizing I needed a better solution.
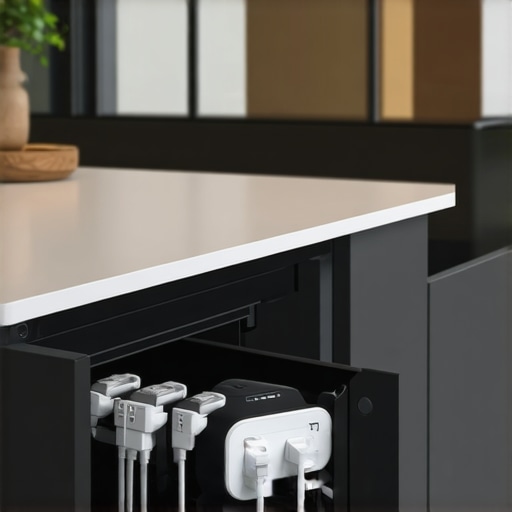
That’s when I discovered the magic of a **dedicated charging drawer**—a sleek, hidden compartment designed specifically for charging devices while keeping cables out of sight. Not only does it declutter your space, but it also protects your devices from spills and accidental damage. Plus, integrating this feature during the build phase is surprisingly simple, especially if you’re working with custom cabinetry. Want to see more ways built-ins can upgrade your kitchen? I highly recommend checking out this guide.
Did you know that according to a study by the University of Michigan, the average person touches their phone over 2,600 times a day? That makes having a convenient charging spot a must-have. It’s not just about convenience; it’s about reducing everyday frustrations and creating a space that works seamlessly with your lifestyle.
Now, I’ll admit, early on I made the mistake of trying to cobble together my own charging station with cheap outlets and makeshift cords. It was a disaster—overheating, flickering, and eventually, failure. That taught me that investing in purpose-built solutions not only saves you time but also ensures safety and durability. If this sounds familiar, don’t worry—help is just a few steps away, and the benefits are worth it.
So, are you tired of fighting the cable chaos in your kitchen? Keep reading—it’s easier than you think to create a clutter-free zone that keeps your devices charged and your countertops pristine.
Prepare Your cabinet space carefully before installation
Begin by selecting a cabinet or drawer that offers enough space for your charging station. Remove the existing drawer or shelf to create a clean workspace. Use a measuring tape to mark the precise dimensions, ensuring enough clearance for your devices and cords. I once rushed this step without proper measurement, resulting in a snug fit that made accessing devices cumbersome—learning the importance of accuracy early on saved me headaches later.
Design a functional layout for electrical access
Determine the best location for outlets. Consider installing a power strip or dedicated circuit behind the cabinet to avoid dangling cords. I used a silicone spray (see how silicone spray smooths drawer slides) on the hardware to make re-installation easier later. Make sure the outlets are accessible but concealed for aesthetic appeal.
Build or modify the drawer box to accommodate wiring
If you’re up for a DIY challenge, reinforce the drawer with thin plywood, creating a false bottom with a hole for cords. Think of this as building a secret compartment—similar to adding a hidden power hub in a toolbox. Use a jigsaw to cut the hole precisely, and sand all edges smooth. I once made a mistake by poorly sealing the hole, causing dust to get inside; paying attention here is crucial.
Tip: Use high-quality plywood to prevent warping over time
For best results, select plywood grade BC or better, like birch plywood, which resists humidity and warping. This ensures your charging drawer remains functional and attractive for years. Resources like this guide on quality plywood can help you choose the best materials.
Install electrical components with safety in mind
Mount the power strip securely inside the box, using brackets or adhesive strips. Connect the wiring, ensuring all connections are insulated and grounded properly. I recommend consulting an electrician if you’re unfamiliar with electrical work—safety always comes first. Double-check that cords are not stretched tight or pinched, which could cause damage over time. Once everything is wired, test the outlet and device charging capability before reassembling the drawer.
Reassemble your cabinet and test
Carefully slide the drawer back into place, making sure the cords are tucked neatly underneath or along the sides. Use furniture sliders or soft-close hardware for smooth operation. Plug in your devices and verify that charging works seamlessly without cords snagging or pulling. Seeing my kids’ surprised faces when they saw the sleek, hidden charging station made all the effort worthwhile.
Transforming a standard drawer into a charging hub simplifies daily routines and keeps your kitchen tidy. By following these detailed steps, you can create a customized solution tailored to your space and needs, just like I did during my recent remodel, which dramatically reduced countertop clutter and improved accessibility. Ready to take your kitchen to the next level? Connect with experts for personalized advice or to explore innovative storage solutions tailored for your home.
Many homeowners assume that simply choosing built-in cabinetry or opting for custom solutions will automatically lead to a perfect, functional kitchen. However, **there’s a hidden nuance in the world of kitchen remodels** that often gets overlooked: understanding the *limitations and complexities* behind these features. For example, many believe that all built-ins are a one-size-fits-all fix, but in reality, **poor planning and assumptions about space utilization often sabotage the project’s success**. A common myth is that custom cabinets can disguise or eliminate structural challenges; in truth, custom solutions must be carefully designed to work with existing architecture to truly optimize space. As expert remodeling professionals note, neglecting detailed measurements or understanding how materials behave over time can lead to costly mistakes, such as warping or misalignment, which degrade both function and aesthetics.
Are built-ins always worth the extra cost and effort?
Research shows that strategic design considerations play a pivotal role. According to a study published in the *Journal of Interior Design*, precise planning and tailored storage solutions dramatically *improve overall usability* and *long-term durability* of a kitchen. Yet, many fall into the trap of selecting trendy finishes or more decorative elements without assessing their practicality—which often results in clutter buildup or inaccessible storage. The key is to **balance aesthetics with function**, which entails understanding the *nuances of material selection, hardware choices, and user behavior*. For instance, soft-close hinges and full-extension drawers aren’t just luxury extras—they prevent wear and tear, reducing the chances of misalignment or damage over time. This isn’t to discourage creative design but to emphasize that **a little extra planning upfront yields significantly better results**. Don’t forget that *integration of storage solutions* like pull-out spice racks or hidden charging stations can transform your space from merely beautiful to genuinely efficient. Want to build a smarter, more organized kitchen? Take a look at these innovative hacks to unlock your design’s full potential.
Another frequent mistake involves underestimating *the importance of flexible storage systems*. Homeowners often specify a rigid layout without considering how their needs might evolve. For example, dedicated wine storage might seem like a good idea now, but what happens if your preferences change? A versatile approach—like adjustable shelving or modular units—can prevent future obsolescence. Embracing this philosophy is crucial because, **unlike standard cabinetry**, custom pieces are an investment that should adapt to your lifestyle, not dictate it. If you’re contemplating upgrading your kitchen, remember that **components like custom drawers and specialized storage often outperform generic solutions** in both function and resale value; explore this guide on seamless storage for more insights.
In conclusion, **the expert secret is recognizing that not every built-in is a magic bullet**, but when designed thoughtfully, they become a game changer. Avoid the trap of overgeneralizing by working with professionals who understand the *nuances of materials, ergonomics, and long-term maintenance*. This is what elevates your remodel from good to extraordinary. Have you ever fallen into this trap? Let me know in the comments, and let’s continue to demystify the subtleties of an intelligent, well-crafted kitchen.Maintaining your custom cabinetry and built-in storage is essential to ensure long-lasting functionality and preserve your kitchen’s aesthetic appeal. Personally, I rely on specific tools and practices that not only make upkeep manageable but also extend the lifespan of high-quality materials. One of my favorite tools is the Microfiber Cleaning Cloth, which gently lifts dust and fingerprints without scratching delicate surfaces like matte black hardware or soft-close hinges. I combine this with a compact cordless drill equipped with soft-bristle brushes to tackle routine tightening of loose hinges or drawer slides, preventing misalignments that can cause frustrating sticking or noise. For stubborn grime, I opt for a mild multi-surface cleaner paired with a microfiber cloth, avoiding harsh chemicals that might degrade finish over time. Regularly inspecting components—such as soft-close glides or magnetic catches—helps catch potential issues early, saving money and restoring smooth operation before minor problems escalate. Incorporating these steps into a quarterly maintenance routine, guided by advice from industry experts, keeps everything functional and looking pristine. Additionally, employing software like Evernote or Notion allows me to track maintenance schedules and notes for each project, ensuring no detail falls through the cracks. Looking ahead, I predict that smart maintenance tools—like appliance sensors alerting you to parts needing attention—will become commonplace, reducing downtime significantly. For now, I recommend trying my go-to tip: keep an emergency touch-up kit with mini screwdrivers, lubricants, and cleaning supplies close at hand, so quick fixes are always within reach. By integrating these practices and tools, you’ll ensure your custom built-ins and storage solutions serve you efficiently and beautifully over the years. Interested in deepening your knowledge? Visit this contact page to connect with professionals who can tailor maintenance plans for your space.
Secrets That Changed My Approach to Built-Ins and Storage
One of the most profound lessons I learned was that meticulous planning and understanding your actual needs trump trendy designs. I used to chase after the latest finishes and hardware without assessing how my family would interact with the space daily. That oversight led to cramped drawers and unused nooks. Now, I focus on real user behavior, creating solutions that adapt seamlessly, like adjustable shelves and versatile storage.
Another insight was the importance of embracing flexibility in custom solutions. Fixed layouts can become quickly obsolete as needs change—think of pull-out spice racks or modular cabinetry that can reconfigure over time. This approach saved me from costly redo’s and kept my kitchen both functional and timeless.
Finally, I realized that even the best-built-ins require regular attention. Simple routine maintenance, like inspecting hinges or cleaning soft-close mechanisms, vastly prolongs their lifespan. Incorporating easy-to-access maintenance points during initial design saves effort later and keeps everything running smoothly.
Tools and Resources That Made My Remodel Successful
My go-to reference has always been this comprehensive guide on modern kitchen remodels, which offers invaluable tips tailored for every space. For material selection, I trust birch plywood resources; they emphasize durability, humidity resistance, and a high-quality finish that endures years of use.
When it comes to hardware, heavy-duty drawer slides and soft-close hinges from reputable brands have stood the test of time in my kitchen. These small upgrades made a tremendous difference in usability and longevity. Additionally, consulting professionals through this contact page can help tailor solutions perfectly suited for your unique space.
Embrace Your Power to Transform Your Kitchen Experience
Designing built-ins and storage solutions that genuinely serve your lifestyle is absolutely within reach. Take inspiration, trust quality resources, and don’t hesitate to seek expert guidance. Your dream kitchen—organized, functional, and beautiful—is just a thoughtful decision away. Remember, every small upgrade compounds into a space that feels undeniably right.
What’s the one area in your current kitchen that causes you the most frustration? Share your experience below, and let’s explore how to turn it into a feature you love.
.