How to Create a Seamless Built-In Look for Your Freestanding Refrigerator
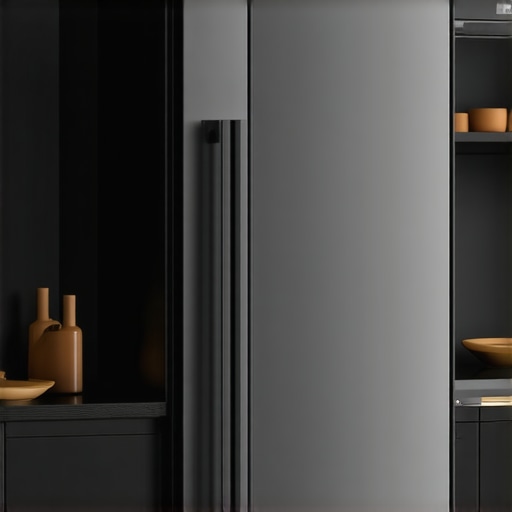
It was a moment of frustration that finally made me realize how much a mismatched fridge can detract from an otherwise stunning kitchen. I had invested so much into sleek cabinets and stylish countertops, yet my freestanding refrigerator stuck out like a sore thumb, breaking the seamless flow I was desperately trying to achieve. That realization was the lightbulb moment that set me on a journey to learn how to create a built-in look for my fridge without replacing it entirely.
Transform Your Kitchen: Why a Built-In Appearance Matters
Let me ask you—have you ever looked at your kitchen and felt that your refrigerator just doesn’t belong? The truth is, a lot of us struggle with how to integrate our freestanding appliances into the overall design, especially when we’re working with existing setups or on a tight budget. Achieving that custom, built-in aesthetic can make your kitchen appear more polished, spacious, and cohesive. Plus, it increases your home’s value—something I’ve come to appreciate after remodeling my space.
But here’s the catch—if not done correctly, your efforts can backfire. I learned this early on when I tried to
Plan the Custom Frame Carefully
Start by measuring your refrigerator’s dimensions precisely—width, height, and depth. Use these measurements to design a wooden frame that will house your fridge, ensuring it fits snugly without gaps. Think of this step as creating a tailored suit for your appliance—precision is key. I once spent an afternoon sketching out my frame on scrap plywood, only to realize I had an inch too narrow—leading to a messy, off-center look that I had to fix later.
Select the Right Materials and Hardware
Choose durable, paintable plywood or MDF for the enclosure, and select hardware like soft-close hinges and support brackets. These components will make your built-in look seamless and functional. I opted for high-quality plywood to resist warping over time, which paid off during the installation. For hardware, I used soft-close hinges on the cabinet doors, enhancing the sleekness of the final appearance. For more advanced storage ideas, consider exploring modern storage solutions.
Build the Enclosure Frame
Using your measurements, cut the panels and assemble your frame with pocket screws or nails for a clean finish. Imagine this as assembling a puzzle—you want tight joints with no gaps. I recall clamping the pieces tightly and checking for squareness consistently; a small misalignment could translate into a crooked finish. This step sets the foundation for a professional-looking built-in.
Install and Secure the Fridge
Then, slide the fridge into the frame, ensuring it fits without forcing. Use shims if necessary to level the appliance, making it sit flush with the surrounding cabinetry. Secure the fridge with brackets to prevent movement, especially if your floor is uneven. In my case, I used additional brackets behind the fridge, which stabilized it and prevented it from shifting over time. For detailed methods on anchoring your cabinetry, see anchoring techniques.
Finish with Seamless Trim and Paint
Attach trim pieces that match your cabinetry style—beadboard, crown molding, or simple trim—to hide gaps and create a flush finish. Paint the entire enclosure to match, blending it seamlessly into your existing cabinetry. I used a semi-gloss white paint, which reflected light well and made the space look larger. Proper finishing touches elevate the look from a DIY project to a custom feature.
Adjust for a Perfect Fit
Finally, check the appliance doors for smooth operation and make adjustments with hinges or shims as needed. Ensure there’s enough clearance for handles, vents, and door swings. During my install, I noticed a slight misalignment in the fridge door and adjusted the hinges for a perfect, silent closure—transforming the appliance from an eye-sore to a sleek component of the kitchen design. For hinge adjustment tips, see hinge adjustment guides.
Many homeowners believe that choosing custom cabinets or built-in storage automatically guarantees a flawless, long-lasting solution. However, seasoned designers know that some common assumptions about these projects can lead to avoidable pitfalls. One misconception is that more complex or elaborate designs always translate to better functionality. In reality, over-customization can result in impractical setups or increased future maintenance, especially if the storage isn’t tailored to actual usage patterns. For instance, intricate corner cabinets or too-deep drawers may look stunning but often become cluttered or hard to access, defeating their purpose. A smarter approach involves focusing on ergonomic placement and flexible storage options, like those highlighted in expert tips on selecting storage solutions.
A crucial nuance many overlook is the impact of material choice and environmental factors. While solid hardwood exudes luxury, it can warp or crack if not properly managed, especially in high-humidity areas. Conversely, engineered materials like HDF or moisture-resistant plywood tend to outperform traditional wood in these settings but are often dismissed as inferior. A recent study published in the Journal of Materials Science emphasizes that choosing the right material, based on environmental conditions, significantly extends the lifespan of cabinetry and prevents costly repairs down the line.
Another sneaky mistake is neglecting ventilation and access points during the design phase. Even the most beautiful built-ins can underperform if vents are blocked or if there’s no room for door swings and hardware adjustments. For example, a sleek, flush cabinet may restrict airflow, leading to moisture buildup and mold—common issues for food storage or humid climates. Planning for hidden vents and maintaining standard clearances can save you a ton of hassle and preserve your investment. For insights on integrating such features seamlessly, check out creating seamless built-in storage solutions.
What Advanced Strategies Can Prevent Hidden Defects in Custom Installations?
Experts recommend thorough pre-planning with detailed measurements, mock-ups, and environmental assessments to sidestep these problems. Skipping these steps might seem minor initially but can cause misalignments, aesthetic inconsistencies, or functional failures over time. For a comprehensive guide to avoiding these pitfalls, visit the ultimate guide to custom cabinets.
Ultimately, the key to perfecting your kitchen remodel isn’t just about the visual appeal but understanding the underlying nuances that determine longevity and usability. Does your current plan account for environmental factors, material suitability, and practical design? If not, you might be setting yourself up for unnecessary frustrations. Remember, a well-designed space balances beauty with function—an art that seasoned experts have mastered after years of experience. Have you ever fallen into this trap? Let me know in the comments.
Keep It Working: Essential Tools and Techniques for Longevity
Ensuring your custom cabinets and built-in storage solutions stay pristine requires the right tools and consistent maintenance. Personally, I rely on a few key pieces of equipment that have proven invaluable over the years. A high-quality cordless drill, for example, is indispensable for tightening hinges and adjusting hardware without the hassle of cords getting in the way. I prefer models with a brushless motor, such as the DeWalt DCD791D2, because they provide more torque and longer battery life—key when working on multiple cabinetry units.
For fine tuning hinges and soft-close mechanisms, I swear by a dedicated precision hinge adjustment tool. It’s designed to quickly calibrate every door and drawer, ensuring seamless operation after years of use. Regularly checking and tightening gold-plated screws with a quality Phillips screwdriver also prevents hardware from loosening prematurely, safeguarding your investment.
Long-term results hinge on proper cleaning and environmental control. I recommend a soft cloth and a mild, non-abrasive cleaner—specifically avoiding ammonia-based products that can degrade finishes. For pretending humidity and temperature consistency, a digital hygrometer and thermostat help monitor conditions, which is especially crucial for wooden components susceptible to warping or splitting, as the materials science study illustrates.
How do I maintain built-in storage over time?
Regular inspections are your best bet. Check hinges, slides, and handles quarterly, applying lubricant like silicone spray to keep everything operating smoothly. When you notice drawers sticking or cabinet doors misaligning, address these issues immediately—they’re often simple adjustments that extend lifespan. Consider integrating a maintenance checklist into your annual remodel plan to stay ahead of wear and tear.
Looking ahead, smart tools and sensors are becoming more commonplace. Automated humidity controls and anti-warp devices are gaining popularity, predicting a future where cabinets can self-monitor and alert homeowners to potential issues before they escalate. For example, future trends in smart kitchen storage forecast an increase in IoT-enabled cabinetry for enhanced durability.
Ready to take your cabinet upkeep to the next level? Try installing a humidity sensor that links to your smartphone. This simple addition can prevent common problems like warping and mold growth, especially in high-humidity environments. For detailed guidance on installing smart controls, see our expert tips.
Remember, the key to long-lasting cabinetry lies not only in initial craftsmanship but also in diligent maintenance. Regularly using the right tools and proactive care ensures your investment continues to impress for years to come. Do you have preferred tools or routines that keep your built-ins in top shape? Share your favorites with the community or visit us through our contact page.
Three Lessons That Changed My Approach to Custom Cabinets
- Less is More—Until It Isn’t: I used to believe that elaborate details guaranteed a luxurious look, but I realized that simplicity paired with high-quality materials creates timeless elegance. Over-customization often leads to impractical spaces; focusing on ergonomics and user habits saves time and money in the long run.
- Materials Matter More Than Looks: Choosing moisture-resistant plywood over traditional MDF in humid kitchens prevented warping and costly repairs. Understanding the environmental impact on materials transformed my remodeling decisions, helping me build cabinetry that endures.
- Plan for Hidden Flaws: Ventilation, hardware clearance, and structural stability are critical. Skipping these details can cause doors to misalign or vents to be blocked, ruining both aesthetic and function. Thorough measurements and environmental assessments are your best allies.
Tools and Resources I Rely On Daily
- DeWalt DCD791D2 Cordless Drill: Its power and battery life make installing and adjusting hardware smooth and efficient. For precision hinge tuning, I trust the dedicated hinge adjustment tool.
- Digital Hygrometer and Thermostat: Monitoring humidity and temperature is vital for maintaining cabinet longevity. I use these to prevent warping, especially in climate-changed environments, referencing insights from material science studies.
- Regular Maintenance Checklists: Inspect hinges, slides, and handles quarterly. Applying silicone spray and making quick adjustments preserve functionality and appearance. For advanced tech, consider smart sensors; I recently added a humidity sensor linked to my phone, preventing future issues.
Your Next Step Towards a Kitchen that Reflects Your Style and Cares for Durability
Embracing these lessons, tools, and proactive habits can elevate your kitchen remodel beyond superficial beauty. Your cabinetry should not just look stunning but also serve its purpose for years. Don’t shy away from creative storage solutions or modern tech—they’re game-changers in maintaining your space. Remember, every great kitchen starts with thoughtful planning, quality choices, and regular care. Are you ready to transform your kitchen into a durable, beautiful space that feels uniquely yours? Share your current projects or questions below—I love seeing how your journey unfolds.