Why Inset Cabinetry Costs More and When It Is Worth the Price
It was a morning like any other, until I opened my kitchen cabinet and realized that my beautiful inset doors, which I had eagerly chosen for their sleek, built-in look, didn’t close flush. Instead, they stuck out awkwardly, creating a gap and a sense of unfinished quality I hadn’t anticipated. That moment of frustration made me question—was the extra cost of inset cabinetry really justified? I soon learned that the price tag mirrors the precision and craftsmanship involved, but it’s not just about the cost; it’s about whether the benefits align with your needs.
Deciphering the True Value of Inset Cabinetry in Your Kitchen Remodel
If you’re considering a kitchen upgrade, you’ve probably seen the allure of inset cabinets—smooth, seamless doors that blend into the wall like furniture built-ins. The question most homeowners ask is, “Are inset cabinets really worth the additional expense?” The answer depends on multiple factors, including your aesthetic goals, budget, and how much you’re willing to invest in personalized craftsmanship. Early in my project, I made the mistake of assuming all cabinets are created equal—yet I ignored the more meticulous installation requirements inset cabinetry demands. That oversight led to misaligned doors, which were a hassle to fix later.
But don’t worry! Today, I’ll walk you through why inset cabinetry costs more, what benefits it offers, and how to decide if it’s actually the right choice for your space. Let’s explore whether the investment makes sense for your particular circumstances.
Is Inset Cabinetry Actually Worth the Hype?
Many homeowners get swayed by the flawless, custom look of inset cabinets. However, they often overlook the intricacies involved in installation and maintenance. For example, inset doors require precise measurement and hinges that allow for perfect alignment—small mistakes can result in sticking or uneven gaps. I learned this the hard way when I rushed my initial installation, leading to doors that wouldn’t close properly, and I had to redo parts of the project.
Supporting that, a recent study from the National Kitchen & Bath Association confirms that inset cabinetry tends to cost between 20% to 30% more than standard overlay cabinets, primarily due to labor and hardware precision requirements. But is the aesthetic payoff worth it? That depends on your commitment to craftsmanship and your patience for potential adjustments.
To help determine if inset cabinetry is worth the extra investment, think about how you use your kitchen, your style preferences, and your willingness to invest in higher-quality installation. If you love the seamless lines and are prepared for the finer details, inset cabinets can truly elevate your space. If not, there are plenty of well-designed alternatives that offer show-stopping style without the hefty price tag.
If you’re unsure whether inset cabinetry fits your budget and style, don’t hesitate to reach out and discuss your options. You can start by consulting with specialists who understand the nuances, like those at Artisan Cabinetry. Remember, a well-chosen cabinetry style not only enhances your kitchen’s beauty but also its functionality—so it pays to choose wisely.
With this foundation in mind, let’s move forward and explore the key factors that influence the cost and how to decide if inset cabinetry is a smart investment for you.
Precisely Measure the Space for Inset Cabinets
Start by carefully measuring your cabinet openings, accounting for door gaps and hinges. Use a high-quality tape measure and double-check each dimension. I once mistakenly measured twice but recorded the wrong width, leading to misaligned doors. To avoid this, mark your measurements clearly on your plan and confirm with a second measurement session.
Select the Right Hardware and Materials
Choose hinges that allow fine adjustment, such as European-style soft-close hinges. Opt for high-quality, dimensionally stable plywood for cabinet boxes to prevent warping. I found that investing in premium hinges significantly reduced door sag over time, saving me from frequent adjustments.
Prepare the Cabinet Framework with Precision
Build your frame on a flat, stable surface, ensuring all corners are square within 1/16 inch. Use clamps and a carpenter’s square during assembly. During my project, I used painter’s tape as a temporary jig to hold parts in place and achieved perfect 90-degree angles—a step that made hinge fitting much smoother later.
Install the Frame and Check Alignment
Secure the frame in the wall opening with screws, ensuring it’s plumb and level. Use shims as needed, especially over uneven floors or walls. I learned that slight adjustments during installation eliminated door binding issues down the line. Constantly check with a spirit level and adjust before fully tightening all fasteners.
Attach and Adjust Doors for a Flush Fit
Mount the doors onto hinges loosely, then adjust for proper gaps and flushness. Use a magnetic fingertip tool or a shim wedge to hold hinges in position while tightening. I encountered doors that refused to close flush due to hinge misalignment, but by fine-tuning the hinge screws and using a calibrated spacer, I achieved a seamless look.
Fine-Tune for Seamless Integration
Finally, make micro-adjustments to hinges for even gaps and that perfect inset appearance. Test doors repeatedly to ensure they close smoothly without sticking. My patience paid off when a half-millimeter tweak made all the difference, giving my cabinets that professional-grade finish.
Integrate Built-In Storage Solutions
To maximize your space, consider custom internal drawers or pull-outs. Incorporate these during the framing process for a sleek, built-in effect. For example, I added a spice rack inside a narrow cabinet, which saved door space and kept everything within reach—learn more about such innovations at this guide.
Many homeowners embark on kitchen renovations with enthusiasm, but in the process, they often fall prey to misconceptions that can undermine their effort and budget. One common myth is that all built-in cabinets and storage solutions are created equal. In reality, the seemingly simple decision to choose custom cabinets over stock options involves nuanced trade-offs, especially in terms of long-term functionality and maintenance. For instance, many assume that custom cabinetry automatically guarantees optimal storage, yet, without proper planning, it can lead to inefficient use of space and accessibility issues. Advanced users, consider that the choice of hardware, internal configurations, and material quality significantly impact the system’s durability and usability over time. Overlooking these nuances can result in costly retrofits, which could have been avoided with early expert consultation. Research indicates that poorly designed storage not only wastes space but also diminishes workflow efficiency — a crucial aspect often underestimated (source: https://artisancabinetworkz.com/expert-tips-on-selecting-storage-solutions-for-a-perfect-kitchen-upgrade). A frequent mistake is underestimating the importance of micro-adjustments during installation; even minor misalignments in inset doors or drawers can cause persistent problems and aesthetic flaws, requiring professional intervention later. Advanced homeowners ask: How can precise measurements and adjustable hardware prevent these issues? Ensuring that hinges and slides are of high quality and adjustable allows for micro-tuning post-installation, preserving that seamless, built-in look. Moreover, many focus solely on visual appeal, neglecting the functional aspect — such as incorporating efficient pull-outs, corner solutions, or hidden compartments — which require thoughtful foresight. You might think that adding a lazy Susan or a spice rack is straightforward, but integrating these features requires careful planning to maintain accessibility without sacrificing cabinet integrity. For a thorough understanding of how small modifications can enhance performance, explore this detailed guide. As you refine your plans, consider the importance of professional guidance to navigate these subtle yet impactful choices. I often recommend consulting experts who can highlight these critical details early — see this contact page for personalized advice. Remember, the devil is in the details, and a well-executed kitchen is a culmination of countless small decisions and precise adjustments. Have you ever fallen into this trap? Let me know in the comments.Maintaining your custom kitchen cabinets and built-ins is essential to preserve their beauty and functionality over time. The right tools and a consistent routine can make all the difference. I personally rely on a few specialized items that streamline the upkeep process and prevent minor issues from becoming costly repairs. An orbital sander with fine-grit sandpaper, for example, is invaluable for light touch-ups to re-gloss or smooth out any scratches that inevitably appear with daily use. I use the DeWalt DWE6423 for its ergonomic design and reliable power, making regular maintenance less of a chore.
Another must-have is a set of micro-adjustable hinges, like the Blum ClipTop series, which allow me to fine-tune door alignment without removing the entire hinge. This prevents issues such as sticking or misalignment that can develop with seasonal humidity changes and broadens the longevity of your cabinetry.
Cleaning should not be overlooked. For routine dusting and wiping, I prefer a microfiber cloth paired with a gentle, pH-neutral cleaner. I recommend the Earth Friendly Products All-Purpose Spray because it cleans thoroughly without damaging delicate finishes or causing discoloration. Regular cleaning extends the lifespan of your cabinet finish and preserves that sleek, custom look.
Investing in a damp-proof, extendable paint scraper can help with removing dried spills or paint drips that might accumulate over years, especially if you’re adding or adjusting built-in storage solutions. This tool prevents damage to the veneer and keeps the smooth surfaces impeccable.
The trend is leaning towards smart maintenance with the integration of electronic sensors that monitor humidity and temperature within your kitchen. Some innovative systems, like the NEST Thermostat, connect to your mobile device and can alert you if conditions fluctuate beyond safe levels for wood furniture. As these technologies evolve, expect to see more proactive ways to care for your cabinetry, reducing the risk of warping or mold.
How do I maintain my cabinets over time? The key lies in regular inspection, cleaning, and minor adjustments. Schedule a semi-annual check to tighten hinges, replace worn hardware, and buff out minor scratches with touch-up pens designed specifically for wood finishes. Consistency is paramount.
If you want to take your upkeep to an advanced level, I highly recommend trying the micro-adjustment technique with your hinges. It takes just a few minutes but can prevent years of misaligned doors or drawers. For a detailed walkthrough, see the expert tips on this resource. Remember, proactive maintenance prolongs not just the appearance but also the structural integrity of your investment.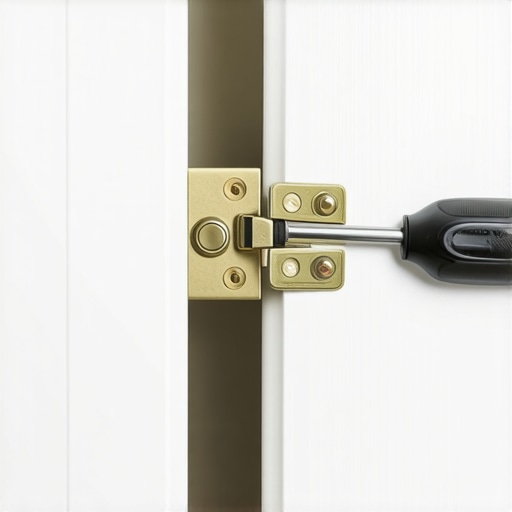
Image prompt: Close-up of a well-maintained kitchen cabinet hinge being precisely adjusted with a screwdriver, emphasizing the importance of fine-tuning hardware for longevity.
The Hidden Pitfalls That Taught Me Patience and Precision
One of the most unexpected lessons was that perfect inset cabinets require more than just dedication—they need meticulous planning and an eye for detail. I learned that rushing measurements leads to misaligned doors, which can be costly to fix later. This experience reminded me that investing time upfront in accurate measurements and quality hardware pays off in stunning, seamless results.
Precision is Your Best Friend in Seamless Design
Failing to account for subtle gaps or hinge adjustment can ruin the sleek look of inset cabinets. I discovered that micro-adjustable hinges and careful shimming during installation ensure doors sit flush and operate smoothly. These small tweaks are like fine-tuning a musical instrument—it makes all the difference in achieving a professional finish.
Embrace the Learning Curve—It’s Worth It
Initially, I was discouraged by the challenges of inset cabinet installation, but persevering turned into a rewarding experience. Each mistake, from incorrect measurements to hinge misalignments, became a valuable lesson. If I had known earlier to prioritize quality hardware and patience, my cabinets would have looked perfect from the start. Embracing this process demystified the craft, making me appreciate the artistry behind custom cabinetry even more.
Curated Tools and Resources That Changed My Approach
A few trusted tools transformed my project. The Blum ClipTop hinges provided precise adjustments, while my trusted tape measure and square kept measurements accurate. I also relied heavily on expert advice from this comprehensive guide, which clarified the importance of proper framing and alignment techniques. These resources made my learning curve smoother and outcomes more satisfying.
Take Your Kitchen into Your Hands—Start Today
Transforming your space with inset cabinets is an achievable goal filled with rewarding challenges. Remember, precision, patience, and the right tools are your allies in creating a seamless, durable kitchen. Don’t let fear of mistakes prevent you from pursuing your dream; every step, even the errors, bring you closer to a personalized masterpiece. Ready to begin your own inset journey? Share your thoughts or questions below and let’s build beautiful kitchens together!
,