The Glue Block Trick: How to Stop Your Deep Drawers From Bottoming Out
I remember the exact moment I realized my kitchen drawers were fighting me. Every time I pulled one out, it would bottom out with a bang, causing things to tumble and frustration to rise. It was a small annoyance at first, but over time, it became a constant nag—especially when I was trying to access my pots and pans after a busy day. That lightbulb moment hit when I finally understood that my drawers lacked the proper support to glide smoothly and stay put. Since then, I’ve learned a simple yet effective trick—the Glue Block Technique—that can save you from similar headaches and extend the life of your cabinetry.
The Hidden Problem Behind Your Deep Drawer Woes
Deep drawers are wonderful for maximizing storage space, but they come with a caveat: without the right support, they tend to bottom out, sag, or even fall out of alignment over time. When I first built my custom kitchen, I overlooked the importance of sturdy support blocks, which is a common mistake many DIYers make early on. This oversight can lead to uneven wear, damaged slides, and frustration every time you open or close your drawers.
Fortunately, resolving this isn’t as complicated as you might think. The Glue Block Trick is a game-changer because it provides a solid foundation that prevents your drawers from bottoming out, ensuring smooth operation and longevity. Plus, it’s a cost-effective fix you can do yourself with just a few materials. Want to see how this simple addition can revolutionize your storage? Head over to [innovative storage solutions](https://artisancabinetworkz.com/innovative-storage-solutions-for-modern-kitchen-remodels) for more ideas on making your kitchen smarter.
Is the Glue Block Method Really Worth the Hype?
I admit, I was skeptical at first. I worried it might be a quick fix that wouldn’t last or that it would require complicated tools. Early in my project, I made the mistake of ignoring these supports, assuming the manufacturer’s slides would do the job. That was a costly oversight. Once I added the glue blocks as recommended in some expert guides—even though it was a bit messy at first—the difference was astonishing. My drawers became quieter, more stable, and I stopped worrying about them collapsing over time. It’s a simple tweak that can save hundreds of dollars in repairs down the line.
If you’re tired of fighting with sticky, bottoming-out drawers, keep reading. I’ll walk you through exactly how to execute this trick step-by-step, so your cabinetry stays functional far beyond your remodel. Ready to get those drawers working like they should? Let’s dive in and make your storage woes a thing of the past.
Start with Precise Measurements and Planning
Before applying any support, measure your drawer’s bottom width and depth. Use a tape measure to determine where the support blocks will sit, ensuring they align with the frame to prevent sagging. I once skipped this step and ended up with uneven supports, which caused more noise when opening the drawers. Think of support blocks like the foundation of a house—they must be accurately placed to bear the weight effectively. For additional insights into customizing your storage, visit custom cabinets.
Gather Materials and Prepare Your Workspace
You will need wooden blocks (preferably hardwood for durability), high-quality wood glue, a saw, clamps, and a drill with screws. Clear your workspace and lay down a protective surface to avoid mess. When I tackled this project in my kitchen, I laid out all materials on a drop cloth, and the cleanup afterward was minimal. Picture support blocks as the scaffolding that keeps your drawers stable—robust and well-placed scaffolding makes the entire structure stronger. For clever storage ideas, explore storage solutions.
Cut and Position the Support Blocks
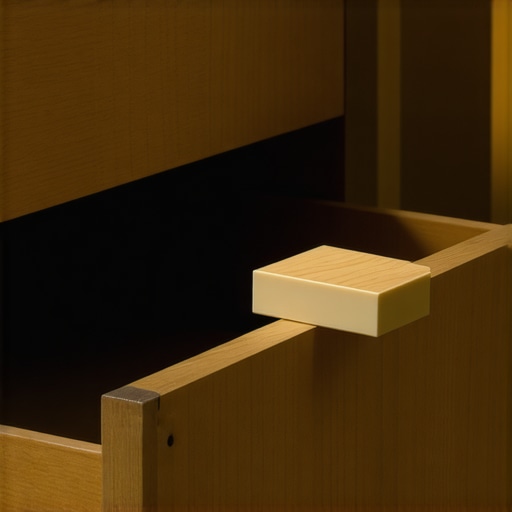
Cut the wooden blocks to fit snugly between the drawer’s bottom and the frame. Use your measurements to make precise cuts. Position the blocks on the sidewalls or the bottom, depending on your drawer design. Secure them temporarily with clamps to check fit. Remember, this step is like building a sturdy raft—you want the supports to distribute weight evenly, preventing any sagging or sticking. I once measured incorrectly and had to redo the cuts, but accuracy saved me hours of frustration later. Consider consulting vertical storage strategies for better cabinet organization.
Apply Glue and Secure the Blocks
Spread a generous amount of wood glue on the contact surfaces of the support blocks. Press the blocks firmly into position and clamp them tightly. Use screws to reinforce the glue when necessary, especially if your drawer handles heavy loads. Hold the clamps for at least 30 minutes or until the glue sets. Think of this process as the glue acting like the adhesive in a rocket—holding everything together under pressure. I learned this the hard way when I didn’t clamp long enough, leading to loose supports that rattled every time I opened the drawer. For a comprehensive guide on cabinet fixes, see reinforcing cabinets.
Finish and Test Stability
Once the glue is dry, remove clamps and screws, then test the support blocks by opening and closing the drawer several times. The drawer should glide smoothly without bottoming out or wobbling. If wobbling persists, add additional supports or adjust existing ones. This final step is crucial—think of it as tuning an instrument for perfect pitch. I found that minor adjustments, like repositioning a support, drastically improved drawer function. For innovative ideas on maximizing space, check out smart storage ideas.
When tackling a kitchen remodel or designing built-ins, many assume that choosing high-end materials or trendy finishes is enough to guarantee functionality. However, **most people overlook subtle nuances** that can make or break the long-term success of their storage solutions. As an expert in cabinetry and remodeling, I’ve observed that understanding these hidden aspects can save you money and frustration down the line.
One common myth is that **custom cabinets automatically translate to better organization**. While tailored designs are advantageous, without precise planning of internal features—such as adjustable shelves, specialized drawers, or hidden compartments—you might still face clutter or inefficient use of space. For instance, a study from the American Society of Interior Designers emphasizes that **customization should prioritize user habits** rather than aesthetic trends alone**.
Another nuance many miss involves the **materials used for built-ins**. Everyone says, “Go for hardwoods for durability,” but the truth is, **not all hardwoods perform equally** in humid or high-traffic areas. The secret lies in selecting species with **stable grain patterns and low warp potential**, which significantly extends the lifespan of your installations. Check out [expert guides](https://artisancabinetworkz.com/the-plywood-grade-test-how-to-spot-low-quality-frame-stock) for tips on choosing the right plywood and framing materials.
**Beware of oversimplified installation methods**. A common rookie mistake is relying solely on nails or staples, which can cause warping or weak joints over time. Instead, **structural integrity demands a mix of joinery techniques**, like dado or rabbet joints, reinforced with appropriate fasteners. This ensures your built-ins withstand daily wear and tear, especially when supporting heavy accessories or appliances.
What Does Advanced Cabinet Design Really Entail?
For experienced remodelers seeking a step further, understanding **the implications of woodworking tolerances and finishing processes** becomes essential. For example, small gaps or uneven paint application can undermine a high-end aesthetic, but addressing these requires precise measurement and proper technique—considering factors like humidity during finishing or joint spacing. Insights from [professional finishing](https://artisancabinetworkz.com/the-sanding-secret-for-a-glass-smooth-painted-cabinet-finish-at-home) can be invaluable.
Finally, don’t fall for the trap of thinking that **costly hardware alone will fix poor design**. Hardware choice does matter—think soft-close hinges or full-extension slides—but if your internal layout doesn’t accommodate easy access or efficient storage, no amount of hardware improvement will compensate. Proper planning with expert input can optimize your space and prevent costly redesigns later.
Remember, the devil is in the details. Integrating a comprehensive understanding of these nuances into your project allows for a more **sustainable, functional, and beautiful** outcome. For more on innovative storage ideas that truly work, visit [modern kitchen remodels](https://artisancabinetworkz.com/modern-kitchen-remodels-featuring-custom-cabinets-and-built-ins).
Have you ever fallen into this trap? Let me know in the comments.When tackling a project as intricate as a kitchen remodel or installing custom cabinets, having the right tools can make all the difference. Personally, I swear by a high-quality cordless drill like the Makita XFD10Z, which offers not only power but also exceptional precision, thanks to its variable speed settings. This allows me to drive screws smoothly without over-tightening, which is crucial when securing delicate cabinet components. Additionally, a digital caliper provides the accuracy needed for precise measurements—preventing costly mistakes and ensuring perfect fitment, especially when crafting built-ins or modifying existing cabinetry.
How do I maintain my tools over time?
Regular maintenance is key. After each project, I clean my power tools thoroughly, checking for any loose parts or worn batteries, and store them in a dedicated toolbox. Using protective lubricant on moving parts extends their lifespan, while keeping blades sharp ensures cleaner cuts and less effort. As technology advances, battery technology has also improved—consider upgrading to lithium-ion batteries for longer hold and quicker recharge times, which keeps your workflow smooth and uninterrupted. Trends suggest that future tools will become even smarter, integrating features like Bluetooth connectivity for maintenance alerts and software updates—so investing in quality tools now means you’ll be prepared for these upgrades.
In my experience, a reliable laser level has saved hours of alignments and rework. I rely on the Bosch GLL 55 for its accuracy and user-friendly interface. This device projects clear, bright lines that help maintain perfect alignment across large surfaces, essential when hanging cabinets or installing counters. Don’t overlook the importance of a sturdy, adjustable clampsystem—such as the Bessey KRE 4K—which holds materials firmly in place, freeing both hands for precise work and reducing fatigue over long sessions.
Remember, the tools you choose directly impact the quality and longevity of your work. Investing in durable, well-maintained equipment translates to fewer setbacks and a finished project that stands the test of time. For a deeper dive into essential tools and their maintenance, check out expert tips on selecting storage solutions.
Try incorporating a magnetic wristband during your next project. It keeps screws, nails, and small hardware within easy reach, streamlining your workflow and preventing frustrating slips. With the right toolkit and maintenance routine, your cabinetry and storage solutions will not only work flawlessly now but will continue to do so for years to come.
Throughout my journey with storage solutions and kitchen remodels, one thing became painfully clear: the real lessons are often learned through mistakes. I used to believe that high-end materials and trendy finishes could mask underlying design flaws, but experience proved otherwise. The most durable and functional built-ins come from paying attention to those overlooked details—like proper support, precise measurements, and thoughtful internal layouts. My lightbulb moment came when I realized that investing time in understanding these nuances could save me both time and money, leading to truly customized spaces that stand the test of time.
Another insight worth sharing is that comprehensive planning outperforms quick fixes. Rushing through measurements or choosing hardware before finalizing the internal organization often leads to costly redo’s. Building support structures like the Glue Block Technique has been a game-changer—understanding when and where to reinforce can mean the difference between a wobbling shelf and a forever-sturdy insert. It’s these nuanced decisions, often born from trial and error, that elevate a good kitchen into a professional-grade culinary hub.
Lastly, embracing continuous learning has kept me ahead. Whether reading expert guides on door hinges or experimenting with innovative storage hacks, staying curious ensures I deliver not just a beautiful kitchen but one that functions flawlessly day after day. Remember, the most effective custom cabinets and built-ins emerge from curiosity, patience, and a willingness to learn from every stumble. For more advanced insights, explore my favorite storage solutions and keep pushing your boundaries.