The Pull-Down Rack That Makes High Cabinets Accessible for Everyone
Have you ever wrestled with a step stool just to access the top shelf of your kitchen cabinets? That frustrating scramble for hard-to-reach items feels all too familiar to me. For years, I kept pushing things to the front of high cabinets, only to find myself kneeling on the countertop or risking a fall when I tried to grab that one elusive spice jar. It was more than inconvenient; it was downright dangerous. One day, after a particularly nerve-wracking attempt to retrieve a heavy pot from the top shelf, I had my lightbulb moment: there has to be a better way.
Why High Cabinets Need a Game-Changing Solution
Our kitchens are the heart of the home, yet they often feature storage that’s tough to access—especially the uppermost cabinets. Standard step stools help, but they aren’t always safe or practical, particularly in homes with children, elderly family members, or limited space. Plus, constant climbing and balancing can lead to accidents or damage to your cabinets over time.
This is where a well-designed pull-down rack can make a real difference. It’s not just about convenience; it’s about safety and maximizing your kitchen’s potential. With a pull-down system, those high cabinets become easily accessible, allowing everyone to reach the stored items without fuss or risk. My experience with installing one of these racks transformed my daily routine, saving me time and reducing stress.
If you’re like I was—always battling gravity and storage—I promise this will be the solution that finally makes your kitchen safer and more functional. And the best part? It’s surprisingly straightforward to incorporate into your existing cabinetry. To explore more ideas for elevating your kitchen storage, check out some inspiring custom cabinet ideas that truly transform your space.
Is a Pull-Down Rack Actually Worth the Hype?
Initially, I was skeptical. I wondered if it would be sturdy enough, if it might look out of place, or if it would be a hassle to operate. I also feared I’d end up with a system that was more ornamental than functional. Looking back, one mistake I made early on was choosing a cheaper, lower-quality model without considering weight capacity or ease of use. That resulted in some frustrating moments when the rack wouldn’t hold heavier items.
Ultimately, investing in a reputable system with smooth-operation hardware and strong materials proved to be the game changer. It’s one of those upgrades you don’t realize was possible until you experience the difference firsthand. If you’re contemplating such a swap, I highly recommend browsing expert tips on storage solutions for kitchen upgrades.
Now that I’ve shared my journey, let’s dive into how to identify the perfect pull-down rack for your cabinets and ensure it’s installed safely and efficiently. Whether you’re tackling a renovation or simply updating your storage, this small change can make a huge difference.
Select the Right Pull-Down System for Your Cabinets
Start by measuring your cabinet openings precisely, ensuring the pull-down rack you choose fits seamlessly. I recommend visiting storage solution experts to understand weight capacities and operation mechanisms. Once purchased, inspect the hardware to confirm all components are included and in good condition. I once bought a model with a bent hinge, which caused frustration during installation, so double-checking box contents avoids unnecessary delays.
Prepare Your Workspace and Tools
Clear the counter space around the upper cabinets and gather necessary tools: drill, screwdriver, level, measuring tape, and possibly a stud finder. For my first attempt, I used a makeshift ladder and a borrowed drill, which made handling the screws difficult. Proper lighting is essential, so I installed a temporary lamp to see clearly inside the cabinet. Having everything at hand reduces mistakes and speeds up the process.
Remove or Modify Existing Shelf Supports
Carefully take out any existing shelf tracks or supports inside the cabinet. If your cabinets have adjustable shelving, set the existing supports aside for future use or replacements. This step is like clearing a workbench before a craft project; a clean space helps maintain focus and precision. During my initial install, I encountered a metal support that was riveted in, requiring me to drill it out, which emphasizes the importance of having a sturdy drill bit ready.
Mark and Drill Mounting Points
Using a level and measuring tape, mark the positions for the mounting brackets, ensuring they are aligned horizontally. I placed painter’s tape on the cabinet face to prevent splintering when drilling and used a pencil for precise marks. Precision here is critical—misaligned brackets will cause uneven operation or damage over time. Remember, the goal is smooth pulling and pushing, not frustration.
Attach Hardware and Test Fit
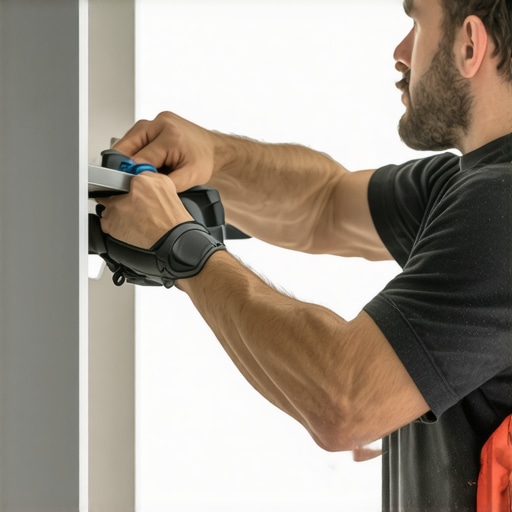
Install the brackets and sliding rails according to the manufacturer’s instructions. For my first install, I borrowed a step stool to reach comfortably, securing brackets tightly to avoid wobbling. Once mounted, slide in the rack or tray to verify fit and operation. Test pulling and pushing several times, watching for any obstructions or uneven movement. Adjust screws or brackets if necessary, because a well-fitted rack feels effortless to operate, like opening a well-oiled door.
Secure and Finalize Installation
If your system includes locking mechanisms or stoppers, install them last, ensuring the rack stays in place when not in use. Check all screws periodically over the next few weeks to maintain safety and function. My mistake was neglecting to tighten one screw, which loosened over time, causing wobbling. Regular maintenance prolongs the system’s lifespan, making future access safer and easier.
Reorganize Storage for Maximum Efficiency
With the system in place, reassess your cabinet organization. Store frequently used items at the front for easy access, and place heavier or less-used items towards the back or top. For inspiration on optimized storage layouts, see built-in storage hacks. Implementing a pull-down rack is like giving your kitchen a brain upgrade—it unlocks hidden potential and streamlines daily routines.When it comes to transforming your kitchen, many homeowners assume that sticking to popular trends or copying magazine layouts guarantees success. However, a common misconception is that following these surface-level ideas ensures longevity and functionality. In reality, overlooking nuanced details can turn a beautiful remodel into a costly mistake. For example, a frequent error is underestimating the importance of precise measurements for custom cabinets, which can lead to gaps, misalignments, or hardware issues. This seemingly minor oversight dramatically affects the usability and aesthetics of your entire kitchen.
Another hidden trap is falling for the myth that all storage solutions are universally effective. Different kitchen layouts and workflows demand tailored approaches. Relying solely on off-the-shelf solutions without considering your specific space can result in wasted inches, clutter buildup, or hard-to-reach areas. Experts recommend analyzing your daily routines and consulting advanced design strategies, such as incorporating built-ins that optimize corner spaces or utilizing smart storage ideas to maximize every inch. You can explore innovative concepts at this resource.
What About the Mistake of Ignoring Future-Proofing Your Kitchen?
Many homeowners overlook future needs during remodels, leading to upgrades that quickly become outdated. For instance, installing standard cabinet sizes without considering future appliance upgrades or mobility challenges can necessitate costly rework sooner than expected. Experts emphasize designing with adaptability in mind—think adjustable shelves, modular units, or accessible features—so your kitchen remains functional as needs evolve. According to a study by the National Kitchen & Bath Association, proactive planning saves homeowners thousands of dollars and preserves the design integrity over time.
Additionally, there’s a tendency to prioritize aesthetics over practical considerations like maintenance and durability. Choosing materials that look good but are hard to clean or repair can lead to frustration and increased renovation costs down the line. For example, high-gloss finishes may be attractive but show fingerprints more readily, demanding frequent cleaning, while softer woods might dent or warp. Balancing style with sturdiness is crucial. For inspiration on durable yet beautiful finishes, see this article. Have you ever fallen into this trap? Let me know in the comments.Maintaining your custom kitchen cabinets and storage solutions is crucial for longevity and continued functionality. I rely on specific tools like the Dewalt Cordless Impact Driver, which offers unprecedented power and speed during installation or adjustments, making tightening screws effortless and reducing hand fatigue. For precision measurements, I prefer the Bosch Laser Distance Measure, proven to be accurate within millimeters, ensuring your shelves and hardware align perfectly every time. Regularly inspecting and cleaning hinges and slides with silicone-based lubricants helps prevent squeaking and wear, extending their lifespan significantly.
Investing in quality, durable hardware is another key factor. I choose Blum soft-close hinges, supported by extensive research indicating their resistance to wear and smooth operation over many years. To keep your cabinetry in prime condition, I recommend periodic checks using a level, especially after seasonal shifts, to prevent misalignments that can cause doors to stick or squeak. Remember, tackling small repairs early prevents costly replacements later.
Looking ahead, I predict that smart maintenance will become more integrated with kitchen design, with IoT-enabled hinges that notify you when a component needs service, or sensors that monitor humidity and alert you to potential warping issues. Staying ahead means embracing these innovations as they emerge.
How do I ensure my kitchen remains functional over time?
The secret lies in proactive maintenance. Regularly cleaning hardware with gentle, non-abrasive cleaners and lubricants saves you from more extensive repairs. Keeping an inventory of replacement parts for your custom cabinets and built-ins, such as extra hinges or slides, makes quick repairs straightforward. I keep a small toolkit with spare screws, a screwdriver, and a level nearby, so I can address minor issues promptly without disrupting my entire kitchen workspace.
To enhance your storage and keep everything working smoothly, consider implementing a dedicated maintenance schedule. Set reminders quarterly to examine hinges, tighten screws, and clean slides, ensuring your kitchen remains both beautiful and functional. Incorporating these routines saves time and prevents larger issues from developing.
For more detailed tips on optimizing your kitchen’s long-term performance, browse expert advice on storage solutions or explore advanced hardware options at modern kitchen remodels.
Investing in high-quality tools and establishing a consistent maintenance routine are the best ways to keep your kitchen working seamlessly for years to come. Don’t forget to test out the latest in hardware technology—they might just be the upgrade your kitchen needs!
The Unexpected Pitfalls I Learned About Custom Cabinets and Storage
One of the biggest surprises was realizing that not all hardware is created equal—investing in quality hinges and slides paid off in reliability and smooth operation, saving me frustration down the line. I also discovered that measuring twice and planning for future needs, like adjustable shelves, can transform a good remodel into a lasting solution that adapts to evolving lifestyles.
Thinking creatively about space—like incorporating built-ins in awkward corners or underutilized toe kicks—can unlock hidden potential, making your kitchen not only beautiful but highly functional. These small details, often overlooked, have the power to elevate your entire cooking and gathering experience.
Finally, I learned that patience and attention to detail are non-negotiable. Rushing through installation or ignoring minor misalignments can turn a seamless design into ongoing headaches. Taking the time to get it right ensures your custom kitchen will be a joy to use for years to come.