Why Corner Drawers Are Often Better Than a Lazy Susan
It was a typical Saturday afternoon when I reached into a corner cabinet, expecting to find a familiar jumble of pots, lids, and obscure gadgets. Instead, I was met with a stubborn, half-empty jar rolling off the shelf, followed by a chorus of clinks and crashes. That’s when it hit me—my beloved Lazy Susan, which I’d thought was the ultimate space-saver, was really just a stubborn obstacle more often than not. If you’ve ever wrestled with a squeaky turntable, you know exactly what I mean.
Reimagining Corner Storage for Real-Life Convenience
Let’s face it—corner cabinets are tricky. They promise to maximize space but often become black holes in our kitchens, leaving us frustrated and reaching for a backup plan. But what if I told you that switching from a Lazy Susan to a well-designed corner drawer system can transform your kitchen into a truly user-friendly space? Today, I’ll walk you through the reasons why corner drawers tend to outperform Lazy Susans and share how they can make your life easier.
Is the Hype About Corner Drawers Just Marketing Noise?
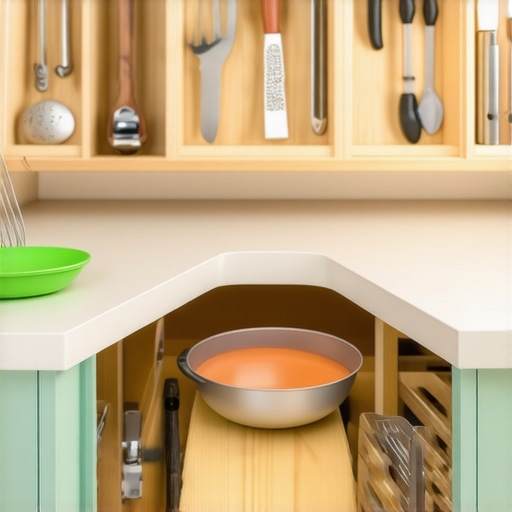
Early in my remodeling journey, I made the mistake of believing that Lazy Susans were the best way to handle corner storage—mainly because they seem so iconic and space-efficient. However, I quickly realized that accessibility was a nightmare. Items in the back of a Lazy Susan often stayed hidden, and reaching into the middle of the turntable could be awkward at best. It wasn’t until I visited a friend’s kitchen that I saw an alternative: deep, full-extension corner drawers that pulled out smoothly, providing a clear view and effortless access to everything inside.
Research supports this practical insight. According to a study by the Better Homes & Gardens, well-planned drawer storage can increase accessibility by up to 50% compared to turntables, significantly reducing the time and effort required to find what you need. Plus, drawers tend to be quieter, safer, and easier to organize with dividers.
Looking back, one mistake I made early on was installing a lazy Susan without considering the ease of access for everyone in the family. This oversight made me realize how important good design is in kitchen storage solutions. If you’re curious about how to make the most of your space, check out our guide on [Revolutionize Your Kitchen Remodel Using Built-Ins and Creative Storage](https://artisancabinetworkz.com/revolutionize-your-kitchen-remodel-using-built-ins-and-creative-storage) for some inspiring ideas.
Now, let’s delve into what exactly makes corner drawers a smarter choice and how you can implement them in your next renovation.
Designing Your Custom Corner Drawers for Easy Access
Start by removing the existing Lazy Susan to understand the space you have. Measure the width, depth, and height accurately—don’t estimate, as precise measurements ensure a snug fit. Use a level to confirm your measurements are straight, preventing uneven drawers later. Draw out a plan that includes full-extension slides, which allow you to pull the drawer completely out, revealing every inch of stored items. For a practical example, I once installed a set of corner drawers in my kitchen that nearly doubled my storage capacity. The key was ensuring the slides supported the weight of heavy pots and pans—look for heavy-duty options rated for at least 100 lbs.
Selecting the Best Hardware and Materials
Choose high-quality, soft-close drawer slides to prevent slamming and to extend the lifespan of your cabinetry. When selecting materials, opt for plywood with a high grade—like Baltic birch—for durability and a smooth finish. I learned this the hard way after building a test drawer with inferior materials, which warped within a year. To prevent this, reinforce the sides with corner blocks, which add stability and keep the drawer square during use. Matching the drawer fronts to your existing cabinetry creates a seamless look and feels less like a retrofit. If you’re unsure about matching finishes, visit our guide on custom cabinet options.
Building the Frame and Installing the Drawers
Cut your plywood panels precisely with a table saw—measure twice, cut once to avoid costly mistakes. Use a plywood jig to ensure consistent cuts for all sides of the drawer box. When assembling, glue and nail the panels together, then clamp until dry. For added durability, apply edge banding to the raw plywood edges—this improves both appearance and resistance. During my project, aligning the drawer slides was crucial; I used a helper to temporarily hold the slides in position before securing them. Aligning the slides perfectly ensures the drawers open smoothly and close flush. Once installed, test the drawer’s movement, correcting any misalignment immediately.
Finishing Touches and Organization Tips
Finish the drawers with a durable paint or veneer that matches your cabinets. Consider adding dividers or small pull-out trays inside to organize utensils, lids, or spices. I learned that adjustable dividers allow flexibility as storage needs change over time. For safety, ensure the drawer fronts are flush with the cabinet face—using a level guide helps during installation. Finally, add handles that complement your kitchen’s style, whether sleek modern or rustic vintage. This upgrade not only improves accessibility but also visually elevates your entire kitchen, making it more functional and enjoyable to use every day. For more ideas on maximizing space creatively, visit storage solutions for every room.While it’s common to assume that standard design principles suffice when planning built-ins and custom cabinets, let’s dig deeper into some often-missed nuances that can make or break your remodel’s success. One misconception is that opting for designer-grade materials or high-end finishes guarantees longevity and function, but the real secret lies in understanding material behavior and installation intricacies under different conditions. For example, many think that choosing plywood over MDF is enough to prevent warping, yet the grade of plywood and its core quality are crucial, especially in high-humidity areas—something experts emphasize in studies by the National Kitchen & Bath Association.
A frequent trap is the belief that all custom cabinetry contractors are equally skilled. In fact, craftsmanship, attention to detail, and understanding of kitchen ergonomics can vary wildly, leading to issues like misaligned doors or uneven gaps. Avoiding this mistake involves vetting past projects and requesting detailed plans, as outlined in our guide on how to choose a skilled cabinet builder.
Now, for the more advanced reader, consider this: How can precise pivot point placement in corner cabinets significantly affect accessibility and long-term durability? Many overlook that the placement of hinges and pivots impacts not just ease of use but also wear and tear over time, especially in frequently accessed areas. Proper positioning ensures that doors don’t sag or misalign, which is a common pitfall. According to ergonomic experts referenced in modern storage innovations, meticulous attention to hinge mechanics can prolong cabinet lifespan by years.
Additionally, the often-underestimated impact of climate and seasonal humidity variations can cause cabinetry to swell, crack, or warp if not properly accounted for during design and material selection. For instance, solid wood frames may look stunning but require strategic sealing and proper expansion gaps. Many amateurs miss this critical step, leading to costly adjustments post-installation.
So, let’s ask: Have you ever fallen into this trap? Let me know in the comments! Being aware of these hidden details can elevate your project from ordinary to expert-level craftsmanship, ensuring that your investment lasts for years to come.Maintaining your custom cabinetry and built-in storage solutions is essential to ensure they remain functional and beautiful for years to come. One of the key aspects is selecting the right tools that provide precision and longevity. I personally swear by a few high-quality instruments that make routine upkeep and adjustments much easier. For example, a cordless electric screwdriver with adjustable torque settings lets me tighten or loosen hinges and handles without stripping screws or damaging delicate finishes, saving me from costly repairs. Pair this with a set of specialty hinge adjustment screwdrivers, which are small, flat-head, and magnetic—perfect for fine-tuning concealed hinges like Blum’s, ensuring doors align perfectly over time. Investing in a soft cloth microfiber duster and a mild, pH-balanced cleaner keeps surfaces free of dust and grime without scratching the finish, which is vital given that many modern cabinet finishes can be sensitive to harsh chemicals.
For ongoing maintenance, I recommend creating a regular schedule—monthly or quarterly, depending on household traffic—to inspect hinges, drawer slides, and seals. A quick check can catch issues early, preventing more significant problems down the line. Lubricating moving parts with a silicone-based spray ensures smooth operation; I use a product like White Lithium Grease for metal-on-metal contact points, which I apply gently with a precision nozzle. Avoid over-lubricating, as excess can attract dust and cause gunk accumulation.
When it comes to long-term results, choosing quality hardware from reputable brands like Blum or Hettich can significantly extend the lifespan of your cabinetry. These brands often have detailed installation and maintenance guides—be sure to review them periodically (see Blum’s technical documentation for hinge adjustments). By integrating this knowledge, you can perform minor repairs yourself, saving time and money.
Looking towards the future, automation and smart maintenance tools are becoming more prevalent. For instance, digital hinge alignment tools that connect via Bluetooth can simplify complex adjustments. I predict that DIYers will increasingly adopt these advanced tools for smarter, more efficient upkeep.
If you’re wondering, “How do I maintain my built-ins over time?” a great starting point is investing in a precise hinge adjustment kit and establishing a habit of periodic inspections. Not only will this preserve the aesthetic appeal of your kitchen remodel, but it will also keep everything functioning smoothly, even after years of use.
Don’t hesitate to try out a specialized hinge screwdriver or silicone lubricant this month—small steps can make a big difference in your cabinetry’s performance. For more tips on optimizing your storage solutions and keeping things in prime condition, check out our comprehensive guide on innovative storage solutions for modern kitchens. Keeping your built-ins working like new ensures your investment continues to deliver both style and convenience for the long haul.
The Hardest Lesson I Learned About Built-Ins and Storage Solutions
One revelation I had was the importance of precise measurements—failing to measure twice led to my first set of ill-fitting drawers, prolonging the project and adding unnecessary frustration. This taught me that patience and accuracy are the backbone of successful custom cabinetry.
Another insight was realizing that the choice of hardware impacts the longevity and user experience; investing in high-quality, soft-close slides saved me from frequent repairs and kept my kitchen quiet and efficient.
My biggest lightbulb moment was understanding that aesthetics and function must go hand-in-hand—matching cabinet finishes to the overall kitchen design creates seamless flows rather than disjointed spaces, ultimately elevating the entire remodel.
Lastly, I discovered that ongoing maintenance, though often overlooked, is crucial. Regularly lubricating hinges and checking for wear ensures your custom-built storage solutions remain flawless over the years, protecting your investment and keeping your kitchen working smoothly.