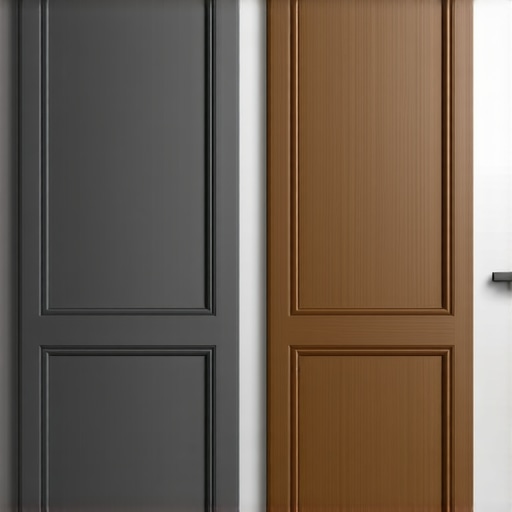
Why We Use HDF Instead of Solid Wood for Painted Door Panels
It was a chilly Saturday morning when I finally faced the reality of my kitchen makeover. I had spent weeks obsessing over paint colors, cabinet styles, and countertop materials. Yet, in the midst of my excitement, I failed to consider a crucial component—what my door panels were actually made of. When I first installed the painted cabinets, I noticed after just a few months that the doors had developed unsightly warps and dents. My heart sank. That was my lightbulb moment: choosing the wrong material can sabotage even the most beautiful kitchen.
Understanding the Material Dilemma: Solid Wood vs. HDF
As someone who’s been through the design trenches, I know how overwhelming it can feel to pick the right material for painted door panels. Today, I want to help you avoid the pitfalls I encountered early on. We’ll explore why high-density fiberboard (HDF) has become the go-to choice over solid wood in modern cabinetry projects, especially for painted finishes. By the end of this, you’ll understand when and why to opt for HDF, saving you time, money, and frustration. Do you find yourself questioning if your current material choice will stand the test of time? You’re not alone. Many homeowners and DIY enthusiasts make the mistake of assuming that solid wood is always the superior option. Spoiler alert: it’s not. Interestingly, a study from the Forest Products Laboratory indicates that HDF can hold paint better, resist warping, and remain more stable over time compared to solid wood. This might seem counterintuitive at first, but once you grasp the practical benefits, you’ll see why so many pros are shifting toward HDF for painted cabinetry. Now, let’s dig deeper into the reasons behind this material shift and how it can transform your renovation experience.
Prepare Your Space and Materials
Before diving into installation, clear your kitchen area and measure precisely where each cabinet will go. Use a tape measure to mark the positions for upper and lower units, ensuring alignments match your design plan. Check the existing wall for levelness; uneven surfaces will require shimming or framing adjustments.
Build a Strong Mounting Framework
Secure wall studs if needed, especially when working with drywall. For added stability, install a ledger board along the wall’s length at the height where the upper cabinets will hang. This temporary guide holds your cabinets steady during mounting. Use a level to ensure the ledger is perfectly horizontal. An experience I had involved misaligning my first row, which caused a ripple effect; always double-check with a level.
Drill Pilot and Mounting Holes
Mark the cabinet’s back panel where the mounting holes will go, aligning these with wall studs or anchors. Drill pilot holes in the cabinet’s back, and optionally, install mounting brackets or cleats for extra support. When I installed my own cabinets, using a template for precise hole placement saved me hours of re-drilling.
Attach Cabinets Securely
Start by lifting the first cabinet, positioning it on the wall, and securing it with long screws into studs or anchors. Use shims behind the cabinet for perfect alignment. Check with a level and adjust as necessary before tightening all screws. For heavy cabinets, enlist help or use carriage straps to hold the weight. I learned this the hard way when I nearly dropped a large base unit—having assistance makes the process safer and smoother.
Nest and Finish Your Cabinets
Once all cabinets are in place, install filler strips to fill any gaps. Attach doors and drawers, adjusting hinges for smooth operation. For a seamless look, scribe or modify cabinet edges to fit wall irregularities. When I faced uneven walls, I used a multi-tool to shave the cabinet edges, achieving a flush fit that looked professional.
Optimize with Built-In Storage Solutions
Enhance functionality by integrating smart storage solutions, such as pull-out shelves, spice racks, or hidden compartments. These make the most of every inch, especially in tight spaces. For inspiration, check out built-in storage ideas to elevate your kitchen’s efficiency.
When planning a kitchen remodel, many assume that adding more cabinets or building custom units automatically solves storage woes. However, the often-overlooked nuance is that **not all storage solutions are created equal**, and some common beliefs can lead to costly mistakes. For instance, a widespread myth is that bigger is always better—more shelves, larger drawers, extra units—yet overstuffed cabinets can become cluttered and inaccessible, defeating their purpose. Advanced homeowners realize that **smart, well-designed storage focuses on function and accessibility** rather than just capacity, especially in tight spaces. One trap to avoid is neglecting the *hidden ergonomics* in your cabinetry; for example, placing heavy pots in high upper cabinets saves space but makes retrieval difficult, increasing the risk of accidents. Studies from the National Kitchen and Bath Association emphasize that **designing for user behavior improves long-term satisfaction** (NKBA, 2022). Additionally, many overlook the importance of integrating built-ins that **maximize every corner and unused space**, such as toe-kick drawers or side-mounted pull-outs, which can double your storage without expanding your footprint. A critical Maintaining the longevity and functionality of your cabinetry and built-ins requires a combination of the right tools, proactive routines, and a keen eye for long-term care. Investing in quality equipment and adopting strategic maintenance practices can extend the life of your kitchen remodel significantly. One tool I personally swear by is a digital moisture meter. High-density fiberboard (HDF), favored in painted cabinets, is susceptible to moisture, which can lead to warping over time. Using a moisture meter periodically—especially in humid climates—helps catch early signs of moisture intrusion, allowing for timely action. I’ve found that a moisture meter with quick response and adjustable calibration offers the best precision and ease of use. In addition to moisture detection, a high-quality orbital sander with variable speed settings is invaluable for touching up paint or refinishing surfaces that encounter wear. A good sander ensures smoothness without damaging the finish, saving you from costly refinishing later. When it comes to cleaning, I recommend microfiber cloths combined with non-abrasive, pH-neutral cleaners. These prevent scratching delicate painted surfaces and keep hardware looking polished. To keep hinges and slides operating smoothly, a silicone-based lubricant—applied sparingly—reduces squeaks and prevents corrosion, especially if your remodel is in a humid area. I personally apply lubricant during routine checkups annually, giving hinges and sliding mechanisms a thorough once-over. Planning for future updates? Software like SketchUp or 3D design platforms can help visualize scaling or modifications down the line, making it easier to plan extensions or add-ons like built-ins that adapt to changing needs. The trend toward modular cabinetry and integrated storage suggests that your kitchen could evolve effortlessly if prepared with flexible designs and maintenance routines from the outset. Looking ahead, solutions that incorporate smart technology—like maintenance sensors or automated moisture alerts—are beginning to surface, promising even greater control over long-term upkeep. How do I keep my cabinets in prime condition over the years? Regular inspections form the foundation—look for loose hardware, door misalignments, or signs of moisture. Address issues immediately before they escalate. For example, if you notice a hinge sagging, tightening or replacing it early can prevent more extensive adjustments later. I also advise sealing any exposed edges or joints with a durable, paint-compatible sealant. This creates a moisture barrier and preserves the integrity of painted surfaces. Incorporating these maintenance habits ensures your investment remains both beautiful and functional for years to come. For an extra layer of protection, consider applying a thin, breathable coating of specialty cabinet wax every few years, particularly to painted surfaces prone to fingerprints or smudges. This not only enhances gloss but also adds a protective barrier, making cleaning easier. To conclude, combine these strategies: keep your tools sharp and calibrated, stay vigilant with routine inspections, and don’t hesitate to try high-tech solutions when appropriate. For instance, exploring moisture sensors for critical areas can proactively prevent costly repairs—try integrating a moisture monitoring system into your next maintenance routine to stay ahead of potential issues. Remember, proper maintenance not only preserves your custom cabinetry but also enhances your overall kitchen experience, making every detail worth every effort. If you’re interested in more advanced storage and maintenance tips, check out smart storage solutions designed for longevity and adaptability.
The Hardest Lesson I Learned About Material Choices and Kitchen Makeovers
Choosing the correct material for painted door panels can make or break your kitchen remodel experience. I once thought solid wood was the obvious choice, only to discover how warping and dents can plague even the most beautiful kitchen. That mistake taught me that understanding the practical benefits of HDF over solid wood is essential for durability and long-term satisfaction.
Tools and Resources That Changed My Approach
My go-to toolkit now includes a digital moisture meter, which helps me monitor moisture levels in high-density fiberboard (HDF) — vital for preventing warping. I also trust comprehensive guides on custom cabinets for expert insights. These tools and trusted resources have made my renovation process more efficient and less stressful, ensuring my cabinets stand the test of time.
Your Journey Begins with Confidence and Care
Embrace the lessons learned, utilize the right tools, and plan maintenance routines early. Your kitchen remodel isn’t just about aesthetics—it’s about creating a functional, lasting space that you love. Remember, proper material selection and routine upkeep will keep your cabinets stunning for years to come.
Insider Wisdom: What I Wish Someone Told Me Before My Kitchen Overhaul
- Don’t assume solid wood always wins: I used to believe solid wood was superior, but HDF’s stability and paint-holding qualities often outperform it in real-life scenarios.
- Moisture control is critical: Regularly measuring moisture levels with a reliable device can prevent costly warping and damage.
- Maintenance saves money: Routine inspections and timely touch-ups extend cabinet life and preserve their appearance.
- Plan storage smartly: Incorporating clever built-ins and maximizing every inch avoids clutter and enhances usability.
Tools and Sources I Trust for Storage and Remodel Success
- Built-in storage solutions — because maximizing space is my top priority
- Smart storage ideas — cutting-edge tips to keep my kitchen functional and stylish
- Custom cabinet guide — trusted for quality and tailored design
Step Into Your Dream Kitchen with Confidence
Every renovation is a journey of discovery. Take the lessons from my experience—prioritize material stability, invest in the right tools, and plan maintenance ahead—and watch your kitchen flourish. Don’t wait to start transforming your space into a durable, beautiful haven.
What’s your biggest challenge when choosing materials for your kitchen remodel? Share your thoughts below—I’d love to hear your story.