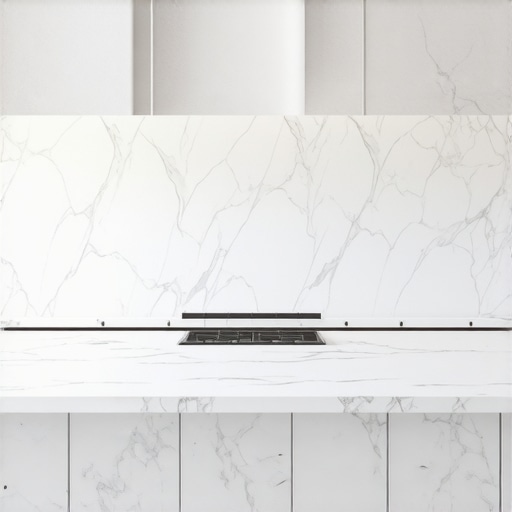
How to Support a 600-Pound Quartz Countertop Without Visible Legs
I’ll never forget the moment I realized my kitchen countertop was more than just a surface—it was a massive slab that felt like it was about to collapse under its own weight. I had installed a stunning quartz countertop, but soon, I faced a dilemma: how to support its hefty mass without resorting to visible legs or bulky supports that ruin the clean look I desired. It was a lightbulb moment; I realized many homeowners struggle with similar issues, especially when aiming for a seamless, modern aesthetic. Today, I’ll share how I cracked the code on discreetly supporting such a weight, ensuring both functionality and style.
Finding the Balance Between Strength and Aesthetics
When redoing my kitchen, I knew that a sturdy support system was essential—after all, a 600-pound quartz slab isn’t something you want to risk sagging or cracking over time. The key was supporting the weight **without** compromising the sleek, modern look I loved. I learned that built-in supports, cleverly hidden from view, could do the trick. This approach not only preserved the visual integrity but also provided long-term durability. Want to learn exactly how I achieved that? Stick around, because the solution is more accessible than you might think—and it’s a lot less invasive than installing chunky legs or bulky supports.
Is Discreet Support Reliable Enough for Heavy Countertops?
Early on, I made the mistake of assuming that installing traditional supports or visible legs was my only option. I assumed that such weight necessitated obvious, bulky supports that would ruin the clean lines. But with a little research and some expert advice, I discovered innovative hidden support systems that are designed specifically for heavy countertops. The real game-changer was understanding how to integrate these supports into the cabinetry itself, distributing weight evenly and keeping everything sleek. Trust me, neglecting proper support can lead to disasters—I’ve seen it happen. That’s why, before diving into DIY solutions, I recommend reviewing options with professionals. If you’d like to learn more about transforming your space with custom fixtures, check out our ideas on custom cabinet ideas.
Now that we’ve covered why support matters, let’s delve into how you can achieve sturdy, invisible support for your heavy quartz countertops. Ready for the step-by-step? Let’s go.
Assess Your Setup and Plan Support Placement
Start by carefully measuring your countertop’s dimensions and load points. Use a level and tape measure to identify where the weight concentrates, typically near the center or over support cabinets. During my project, I marked support points directly on the underside of the quartz slab with painter’s tape. This visualization helped me decide precisely where hidden supports would do the most good without disrupting the aesthetic. Remember, accurate planning ensures even weight distribution and prevents future sagging.
Choose the Right Support System and Materials
Opt for Concealed Support Brackets
For maximum discretion, select support brackets that are designed to be hidden — like steel cleats or custom-fabricated brackets that attach to the cabinet framework. I used steel L-brackets reinforced with wood blocks, which I painted to match the cabinetry. These brackets anchor into the cabinet framework and extend upward, gently holding the countertop from beneath, effectively transferring weight and preventing flexing.
Select Durable, Customizable Support Blocks
If adding embedded support blocks, choose high-density materials like closed-cell foam or specialized composites that won’t compress under weight. In my fix, I built a support block assembly using plywood and metal braces, shaped to fit snugly against the underside of the slab. Using quality materials ensures long-term stability and seamless integration into the cabinetry.
Prepare the Support Structures and Cabinets
Before installation, reinforce your cabinetry by adding internal braces or blocking if necessary. This step is akin to reinforcing a bookshelf with braces in the back to prevent wobbling—necessary for heavy loads. I removed the cabinet drawers below the support zone and installed vertical blocking between the studs for added strength. This provides a solid anchoring point for the brackets or support blocks.
Secure Support Systems to the Cabinets
With your support system selected, carefully attach brackets or support blocks to the cabinet frame using lag bolts or screws—make sure to use appropriate anchors if attaching to drywall or hollow studs. During my installation, I pre-drilled into the reinforced framing and used high-quality fasteners, ensuring a tight, wobble-free fit. Check for levelness regularly throughout to prevent tilting or uneven support.
Affix the Countertop Safely and Invisibly
Lift the quartz slab onto the prepared supports—this may require a helper or specialized lifting tools. Once in position, verify the level and adjust supporting elements if necessary. Glue or secure the support brackets to the underside of the slab using construction adhesive rated for stone, but avoid overtightening to prevent stress cracks. During my process, I used temporary shims and clamps to hold everything in place while the adhesive cured, ensuring a flush, stable surface.
Finalize and Conceal the Support System
Finish by sealing any gaps with matching caulk or decorative trim pieces that align with your kitchen’s aesthetic. In my case, a thin beaded trim covered the support brackets, making them virtually invisible. Carefully inspect the structure for stability and ensure there’s no movement or squeaking—this guarantees durability and peace of mind for years to come.
Implementing hidden supports is more straightforward than it appears if you plan properly and select suitable materials. The key lies in precise measurement, reinforced cabinetry, and discreet attachment points. Once completed, you’ll enjoy a sturdy, elegant surface that supports your heavy countertop seamlessly, enhancing both function and style in your kitchen remodel.
When planning a kitchen remodel, many homeowners fall into common traps, believing they understand all there is about custom cabinets and built-in storage. However, the truth is that some of the most impactful nuances are often overlooked, leading to less-than-ideal results and added costs. One widespread misconception is the assumption that every custom cabinet will naturally fit perfectly without meticulous planning. In reality, understanding the hidden factors—such as precise wall measurements, wall material variations, and the importance of proper framing—can make or break your project. For instance, a small miscalculation in measuring wall outlets or obstacles can delay installation or require costly adjustments. Enthusiasts often overlook the significance of detailed internal configurations; knowing how to optimize shelving heights, drawer depths, and adjustable hardware can vastly improve usability. Moreover, many are unaware of the myths surrounding built-ins—believing they are only for aesthetic appeal, while in fact, they can dramatically boost functionality when designed with thoughtful storage solutions in mind. An advanced mistake is underestimating the importance of integrating electrical and lighting plans early on, which can lead to startling inconveniences later. According to design experts, up to 30% of remodeling delays stem from planners neglecting these key details upfront. This oversight highlights the necessity of collaborating with experienced designers and contractors who comprehend these nuances. For added insight into how to avoid common pitfalls and truly elevate your kitchen, check out our comprehensive guide on custom cabinets as a game-changer. Don’t let hidden mistakes undermine your dream kitchen—plan thoroughly, and remember that every detail counts in creating a space that’s both beautiful and supremely functional. Have you ever fallen into this trap? Let me know in the comments.
Invest in Quality Tools for Longevity
Maintaining your custom kitchen features requires the right set of tools, not just for initial installation but for ongoing upkeep. I personally rely on a high-grade cordless oscillating multi-tool, which allows me to make precise adjustments, perform minor repairs, and clean tight spaces without removing cabinetry. Its versatility minimizes downtime and preserves the integrity of delicate finishes. Additionally, a Bluetooth-enabled moisture meter is invaluable for detecting hidden moisture issues behind cabinetry, preventing future warping or mold. Using quality tools ensures your maintenance efforts are effective and long-lasting.
Implement Routine Checks to Prevent Major Repairs
Regular inspections are key. I recommend monthly visual checks of hinges, handles, and joints—looking for signs of wear or looseness. I keep a detailed maintenance log to track when lubricants or adhesives were last applied. For instance, applying a few drops of silicone-based lubricant to soft-close hinges every six months keeps them operating smoothly and prevents squeaking or stiffness. Proactive maintenance saves money and preserves the aesthetics of your custom cabinets in the long run.
Use Software to Manage Maintenance Schedules
Digital tools like task management apps can help organize your maintenance calendar. I use a shared Google Calendar to set reminders for cleaning, hardware tightening, or refinish touch-ups. Some specialized apps also allow you to log repairs with photos and notes, creating a history that can inform future decisions or warranty claims. This kind of systematic approach ensures nothing gets overlooked, maintaining your kitchen’s functionality and beauty over the years.
How do I keep my storage solutions working smoothly over time?
Periodic cleaning and adjustment are essential. For example, glide the drawers and trays every few months to prevent sticking, applying a thin layer of lubricant if needed. Also, check the alignment of pull-out shelves and replace worn soft-close mechanisms proactively. High-quality hardware from brands like Blum or Grass is designed for durability, but they still benefit from regular upkeep. For ideas on innovative storage solutions that stand the test of time, consider integrating adjustable shelving or movable components that are easy to repair or upgrade.
Prepare for Long-Term Success and Scaling
As your needs evolve, scaling your storage or cabinetry can be straightforward if you select modular systems and tools designed for expansion. Power screwdrivers with variable torque settings make adding new hardware painless. A digital caliper ensures precise measurements for custom components, preventing costly rework. Looking ahead, I predict smart maintenance tools—like app-controlled lubricators or IoT moisture sensors—will become standard, offering real-time alerts to prevent issues before they escalate. To get started, test out a high-quality electric screwdriver with adjustable torque for your next upgrade, making future modifications simpler and more accurate. For inspiration on how to streamline your kitchen remodel, embrace these advanced tools and maintenance habits today.
Reflecting on my journey with custom cabinets and kitchen remodels, I realize that the true challenge—and reward—lies in the details that often go unnoticed. One crucial lesson I’ve learned is that perfectly balanced support systems are the unsung heroes of a durable and sleek kitchen. The moment I embraced concealed support solutions, my confidence in the project’s longevity soared. Truly, sometimes the most impactful innovations come from looking where others don’t—a reminder that the success of your kitchen upgrade hinges on details you might overlook but shouldn’t.
What I Didn’t Expect About Discreet Support Strategies
- Patience pays off: Planning support placement meticulously saves time and prevents costly mistakes. Rushing the process can lead to uneven weight distribution or visible supports that ruin the aesthetic.
- The importance of reinforcement: Even the sturdiest cabinets require internal bracing, which can make or break the support system’s effectiveness. Incorporating these details early on makes installation smoother and more reliable.
- Materials matter more than you think: Choosing support hardware and composites that withstand the test of time isn’t just about durability; it’s about maintaining the beauty and integrity of your design over years.
- Collaboration with pros: While DIY can be rewarding, consulting with specialists ensures you select the right hidden supports—saving face and future headaches.
- Cleaning up afterwards is crucial: Concealed supports shouldn’t just be hidden—they should be easy to access for maintenance, reminding me that usability matters just as much as invisibility.
Tools & Resources That Make the Difference
- High-quality fasteners from trusted brands: Durable screws and brackets ensure longevity and ease of installation.
- Measuring tools like a digital caliper: Precise measurements are the backbone of a support system that fits perfectly and performs reliably.
- Design software like SketchUp: Visualizing hidden supports helps in planning and communicating your vision effectively.
- Expert consultations: Learning from professionals through resources or direct advice can unlock innovative solutions that you might not discover alone.
Your Next Step in Crafting a Seamless Kitchen Space
Remember, the journey toward a flawless kitchen with hidden supports is as much about mindset as it is about technique. Embrace patience, plan meticulously, and trust in the quality of your materials and tools. The payoff is a space that feels as good as it looks—sturdy beneath the surface, with a sleek, modern aesthetic that lasts. If you’re ready to elevate your kitchen remodel with expert support system strategies, explore our custom cabinet ideas for inspiration, or reach out through our contact page to get personalized advice and support. Your dream kitchen isn’t just possible—it’s within reach, one discreet support at a time.
What hidden support challenge have you faced in your remodel, and how did you overcome it? Share your experiences below—I’d love to hear your story!